


Driver Installation
3-7
User’s Manual
16.
“
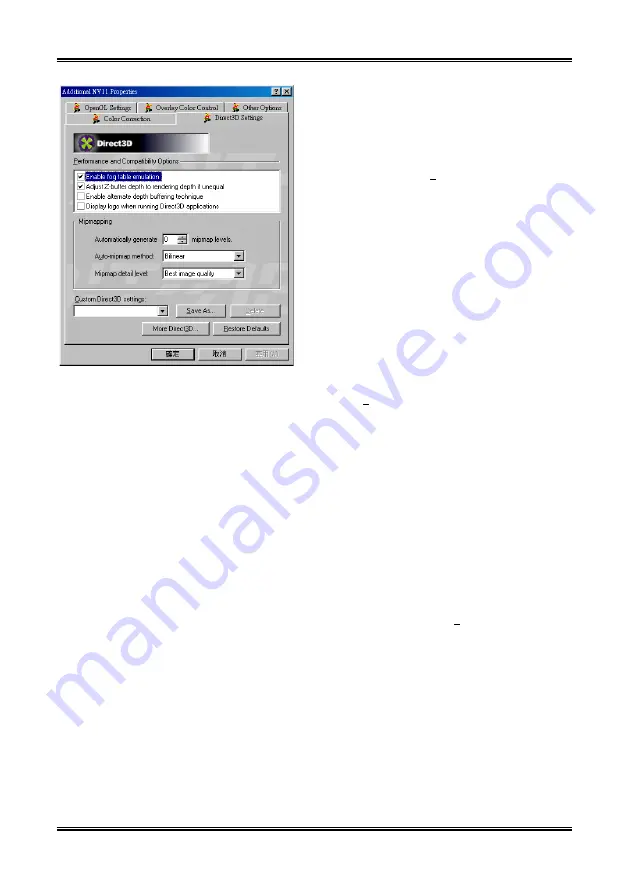
Direct3D Settings
” tab:
"
"
"
"
Enable fog table emulation:
This option is used to turn the fog table
emulation on or off.
Direct3D specifies that a display adapter
capable of D3D hardware acceleration should
be able to implement either vertex fog or table
fog. Some games do not correctly query the
D3D hardware capabilities and expect table fog
support. Choosing this option will ensure that
such games will run properly on your NVIDIA
graphics processor.
"
"
"
"
Adjust Z-buffer depth to render depth if
unequal:
This will cause the hardware to automatically
adjust the depth of its Z-buffer to the depth that
the application requests.
Keep this option enabled, unless your work
absolutely requires a specific Z-buffer depth. If
this option is disabled, any application whose
working Z-buffer depth does not match that of
the current hardware configuration will not run.
"
"
"
"
Enable alternate depth buffering
technique:
This option enables an alternate technique for
depth buffering. It allows the hardware to use a
different mechanism for depth buffering in 16
bit applications. Enabling this setting can
produce higher quality renderings of 3D images.
"
"
"
"
Display logo when running Direct3D
applications:
Enabling this option will display the logo of
NVIDIA at the lower corner of the screen while
running Direct3D applications.
"
"
"
"
Automatically generate …… mipmap
levels:
The NVIDIA
™
GeForce2 MX can generate
mipmaps automatically to increase the
efficiency of texture transfers across the bus and
provide higher performance of Direct3D
accelerated applications and games.
For some applications, the automatically
generated mipmaps will cause problems. In such
cases, you can reduce the number of
automatically generated mipmap levels until the
images are properly displayed. Usually,
decreasing the number of mipmap levels can
eliminate texture misalignment or seaming. (If
you do that, some performance will be lost.)
"
Auto-mipmap method:
This option has two options: bilinear and
trilinear. The bilinear method provides better
performance than the trilinear method. The
trilinear method provides higher image quality
than bilinear method.
"
"
"
"
Mipmap detail level:
This option allows you to adjust the level of
detail (LOD) bias for mipmap. A lower bias will
provide better image quality, and higher bias
will increase application performance. You can
choose from five preset bias values from “
Best
image quality
” to “
Best performance
”.
Click the “
More Direct3D…
” button to go the
next menu.


