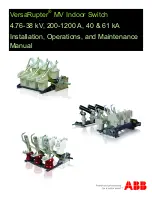
VersaRupter MV Indoor Switch | Installation and Operation Manual
7
Installation and Mounting
Test operations continued
K-mechanism closing operation
1. If the VersaRupter is equipped with a grounding
switch, be sure that it is in the open position, Figure
103.
2. Make sure all enclosure doors are closed.
3. Disengage any padlocks or key interlocks required to
operate the VersaRupter (if equipped).
4. For HE handles, apply the removable handle on the
splined shaft of the manual drive, pull the arrestor
ring, Figure 93. Rotate the handle in the closing di-
rection until the arrestor ring snaps back into the
locked position.
5. For HM handles, apply the removable handle on the
splined shaft of the manual drive, an arrestor ring is
not present so the handle should be rotated in the
closing direction until the rotation is stopped by the
fixed tab on the front bearing.
6. For chain drive and side direct drive handles, rotate
the handle in the closing direction until the full mo-
tion is completed. Motion range is indicated by the
location of the pad lock holes.
7. Visually check that all poles of the switch have closed
properly, Figure 103.
8. For HE and HM handles, remove the removable handle
from the manual drive and secure with a padlock (if
equipped). For all other handles, engage padlocks or
key interlocks (if equipped).
K-mechanism opening operation
1. Make sure all enclosure doors are closed.
2. Disengage any padlocks or key interlocks required to
operate the VersaRupter (if equipped).
3. For HE handles, apply the removable handle on the
splined shaft of the manual drive, pull the arrestor
ring, Figure 93. Rotate the handle in the opening di-
rection until the arrestor ring snaps back into the
locked position.
4. For HM handles, apply the removable handle on the
splined shaft of the manual drive, an arrestor ring is
not present so the handle should be rotated in the
opening direction until the rotation is stopped by the
fixed tab on the front bearing.
5. For chain drive and side direct drive handles, rotate
the handle in the opening direction until the full mo-
tion is completed. Motion range is indicated by the
location of the pad lock holes.
6. Visually check that all poles of the switch have
openend properly, Figure 103.
7. For HE and HM handles, remove the removable handle
from the manual drive and secure with a padlock (if
equipped). For all other handles, engage padlocks or
key interlocks (if equipped).
8. If the VersaRupter is equipped with a grounding
switch, it may be closed after confirming the Ver-
saRupter is open, Figure 103.
Summary of Contents for VersaRupter
Page 74: ...VersaRupter MV Indoor Switch Installation and Operation Manual 74 Auxiliary Switch Kit ...
Page 75: ...VersaRupter MV Indoor Switch Installation and Operation Manual 75 Chain Drive Assembly ...
Page 76: ...VersaRupter MV Indoor Switch Installation and Operation Manual 76 Left Hand Shaft Extension ...
Page 77: ...VersaRupter MV Indoor Switch Installation and Operation Manual 77 Mechanical Door Interlock ...
Page 80: ...VersaRupter MV Indoor Switch Installation and Operation Manual 80 HE HM Handles ...
Page 82: ...VersaRupter MV Indoor Switch Installation and Operation Manual 82 Notes ...


