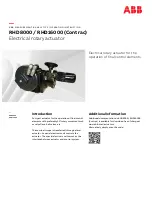
RHD8000 / RHD16000 (Contrac)
ELECTRICAL ROTARY ACTUATOR | OI/RHD8000/16000-EN REV. D
11
Assembly with the final control element
WARNING
Risk of injuries due to crushing between the lever and the
stops or between the lever and the coupling rod,
respectively!
• Prior to starting any mechanical work on the device,
switch off the voltage supply to the motor and take
precautions to prevent unintentional switch-on.
WARNING
Risk of injury due to live parts!
• When working on the actuator or the related subassembly,
switch off the power supply for the electronic unit and
separate anti-condensation heater (option), and take
precautions to prevent unintentional switch-on!
NOTICE
Vibrational loading may cause the lever cover to come off!
• Secure the lever cover with the appropriate screw locking
devices!
Note
Before finally coupling the actuator to the valve, let it once
overshoot the actual ‘OPEN’ and ‘CLOSED’ end positions by at
least 10 %.
Preparation for mounting with lever
1.
Make sure that the shaft and lever hole surface are clean and
free of grease.
2.
Determine the length of the coupling tube (not included in
the scope of delivery) on-site.
3.
Move the final control element to the ‘CLOSED’ end position.
4.
Use the handwheel to move the actuator into the proper end
position. Observe the permissible angle.
5.
Refer to relevant data sheet for the required length of the
connection pipe.
6.
In order to fasten the second ball-and-socket joint, provide a
cone in the lever of the final control element, in accordance
with the dimensions.
7.
Insert the ball-and-socket joint, and secure with crown nut
and split-pin.
8.
Remove the welding bushings and weld them to the coupling
tube.
9.
Insert the link rod between the two ball-and-socket joints
and screw it in.
10.
The ‘L’ dimension can be adjusted by turning the link rod.
11.
When adjustment is finished, fasten the counter nuts.
Travel-dependent stop adjustment
1.
Remove the lever cover.
2.
Move the actuator lever / final control element to the end
position requiring finer mechanical adjustment.
3.
Put the limit stop onto the toothing as close to the actuator
lever as possible and fasten it with screws.
4.
Do not fix the mechanical limit stops within the adjusted
operating range.
5.
Move the driver lever towards the limit stop using the
handwheel; turn the link rod for fine adjustment.
6.
Tighten the counter nuts.
7.
Fasten the limit stop in the other mounting position close to
the end position, depending on the toothing.
8.
Re-attach the lever cover. Observe the tightening torque!
Force-dependent stop adjustment
1.
First make adjustment as described in
Travel-dependent
stop adjustment
on page 11 (action steps 1 to 4).
2.
Prior to re-fastening the counter nut, turn the link rod with
the hand wheel locked in place to provide pretension in the
closed position of the valve.
3.
Lock the hand wheel.
4.
Turn the link rod or slightly shift the mechanical limit stop to
get a small gap between the lever and the limit stop. The
procedure depends on the stiffness of the linkage
arrangement.
5.
Tighten the counter-nuts and limit stop screws.
6.
Re-attach the lever cover. Observe the tightening torque!


