


10
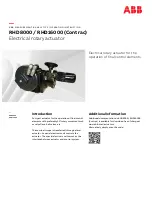
RHD8000 / RHD16000 (Contrac)
ELECTRICAL ROTARY ACTUATOR | OI/RHD8000/16000-EN REV. D
… 5 Installation
… Mounting
Installation instructions
• Make sure that no process forces are exerted on the final
control element.
• Do not lift the actuator by the motor or handwheel.
• The load pick-up device (eyebolt) attached to the actuator
may only be loaded in the vertical direction. Only use the load
pick-up device to lift / lower the actuator (without final
control element mounted).
• Make sure that the actuator is accessible from all sides so
that convenient handwheel operation, electrical connection,
or exchange of assemblies is possible.
• Select the installation location such to avoid direct exposure
to rain, snow and other environmental influences.
• The control actuators can withstand vibration loadings in
accordance with EN 60068-2-6, Table C.2 to 150 Hz and max.
2 g.
• The substructure should be designed to be level and torsion-
resistant.
• When mounting the actuator close to heat sources use an
insulating layer or shielding.
• Make sure that the maximum ambient temperature is not up-
scaled. If required, provide a sunshield to protect against
direct sunlight.
Fastening the actuator
1.
Place the actuator on the fastening device in the correct
position. Pay attention to the rotating direction in
combination with the final control element.
2.
Fasten the actuator using four screws. Use the biggest
possible screw diameter and observe the tightening torque
(see table
Locking and fastening elements
on page 12).
Mounting position
The spur gear of the actuator RHD8000 / RHD16000 (Contrac)
are lubricated with oil. When delivered, the actuator is filled at
the factory with the maximum oil volume in accordance with IMB
3. Once the actuator is installed replace the uppermost check
plug by the separately supplied venting plug.
M10367
IMB 3
IMB 6
IMB 7
IMB 8
IMV 6
IMV 5
12
1
Control screw
2
Vent valve
Figure 3: Permissible mounting positions
The mounting positions presented are permissible. To facilitate
mounting and maintenance, however, it is recommended that
you use position IMB 3 For each mounting position, you should
check the specified oil level before commissioning,
Filling
volumes
on page 28.
Note
For the RHD16000, only mounting position IMB 3 is permitted.
Note
It is important that sufficient cooling air is supplied and
sufficient space is available.
To achieve this, allow for the following minimum distances:
Actuator Space
RHD8000 / RHD16000
40 mm (1.57 in)


