background image

ABB | SACE Emax 2

Emax E1.2 circuit-breakers | 4 - Description

15 | © 2017 

ABB |  

1SDH000999R0002 - ECN000058721 - Rev. B

Manual operations for opening 
and closing the circuit-breaker

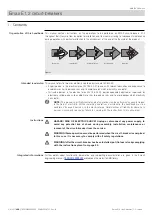
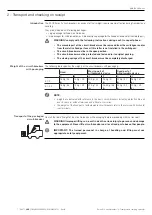
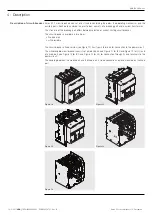
The following is the sequence of steps for closing and opening the circuit-breaker:

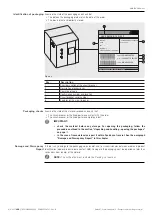
1.  Check that the circuit-breaker is open (open / closed indicator "O - OPEN"), and check that the springs 

are discharged (spring signalling device "white - DISCHARGED SPRING") as indicated in Figure 18.

2.  Charging the springs - Pull the lever [A] downwards several times until the springs charged signalling 

device [B] is “yellow - CHARGED SPRING” as indicated in Figure 19.

Figure 18

A

B

Figure 19

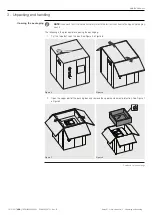
3.  Check that the circuit-breaker is open (open/closed signalling device “O - OPEN”), and check that the 

springs are charged (springs signalling device “yellow - CHARGED SPRING”) as indicated in Figure 20.

4.  Closing - Press the closing pushbutton “I - Push ON” as indicated in Figure 21.

Figure 20

Figure 21

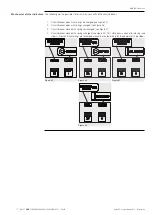
5.  Check that the circuit-breaker is closed (open/closed indicator "I - CLOSED"), and check that the 

springs are discharged (spring signalling device "white - DISCHARGED SPRING" as indicated in 
Figure 22.

6.  Opening - Press the opening pushbutton “O - Push OFF” as indicated in Figure 23.

Figure 22

Figure 23

Continued on the next page

Summary of Contents for Emax E1.2

Page 1: ...DOC N 1SDH000999R0002 ECN000058721 Rev B SACE Emax 2 Emax E1 2 low voltage air circuit breakers Installation operation and maintenance instructions for the installer and the user ...

Page 2: ...ABB SACE Emax 2 2 2017 ABB 1SDH000999R0002 ECN000058721 Rev B ...

Page 3: ...r plates 30 Introduction to Ekip protection trip units 31 1 Presentation 31 Families and functionality 31 Protections 32 Measurements 32 Integrated functions Self diagnosis Test and Power Controller 33 Accessorizing modules 33 Ekip Dip protection trip unit 34 1 Operator interface 34 Introduction 34 Components of the interface 34 LEDs 35 Protections thresholds 35 Protections times 35 Settings 35 iT...

Page 4: ...position key lock 86 PLC padlock 86 anti insertion lock 86 MOC Operation counter 86 PLP padlock in connected test disconnected positions 87 KLP key lock for connected test disconnected positions 87 KLP lock additional accessory 87 SL shutter lock 88 DLC Door opening lock with the circuit breaker in closed position 88 Fail safe 88 3 Mechanical Interlocks 89 Mechanical interlock of type A Two Circui...

Page 5: ...ABB SACE Emax 2 3 2017 ABB 1SDH000999R0002 ECN000058721 Rev B ...

Page 6: ...lled persons to enable him or her to perceive risks and to avoid danger which electricity can create NOTE This manual specifically indicates what operations can be performed by people trained in the field of electricity All the remaining operations described in the handbook must be performed by expert persons in the electrical area ABB declines all liability for damage to persons or property cause...

Page 7: ...ions against certain methods of installation use and maintenance that could cause harm to personnel damage devices or make them unsafe these warnings and alarms do not include all conceivable ways to make installation use and maintenance recommended by ABB or not that may be made or possible consequences and complications of each conceivable way nor shall ABB investigate all those ways anyone usin...

Page 8: ...tional standards IEC 60947 EN 60947 CEI EN 60947 IEC 61000 UL 1066 They comply with the following EC directives Low Voltage Directives LVD no 2006 95 EC Electromagnetic Compatibility Directive EMC no 2004 108 EC The SACE Emax 2 circuit breakers also feature a range certified according to these standards Russian GOST Russia Certificate of Conformity Chinese China CCC China Compulsory Certification ...

Page 9: ...mpletely discharged Weight of the circuit breakers with packaging The following table specifies the weights of the circuit breakers with packaging Fixed Moving part of withdrawable device Fixed part of withdrawable device III IV III IV III IV E1 2 16 Kg 35 lbs 18 Kg 39 lbs 20 Kg 44 lbs 23 Kg 51 lbs 23 Kg 51 lbs 26 Kg 57 lbs E1 2 A 16 Kg 35 lbs 18 Kg 39 lbs 22 Kg 48 lbs 25 5 Kg 56 lbs 24 Kg 52 lbs ...

Page 10: ... 5 Circuit breaker serial number 6 Features of the circuit breaker Packaging checks Examine the state of the material received and verify that The circuit breaker or the fixed part are consistent with the order The circuit breaker or the fixed part are completely intact IMPORTANT check the material before any storage For opening the packaging follow the procedures outlined in the section Unpacking...

Page 11: ...xed parts on a horizontal plane not in contact with the floor If the circuit breaker has been removed and reinserted in the package ensure prior to storage that the circuit breaker is in the open position and springs discharged See the chapter Description circuit breaker opening closing operations on page 15 the circuit breaker is protected and locked in its original packaging Figure 4 ...

Page 12: ...k the circuit breaker safely refer to the instruction sheet in the zipped packaging pouch The following is the procedure for opening the packaging 1 Cut the tape that seals the box See Figure 5 e Figure 6 Figure 5 Figure 6 2 Open the upper part of the packing box and remove the upper containment protection See Figure 7 e Figure 8 Figure 7 Figure 8 Continued on the next page ...
Page 13: ...lowing table specifies the weights of the circuit breakers without packaging Fixed Moving part of withdrawable device Fixed part of withdrawable device III IV III IV III IV E1 2 14 Kg 31 lbs 16 Kg 35 lbs 18 Kg 40 lbs 20 Kg 44 lbs 20 Kg 44 lbs 23 Kg 51 lbs E1 2 A 14 Kg 31 lbs 16 Kg 35 lbs 20 Kg 44 lbs 22 5 Kg 49 lbs 21 Kg 46 lbs 24 Kg 52 lbs Disposal of packing materials For disposal of the packagi...

Page 14: ...ective or current limiting circuit breaker The circuit breaker is available in two types fixed version withdrawable The circuit breaker in fixed version see Figure 10 has its own terminals for connection to the power circuit The withdrawable circuit breaker consists of a mobile part see Figure 11 for IEC and Figure 12 for UL and of a fixed part see Figure 13 for IEC and Figure 14 for UL for connec...

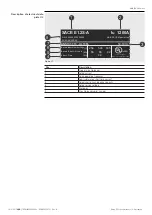
Page 15: ...Opening pushbutton 7 Mechanical signalling of tripped TU 8 Springs charged discharged signalling device 9 Electrical data plate Description of electrical data plate IEC 1 2 3 4 5 9 8 7 6 10 11 12 Uimp 12Kv Figure 16 Pos Description 1 Type of circuit breaker 2 Utilization category 3 Device type Circuit breaker or switch disconnector 4 Rated current 5 Rated operating frequency 6 Admissible rated sho...

Page 16: ...XXXXXX ANSI C37 13 UL1066 50 60 Hz Ra t e d M a x i mum Volt a ge V 254 635 Ra t e d S hor t Ci r c ui t kA 66 42 S hor t Time kA 508 66 Low V ol tage AC Power Ci r cui t Br aker 63FA 42 A Figure 17 Pos Description 1 Type of circuit breaker 2 Rated current 3 Rated operating frequency 4 Admissible rated short time current 5 Rated short circuit breaking capacity 6 Rated service voltage 7 Standards 8...

Page 17: ... springs charged signalling device B is yellow CHARGED SPRING as indicated in Figure 19 Figure 18 A B Figure 19 3 Check that the circuit breaker is open open closed signalling device O OPEN and check that the springs are charged springs signalling device yellow CHARGED SPRING as indicated in Figure 20 4 Closing Press the closing pushbutton I Push ON as indicated in Figure 21 Figure 20 Figure 21 5 ...

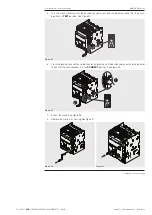
Page 18: ...x E1 2 circuit breakers 4 Description Continued from the previous page 7 Check that the circuit breaker is open open closed indicator O OPEN and check that the springs are discharged spring signalling device white DISCHARGED SPRING as indicated in Figure 24 Figure 24 ...

Page 19: ...ircuit breaker open with springs discharged see Figure 25 2 Circuit breaker open with springs charged see Figure 26 3 Circuit breaker closed with springs discharged see Figure 27 4 Circuit breaker closed with springs charged see Figure 28 This state occurs when after closing see step 4 Figure 28 the springs are recharged manually or automatically by the gearmotor if provided Figure 25 Figure 26 Fi...

Page 20: ...efore proceeding remove all equipment used during the work and remove processing waste and materials used 1 Make sure that signalling device on the fixed part indicates the DISCONNECT position See Figure 29 Figure 29 2 Position the moving part in the fixed part and push until it comes to a stop See Figure 30 and Figure 31 Figure 30 Figure 31 3 Extract the disconnection crank from its housing See F...

Page 21: ...indicator shows that the circuit breaker is in TEST position See Figure 34 Figure 34 6 Press the lock button and then rotate the crank clockwise until the button comes out and the indicator shows that the circuit breaker is in the CONNECT position See Figure 35 2 1 Figure 35 7 Extract the crank See Figure 36 8 Replace the crank in its housing See Figure 37 Figure 36 Figure 37 Continued on the next...

Page 22: ...ch the test position Discharge the springs before removing the circuit breaker from the fixed part On the UL version the fail safe prevents the removal of the circuit breaker from the fixed part with springs charged For further information see chapter 2 Mechanical safety accessories on page 86 Mechanical position indicators The following are the possible positions where you can find the mobile par...

Page 23: ...haracteristics are guaranteed between 25 C and 70 C 13 F e 158 F Particular weather conditions The circuit breaker is designed to operate in particularly difficult industrial environments It was tested according to IEC 60068 2 1 endurance at low temperatures IEC 60068 2 2 hot dry climate IEC 60068 2 30 hot humid climate IEC 60068 2 52 severity 2 saline mist atmosphere IEC 60947 pollution level 3 I...

Page 24: ...8 68 Rated current A at 40 C 100 98 93 90 Electromagnetic compatibility The use of specific devices in industrial installations may cause electromagnetic interference in the electrical system The SACE Emax 2 circuit breakers were developed and tested in an EMC environment in accordance with IEC 60947 2 Annex J and F Storage Environment Store the circuit breaker in a dry dust free environment free ...

Page 25: ...rsonnel in charge of handling and lifting must use appropriate safety equipment Mounting of the fixed circuit breaker Fix the circuit breaker to a horizontal surface using four M5 x 25 screws see Figure 42 Lock the screws with tightening torque 4 Nm 35 lb in Figure 42 Mounting anti insertion locks Before installing the fixed part it is necessary to fit the lock that prevents the insertion of circu...

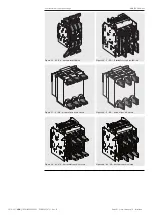
Page 26: ...he fixed part to a horizontal surface using four M8 x 25 screws see Figure 44 Tighten the screws with tightening torque 21 Nm 186 lb in Figure 44 Types of terminal The following are the different types of terminal Figure 45 F HR Horizontal rear IEC Figure 46 F VR Vertical rear IEC Figure 47 F F Front IEC UL Figure 48 F EF Extended front IEC UL Continued on the next page ...

Page 27: ...8721 Rev B Continued from the previous page Figure 49 F ES Spread front IEC UL Figure 50 F FC Terminals for cables IEC UL Figure 51 W HR Horizontal rear IEC Figure 52 W VR Vertical rear IEC Figure 53 W SHR Spread horizontal rear IEC Figure 54 W EF Extended front IEC UL Continued on the next page ...
Page 28: ...rs 6 Installation Continued from the previous page Figure 55 W ES Spread front IEC UL Figure 56 F FC Terminals for cables IEC UL Figure 57 F HR Horizontal rear UL Listed Figure 58 F VR Vertical rear UL Listed Figure 59 W HR Horizontal rear UL Listed Figure 60 W VR Vertical rear UL Listed ...

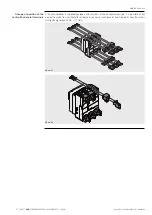
Page 29: ...position of the vertical horizontal terminals If the circuit breaker is supplied equipped with terminals of the horizontal rear type it is possible at any moment to switch from horizontal to vertical and vice versa see Figure 61 and Figure 62 Lock the screws with tightening torque 20 Nm 177 lb in Figure 61 Figure 62 ...

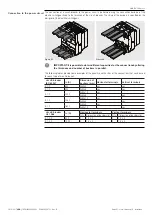
Page 30: ...pacities for the connections by altering the thickness and number of busbars in parallel The following tables provide some examples of the quantity and the sizes of the connections that can be used for each type of circuit breaker circuit breaker IEC 60947 Iu A Dimension of busbars mm Horizontal terminals Vertical terminals E1 2 630 2x40x5 yes yes E1 2 800 2x50x5 yes yes E1 2 1000 2x50x10 yes 2x50...

Page 31: ...configurations is available on the web site http new abb com low voltage products circuit breakers emax2 Dimensions Information on the overall dimensions is available on the web site http www abb com abblibrary DownloadCenter The following drawings are also available in dxf format 1SDH000999R0101 E1 2 III IV Fixed F EF IEC UL 1SDH000999R0102 E1 2 III IV Fixed FC IEC UL 1SDH000999R0103 E1 2 III IV ...

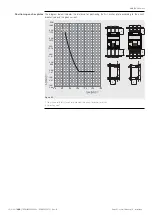
Page 32: ...ow indicates the distance for positioning the first anchor plate according to the circuit breaker type and the peak current 100 3 94 150 5 91 200 7 87 250 9 84 300 11 81 350 13 78 400 15 75 450 17 72 500 19 69 40 60 80 100 120 140 160 E1 2 L L L L L L Figure 65 1 distance of the first anchor plate from the circuit breaker terminals 2 peak current ...

Page 33: ... Ekip Hi Touch LSI LSIG Ekip G Touch LSIG Ekip G Hi Touch LSIG The Ekip Touch trip unit can be equipped with the Ekip Measuring module to extend the measurement functions or the protection and measurement functions with the Ekip Measuring Pro module to voltage power and energy NOTE the Ekip Hi Touch Ekip G Touch and Ekip G Hi Touch trip units have the Ekip Measuring Pro module mounted as standard ...

Page 34: ...h Pr Measuring Pro Pr Touch Pr Measuring Pro Pr Hi Touch Pr Touch Pr Measuring Pro Pr G Touch Pr Touch Pr Measuring Pro Pr Hi Touch Pr G Touch Pr G Hi Touch Pr External toroid S G R Rc DIP protections are available from page 37 Measurements The trip units include a huge range of measurements As for the protections availability and combinations vary for each version of the trip unit Dip Touch DISTR...

Page 35: ...The Emax 2 circuit breakers and Ekip trip units can be equipped as indicated in the combination tables on page 53 Various types of modules are available differing in functionality and the position in which they are mounted on the circuit breaker The modules available for the terminal box of the circuit breaker are Name Description Page Ekip Supply Power supply module 62 Link Communication module 6...

Page 36: ... Description A LED L Protection LED alarm and trip B L Protection LED pre alarm C S Protection LED alarm and trip D I Protection LED trip E G Protection LED alarm and trip F Power on LED trip unit powered and on G Protections thresholds L Protection dip switch threshold I1 H S Protection dip switch threshold I2 I I Protection dip switch threshold I3 L G Protection dip switch threshold I4 M Protect...

Page 37: ...r status of the protection trip unit LED on default configuration fixed or blinking signals trip unit energized LED off signals trip unit de energized NOTE with Ekip T P and Ekip Bluetooth modules and Ekip Connect software it is possible to configure how the power LED functions LED fixed or blinking Protections thresholds The thresholds of all the protections can be modified with various dip switc...

Page 38: ...mately 4 seconds the power on LED if the trip unit is off due to an energy drop primary current less than the minimum level of operation removal of auxiliary power supply with circuit breaker open etc the protection tripped LED if the trip unit is off due to a protection trip Test connector The test connector allows the connection of Ekip TT Ekip T P and Ekip Bluetooth modules in order to perform ...

Page 39: ...h reference to the curve it is the part parallel to the y axis IMPORTANT The protection is activated and starts timing for currents between 1 05 and 1 2 of the threshold I1 set 1 The delay is interrupted if the current drops below the activation threshold Time t1 The value t1 contributes in calculating the tripping time with reference to the curve T1 affects the entire curve by shifting it as a wh...

Page 40: ...2 It defines the current value that if exceeded activates the protection with reference to the curve it is the part parallel to the y axis IMPORTANT The I2 threshold set must be higher than the I1 threshold An incorrect configuration returns an alarm signal The delay is interrupted if the current drops below the activation threshold Time t2 The selected function determines the contribution of t2 F...

Page 41: ...a fixed non adjustable time Parameters The user can set the intervention threshold Parameter Description Enable By setting the threshold dip switches to the Off position the protection is disabled Threshold I3 It defines the current value that if exceeded activates the protection with reference to the curve it is the part parallel to the y axis IMPORTANT The I3 threshold set must be higher than th...

Page 42: ...o the selection NOTE calculation of the tripping time of the inverse time curve is based on a mathematical expression The details are provided in the table on page 43 Threshold I4 It defines the current value that if exceeded activates the protection with reference to the curve it is the part parallel to the y axis IMPORTANT The delay is interrupted if the current drops below the tripping threshol...

Page 43: ...ters The user can activate the protection and set the percentage for calculation of the protection thresholds Parameter Description Enable By setting the threshold dip switches to the Off position the protection on the Neutral is disabled Threshold InN It establishes the multiplication factor applied to the trip thresholds of the protections 50 lowest trip thresholds for the neutral current 100 sa...

Page 44: ...ions is to signal that the measured current is near the activation threshold of the protection itself It is possible to set the pre alarm threshold in order to establish the pre alarm activation values the pre alarm threshold is expressed as a percentage in relation to the protection thresholds I1 and I4 and is adjustable between 50 and 90 default value Example with I1 0 6 In and pre alarm thresho...

Page 45: ...ith I4 0 8 In t4 0 2 s If 2 In 15 Iinst Defined by ABB Instantaneous 1 See the serigraph for the available combinations 2 t t calculation is valid for If values that have exceeded the trip threshold of the protection Use fault current and threshold values expressed in In to calculate t t as shown in the example 3 Tolerances valid with trip unit energized in service conditions or with the auxiliary...

Page 46: ...an be programmed by the user Every measurement recorded is accompanied by the following information Recording interval Phase and value of maximum and minimum current measured Date and time of the recording referring to the internal clock NOTE in the case of the minimum current if the value drops below the 0 03 In threshold it will be recorded and represented by the symbol in the measurement field ...

Page 47: ...ircuit breaker is closed and that there are no primary currents 2 Connect Ekip T P or Ekip Bluetooth to the front test connector 3 Start the communication with Ekip Connect 4 Open the Information page and select the Test command which opens the protection test page 5 Set up the test as required and verify that the trip unit functions properly Further information on Ekip Connect is available on the...

Page 48: ... its own operating condition and that of all the devices to which it is connected All the signals are available with the front LEDs The protection LEDs provide information with various combinations of lighting and flashing while the power on LED as described on page 35 indicates the power on conditions of the trip unit Figure 68 NOTE the number of LEDs depends on the version of the trip unit LI LS...

Page 49: ...ection delay x C Temperature alarm 1 x C Pre alarm L x C Trip 2 x C Hardware Trip 3 x x B Installation error x E Parameter error x D Circuit breaker state not defined or in error x B Error on Local Bus x F Maintenance alarm x F Software incompatibility x x G Low battery during self test 4 x H 1 The temperature alarm is signalled by lighting of the protection L and I red LEDs 2 The last trip can al...

Page 50: ... C Normal operation signalling provided by the trip unit D Error in setting of the dip switches Check and correct the following conditions All the dip switches of L are in the ON position I1 I2 or I2 I3 Iu 2 In I1 in the case where InN 200 I4 0 3 In con In 100 A 0 25 In con In 400 A or 0 2 In for all other sizes in the absence of auxiliary power supply t2 0 4s in the case of UL circuit breaker t4 ...

Page 51: ... Ekip Multimeter or Ekip Signalling 10K modules the Local Bus parameter must be enabled NOTE communication with the modules is active if the auxiliary power supply is present Date and time The Ekip Dip trip unit has a user adjustable internal clock Setting the date can be useful for some functions such as the recording of trips and minimum and maximum currents and maintenance The clock is active i...

Page 52: ...mands 7 and 8 are not valid IMPORTANT in this case remote circuit breaker opening and closing can still be obtained using the programmable YC COMMAND and YO COMMAND functions and the Request circuit breaker opening 28 and Request circuit breaker closing 29 commands Modules network settings retention Allows the communication parameters of the circuit breaker to be controlled if the trip unit is rep...

Page 53: ... source useful for activating some functions such as communication on the Local Bus or recording of manual operations The auxiliary power can be supplied by the modules of the Ekip Supply range for further functional details see page 62 or with direct connection to a terminal box The direct connection must be made guaranteeing the operating following conditions Parameter Operating limits Voltage 2...

Page 54: ...nt DIPs protections Frequency Neutral other via front bus Protection Parameter Value L 1 In 144 s S 1 Off 0 1 s I 4 In G 1 Off 0 1 s Frequency 50 Hz IEC 60 Hz UL Neutral Off for three pole circuit breakers 50 for four pole circuit breaker Hardware Trip Disabled Monitor time 5 minutes Local Bus Disabled Alive LED Disabled Power on LED fixed Maintenance Off 1 S Protection available with LSI and LSIG...

Page 55: ...ing table shows the possible combinations of the electrical and mechanical accessories Type of accessory Accessory Circuit breakers Switch disconnectors Electrical signalling AUX 4Q S R AUX 15Q R R Ekip AUP R R Ekip RTC R R S51 S S33 M 2 R R Electrical control YO YC R R YO2 R R YU R R M R R YR R Safety mechanical KLC and PLC R R KLP and PLP R R SL S S DLC R R anti insertion lock S S MOC R R FAIL S...

Page 56: ... R Ekip Com Redundant R R R R Ekip Com Actuator R R R R R Ekip Link R R R R R Ekip Bluetooth R R R R R Ekip Signalling Modbus TCP R R R R R Signal Ekip Signalling 2K R R R R Ekip Signalling 10K R R R R Measurement and Protection Ekip Measuring R Ekip Measuring Pro R S S S Ekip Synchrocheck R R R R Rating plug R R R R R S G R sensor R R R R RC sensor R R R R External neutral sensor R R R R R Displa...

Page 57: ...ver and protections After reassembling the accessories the parts previously disassembled must be reassembled as indicated Front cover A and protection F by screwing the fixing screws B and C Lock with tightening torque 0 8 Nm 7 lb in B and 1 5 Nm 13 lb in C For circuit breakers in four pole versions the lateral protection D by removing the screws C and E Tighten with tightening torque 1 5 Nm 13 lb...

Page 58: ...2 14 13 XK1 T11 T12 K51 1 N UI N 15 16 T43 T44 EKIP G HI TOUCH EKIP G TOUCH Q 27 Q 26 YO1 7 8 XK3 XK3 10 9 XK3 6 5 RTC EKIP A1 A T41 T42 8 7 TI N C EKIP DIP EKIP TOUCH EKIP HI TOUCH H Diagram A General diagram of the circuit breaker NOTE The diagram is shown in the following conditions Circuit breaker in withdrawable version also valid for fixed version open and connected Circuits de energized Tri...

Page 59: ...ries according to the type of circuit breaker Terminal box for circuit breaker in fixed version Terminal box for circuit breaker in withdrawable version The differences between the two terminal boxes are shown in Figure 72 C13 C3 Ne Rca Ne K2 K1 W3 W4 Trip Unit I O V3 Vn Ge Szi Szo Ge Rct V2 V1 Gzo Szc Gzi S51 95 96 98 38 36 35 M U1 U2 R1 R2 YR EKIP Supply S33 Q4 44 42 41 31 32 34 Q3 Q2 24 22 21 1...

Page 60: ... REDUNDANT RIDONDANTE 61 66 n 58 K51 MEAS 51 48 43 42 41 O ORTA COMUNIC COMMUN O ORT W K51 COM K31 K33 K32 K34 K51 SIGN O 32 H32 H31 HC3 O 31 K51 SIGN K21 K23 K22 K24 K51 SIGN O 22 H22 H21 HC2 O 21 K51 SIGN VN V3 V1 V2 K51 SYNC Vs VS1 VS2 KS1 KS2 K51 SYNC XSC K51 SIGN O 11 HC1 H11 H12 O 12 K51 SIGN K51 SIGN I 12 K14 K12 K13 K11 23 21 20 22 22 21 20 23 32 31 AUX SUPPLY ALIM AUS N L LOCAL BUS K51 W3...

Page 61: ...nd 110 240Vac dc K51 SYNC Synchronization module K51 YC Closing control from the Ekip protection trip unit K51 YO Opening control from the Ekip protection trip unit M Motor for loading closing springs M2 Fan motor O 01 32 Programmable signalling contacts O SC Contact for synchronism control Q Circuit breaker Q 1 Q 27 Auxiliary open closed contacts of the circuit breaker Rc Rc sensor RT1 RT3 Temper...

Page 62: ...se L2 UI L3 Current sensor phase L3 UI N Current sensor on neutral UI O S G R sensor W2 Serial interface with internal bus Local Bus W9 W13 RJ45 connector for communication modules W9R W11R RJ45 connector for redundant communication modules X Delivery connector for auxiliary circuits for withdrawable version of circuit breaker XB1 XB7 Connectors for circuit breaker applications XF Delivery termina...

Page 63: ...the case of presence of any Ekip module L In the presence of diagram 32 up to three applications can be provided between diagrams 41 58 taken only once In addition it is possible to duplicate an Ekip Com module that may be selected choosing between diagrams 61 66 M The opening and closing commands from module Ekip Actuator are available with YO and YC coils maximum voltage of 110 120 V DC and 240 ...

Page 64: ...c Ekip Supply 110 240Vac dc Compatibility The modules can be installed in the presence of trip units of Ekip Dip Ekip Touch Ekip Hi Touch Ekip G Touch and Ekip G Hi Touch trip units Electrical characteristics The following table lists the electrical characteristics of the modules Module Power supply voltages Frequency Power input Inrush current Ekip Supply 24 48Vdc 21 5 53 V DC Maximum 10W Maximum...

Page 65: ... YO EKIP Supply Trip Unit I O Ge Ge Szc K2 K1 W4 W3 Q4 Q3 Q2 Q1 YC YU YO2 RTC I O TU 44 42 41 34 32 31 24 22 21 14 12 11 C12 C13 C11 C2 C3 C1 D2 D1 48 46 45 Ne Rca Ne Gzi Szo Szi Gzo Rct Vn V1 V2 V3 Module Module Uaux A3 110 240VAC DC A4 L N 24 48VDC Ekip Supply 24 48VDC Ekip Supply 110 240VAC DC SUPPLY K51 A I EKIP 32 K51 A1 XV X K1 K1 K1 K2 K2 K2 W3 W3 W3 W4 W4 W4 K1 K2 B A LOCAL BUS Q W2 W3 W4 ...

Page 66: ... necessary access authorisations and so on The module cannot be connected to other Ethernet networks for example with the purpose of monitoring the system or the office or to the Internet The module is necessary if you wish to implement these functions Power Controller Zone Selectivity Programmable Logic For these functions the trip units of the system that are involved must be equipped with an Ek...

Page 67: ...lock of the E1 2 circuit breakers and the wiring diagram R2 R1 U2 U1 38 36 35 98 96 95 YR M S33 S51 YO EKIP Supply Trip Unit I O Ge Ge Szc K2 K1 W4 W3 Q4 Q3 Q2 Q1 YC YU YO2 RTC I O TU 44 42 41 34 32 31 24 22 21 14 12 11 C12 C13 C11 C2 C3 C1 D2 D1 48 46 45 Ne Rca Ne Gzi Szo Szi Gzo Rct Vn V1 V2 V3 Module Module A4 A3 A4 58 194 XK7 XK7 1 2 193 S75I 5 W13 RJ45 LINK BUS Ekip Link n O K51 COM L R Diagr...

Page 68: ...D on the trip unit power supply and communication with trip unit present with a trip unit with the Alive LED option enabled On with two quick flashes per second not synchronized with those of the green LED on the trip unit power supply present and communication with trip unit absent for example because Local Bus disabled B LED Link green The possible states are Off connection error signal absent O...

Page 69: ...om abblibrary DownloadCenter in particular with the kit sheet 1SDH000999R0501 Wiring diagram are provided below for the module S43 C13 C13 C13 SO C12 C12 C12 YO C11 C11 C11 76 XB4 1 XB4 2 K51 YO K51 7 XK7 XK7 8 Ekip Com Actuator A4 X XV X XV A1 A4 78 C1 C1 C1 YC C2 C2 C2 SC C3 C3 C3 S43 XB3 1 XB3 2 K51 YC K51 9 XK7 XK7 10 Ekip Com Actuator M M Diagrams 78 76 Further information is available on pag...

Page 70: ...pted current of the circuit breaker indicated on the rating plate of the circuit breaker The trip unit continuously checks for the presence of the Rating Plug signalling its absence or any errors in assembly or installation Once mounted when the trip unit is energized its installation is requested Further details about assembly and the Rating Plug installation procedure are available on the websit...

Page 71: ...ction to a PC automatically switches the module on and charging in progress is indicated by the flashing green LED with increasing frequency as the level of charging rises Completion of charging is indicated by the green LED on fixed NOTE during recharging the module must be kept energized Further information on Ekip Bluetooth is available on the web site http www abb com abblibrary DownloadCenter...

Page 72: ...o Check that the opening mechanism of the circuit breaker functions properly by commanding an opening by means of the test procedure see page 45 Power the trip unit so that you can see which protection tripped either on the display or through the lighting of the corresponding LEDs in the absence of auxiliary voltage and where the circuit breaker is open due to a protection tripping Power the Ekip ...

Page 73: ...50022 type TS 35 x 15 mm Its function is to share via an Ethernet network with Modbus TCP communication protocol information about the state of circuit breakers that may even be without the ability to provide such information via Ethernet and to allow these circuit breakers to be operated via remote control The module has 11 digital inputs and 10 output contacts The inputs allow the state of the c...

Page 74: ...ed with a maximum length of 15 m The screen of the cables must be connected to ground on both sides of the connection Further information on Ekip Multimeter is available on the web site http www abb com abblibrary DownloadCenter in particular in the kit sheet 1SDH001000R0520 External neutral This is a current sensor for the neutral pole outside the circuit breaker It is supported only for three po...

Page 75: ...y IMPORTANT If the closing coil is permanently energized and the opening coil trips after opening the closing coil must be momentarily de energized so that it can be reused for the next closing operation If instead the opening coil trips it is necessary after having de energized it to wait at least 100 ms before operating the closing coil NOTE the second opening coil YO2 is alternative to the unde...

Page 76: ...enter where the wiring diagram is available 1SDM000091R0001 A4 X XV X XV A1 A4 SC C2 C2 C2 YC C1 C1 C1 77 1 XB3 2 XB3 A4 X XV X XV A1 A4 75 C11 C11 C11 YO C12 C12 C12 SO XB4 1 XB4 2 SO D2 D2 D2 YO2 D1 D1 D1 72 XB5 1 XB5 2 Diagrams 75 72 77 Information on assembly is available on the web site http www abb com abblibrary DownloadCenter in particular with the kit sheets 1SDH000999R0502 for coils YO a...

Page 77: ... coil YU is a emergency trip unit For service operations use the opening coil NOTE the power supply of the coil must be drawn on the supply side of the circuit breaker or from an independent source If the undervoltage coil trips it is necessary after having reset it to wait at least 100 ms before operating the closing coil The tables listing the available voltages and the electrical characteristic...

Page 78: ...he available voltages and the electrical characteristics are provided below Available voltages Un 24 V AC DC 110 V AC DC 220 V AC DC General characteristics Operating limits 90 110 Un YR Connections Further information is available on page 59 or on the site http www abb com abblibrary DownloadCenter where the wiring diagram is available 1SDM000091R0001 A4 X XV X XV A1 A4 SR R2 R2 R2 YR R1 R1 R1 14...

Page 79: ...e closing springs can in any case be charged manually through the appropriate front control lever The tables listing the available voltages and the electrical characteristics are provided below Available voltages Un 24V 30V AC DC 48V 60V AC DC 100V 130V AC DC 220V 250V AC DC 380V 415V AC General characteristics Operating limits 85 110 Un Inrush power Ps 500 VA W Power during charge Pc 100 VA W Cha...

Page 80: ...able provides information on the electrical characteristics Characteristics Standard Digital signals Breaking capacity DC 24V 0 1 A 125V 0 5A 0ms 0 3A 10ms 250V 0 3A 0ms 0 15A 10ms AC 250V 3A cos φ 0 3 5A cos φ 0 7 5A cos φ 1 400V 3A cos φ 1 2A cos φ 0 7 1A cos φ 0 3 Minimum load 100mA 24V 1mA 5V AUX 4Q Connections Further information is available on page 59 or on the site http www abb com abblibr...

Page 81: ...reaking capacity DC 24V 0 1 A 125V 0 5A 0ms 0 3A 10ms 250V 0 3A 0ms 0 15A 10ms AC 250V 3A cos φ 0 3 5A cos φ 0 7 5A cos φ 1 400V 3A cos φ 1 2A cos φ 0 7 1A cos φ 0 3 Minimum load 100mA 24V 1mA 5V AUX 15Q external Connections Further information is available on page 59 or on the site http www abb com abblibrary DownloadCenter where the wiring diagram is available 1SDM000091R0001 91 A4 Q 18 272 274 ...

Page 82: ...cs Characteristics Standard Digital signals Breaking capacity DC 24V 0 1 A 125V 0 5A 0ms 0 3A 10ms 250V 0 3A 0ms 0 15A 10ms AC 250V 3A cos φ 0 3 5A cos φ 0 7 5A cos φ 1 400V 3A cos φ 1 2A cos φ 0 7 1A cos φ 0 3 Minimum load 100mA 24V 1mA 5V AUP Connections Further information is available on page 59 or on the site http www abb com abblibrary DownloadCenter where the wiring diagram is available 1SD...

Page 83: ...t pushbutton on the front panel The RTC is a switching contact type and is available in the standard version or in the versions for digital signals The following table provides information on the electrical characteristics Characteristics Standard Digital signals Breaking capacity DC 24V 0 1 A 125V 0 3A 0ms 0 15A 10ms 250V 0 3A 0ms 0 15A 10ms AC 125V 250V 1A cos φ 0 3 2A cos φ 0 7 3A cos φ 1 Minim...

Page 84: ...cal signalling The following table provides information on the electrical characteristics Characteristics Standard Digital signals Breaking capacity DC 24V 0 1 A 125V 0 3A 0ms 0 15A 10ms 250V 0 3A 0ms 0 15A 10ms AC 125V 250V 1 5A cos φ 0 3 3A cos φ 0 7 5A cos φ 1 Minimum load 100mA 24V 1mA 5V S51 Connections Further information is available on page 59 or on the site http www abb com abblibrary Dow...

Page 85: ...he motor The following table provides information on the electrical characteristics Characteristics Standard Digital signals Breaking capacity DC 24V 0 1 A 125V 0 5A 0ms 0 3A 10ms 250V 0 3A 0ms 0 15A 10ms AC 250V 3A cos φ 0 3 5A cos φ 0 7 5A cos φ 1 400V 3A cos φ 1 2A cos φ 0 7 1A cos φ 0 3 Minimum load 100mA 24V 1mA 5V S33 M2 Connections 38 36 35 S33 Further information is available on page 59 or...

Page 86: ... that inhibits the use of one or both pushbuttons with the aid of a padlock Information on the assembly is available on the web site http www abb com abblibrary DownloadCenter in particular with the kit sheet 1SDH000999R0715 IP54 protection The IP54 protection completely protects the front of the circuit breaker to achieve Protection class IP54 It is always equipped with two locks for closing avai...

Page 87: ...inal covers Information on assembly is available on the web site http www abb com abblibrary DownloadCenter in particular with the kit sheets 1SDH000999R0612 for the high terminal covers 1SDH000999R0613 for the low terminal covers PB Phase separators The phase separators are applied in order to increase the insulation clearance between two adjacent phases Information on the assembly is available o...

Page 88: ... with pre engineering for Castell locks PLC padlock The PLC locks the circuit breaker in the open position It is available in two types lock usable with a maximum number of three padlocks with a diameter of 4 mm 0 16 lock usable with a maximum number of two padlocks with a diameter of 8 mm 0 32 lock for a padlock with a diameter of 7 mm 0 28 or for a latch chain NOTE The padlocks are at customer s...

Page 89: ...positions is available with two types of lock lock with different key code numbers for a single circuit breaker lock with the same key code number for more than one circuit breaker The maximum number of key code numbers available is five Through an appropriate setup the KLP lock for connected test disconnected positions can work with three other types of lock Ronis Profalux Kirk Castell The maximu...

Page 90: ...xed version opening the switchgear door with the circuit breaker closed and in connected position if the circuit breaker is in fixed version closing of the circuit breaker when the switchgear door is open Information on the assembly is available on the web site http www abb com abblibrary DownloadCenter in particular with the kit sheet 1SDH000999R0712 Fail safe The fail safe is a device that preve...

Page 91: ...erlock of type A Two Circuit breakers 1 2 O I O O O I The Type A interlock is applicable to two circuit breakers normal power supply emergency power supply It allows you never to have two circuit breakers in the closed position at the same time Information on assembly is available on the web site http www abb com abblibrary DownloadCenter in particular with the kit sheets 1SDH000999R0720 for inter...

Page 92: ...orrect ground connections 4 Maximum distances of separators respected Operations Perform some opening and closing operations See chapter Description of the product circuit breaker opening closing operations on page 15 The spring loading lever must move with regularly WARNING in the presence of an undervoltage coil the circuit breaker can be closed only after the trip unit is energized Trip unit al...

Page 93: ...breaker Result The circuit breaker closes correctly the signals are normal 2 Turn off the voltage supply to the trip unit The circuit breaker opens 3 Power the undervoltage coil at the relevant rated voltage and perform the closing operation on the circuit breaker Result The circuit breaker closes the signal switches over WARNING If the undervoltage coil has been tripped by a power failure the cir...

Page 94: ...ignalling circuits 2 bring the circuit breaker to the connected isolated for test and disconnected position Result the signals due to the relative operations are normal Locking devices for connected test disconnected positions 1 Perform operating tests Result the interlocks function correctly Interlocks between circuit breakers assembled side by side and stacked 1 Perform operating tests Result th...

Page 95: ...eer of the installation If necessary power the protection trip unit with an Ekip TT unit 4 Removal of the Ekip TT If present remove the Ekip TT unit 5 Connecting the voltage Connect the auxiliary voltage 6 Closing the switchgear Close the switchgear door 7 Charging the springs Charge the closing springs 8 Undervoltage coil Make sure that undervoltage coil is energized 9 Opening and closing coils M...

Page 96: ...person with relevant education and experience to enable him or her to perceive risks and to avoid hazards which electricity can create Indeed it may be necessary to perform insulation and dielectric tests on part or all of the installation Some failures involve partial operation of the circuit breaker Consult the paragraphs Faults causes and remedies on page 95 and Faults signalled on the display ...

Page 97: ...n the closing coil is powered The trip signal of the protection trip unit has not been reset Press the TU Reset button The power supply voltage of the auxiliary circuits is too low Measure the voltage it should not be lower than 70 of the rated voltage of the coil The power supply voltage is different from that indicated on the rating plate Check the voltage on the rating plate The cables of the c...

Page 98: ...ls Make sure there is continuity between cable and terminal and if necessary reconnect the cables of the gearmotor to the terminals The connections of the power supply circuit are wrong Check the connections using the relevant wiring diagram The circuit breaker is in disconnected position Switch the circuit breaker to the test or connected position The gearmotor protection internal fuse has trippe...

Page 99: ...g condition Temperature outside range Correct operating condition The display is not backlit if present Current and or voltages below the display switch on limit Correct operating condition Incorrect current reading Current below the minimum threshold that can be displayed Correct operating condition Incorrect voltage power and cos φ reading Incorrect connection between isolation transformer and E...

Page 100: ...iguration conflicts Internal Error Contact ABB Invalid Date Set the date CB Status Error Check the circuit breaker status signal contacts Rating Plug Installation Warning Install Rating Plug and in the case of faults check its connection Switchboard Actors Communication Error Check the configuration and connection of the Ekip Link modules Battery Low Change the battery on the trip unit 1 Voltage m...

Page 101: ...t see the indication DISCONNECTED If work must be performed on fixed circuit breakers or on fixed parts disconnect the power supply to the power circuit and auxiliary circuits and visibly ground the terminals on both the supply side and load side Use adequate personal protection equipment ensure that the apparatus is in a safe condition and proceed in accordance with the Laws in force Skilled pers...

Page 102: ...rcuit breakers specifies the maintenance frequency for the different types of site conditions We include the table indicating the frequency with which maintenance should be carried out and the relative routine maintenance operations required Maintenance in standard environments 1 Maintenance in dusty environments dust level measured 1mg m3 Frequency One year or 2000 operations or after tripping du...

Page 103: ...ssibly using mild detergent Use a cleaning product such as Henkel 273471 or Chemma 18 or equivalent if there is a heavy coating of dirt 2 Check that the rating plates with the technical specifications of the apparatus are present 3 Clean the rating plates with clean dry rags 4 Make sure that there are no foreign bodies in the circuit breaker compartment Circuit breaker connections and connections ...

Page 104: ...he fixing screws E 3 With circuit breaker in the withdrawable version remove the protection F and the terminal cover G by removing the screws H A D E C B Figure 74 Four pole fixed circuit breaker A F H G C B Figure 75 Three pole withdrawable circuit breaker 4 Remove the gearmotor E by removing the screw F 2 4 I L Figure 76 Removing the gearmotor 5 If there is a undervoltage coil M remove it and di...

Page 105: ...ondition no excessive wear and tear overheating rupture 4 Make sure that the mechanical operation counter functions correctly if present by operating the circuit breaker 5 Check the wear on the brushes of the gearmotor and if necessary replace them NOTE it is advisable to replace the gear motor if it has performed more than 10000 spring charging operations or reached 50 of the declared mechanical ...

Page 106: ... paragraph Disassembly Operations in reverse order and if necessary reconnect the auxiliary power supply 2 Put the movable part breakers in the test position see indication TEST 3 Perform the following operations 10 times Opening in both local and remote modes if applicable Closing in both local and remote modes if applicable Tripping via Trip Test 4 Perform the operations in the following sequenc...

Page 107: ...e electrical field IEV 195 04 02 person adequately advised or supervised by electrically skilled persons to enable him or her to perceive risks and to avoid danger which electricity can create End of life treatment for circuit breaker materials The materials used in the production of SACE Emax 2 circuit breakers are recyclable and should be treated separately as shown in the following table TYPE M...

Page 108: ...ABB SACE Emax 2 106 2017 ABB 1SDH000999R0002 ECN000058721 Rev B Putting into service and maintenance 5 Decommissioning and treatment at end of life ...

Page 109: ...1SDH000999R0002 ECN000058721 Rev B ...

Reviews: