Chapter 11
Troubleshooting
11-2
The majority of faults cause the DROK contact to operate. The use of fault
messages may aid in identifying drive and motor malfunctions. If a drive
fault occurs, the fault detection circuitry can be reset by removing and
reapplying power to the transformer supplying the servo drive or
connecting the Reset input (TB2-11) to ground (TB2-12) with the enable
removed.
This material along with the diagnostic/troubleshooting information in-
cluded with the position controller, will help identify most common system
malfunctions to an assembly level. The position controller is considered to
be a; computer numerical control (such as an Allen-Bradley 9/240), pro-
grammable controller (IMC 120, 121, 123) or stand-alone control (S Class,
MAX), controlling a closed loop position or velocity system.
Substituting or interchanging complete servo drives or major board
assemblies is a common technique used in troubleshooting closed loop
position systems. The 1391-DES has been designed to facilitate this
technique. The procedures provided must be followed when substituting or
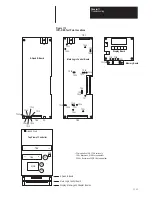
interchanging drives or board assemblies. Refer to Figure 11.1 for board
and connector locations.
ATTENTION: This drive contains ESD (Electrostatic
Discharge) sensitive parts and assemblies. Static control
precautions are required when installing, testing, servicing or
repairing this drive. Component damage may result if ESD
control procedures are not followed. If you are not familiar
with static control procedures, reference A-B publication
8000-4.5.2, Guarding Against Electrostatic Damage or any
other applicable ESD protection handbook.
!
Drive Substitution
1. Remove all power to the drive branch circuit.
2. Remove connectors TB1, TB2 and TB3.
3. Label and remove the motor leads and three-phase input at TB4. Also
remove the drive ground wire.
4. Remove the Memory Board. Refer to Figure 11.1 and the following
page for further information.
5. Remove the drive and insert replacement unit.
6. Reconnect the ground wire, motor leads, three-phase input and signal
connectors previously removed.
7. Replace the Memory Board previously removed.
8. Apply power to the system and check for proper operation – tuning
should not be required.
Summary of Contents for 1391-DES Series
Page 2: ...User Manual 1391 DES Digital AC Servo Drive ...
Page 10: ...Chapter 1 Introduction 1 10 End of Chapter ...
Page 38: ...Chapter 5 Inputs Outputs and Switch Settings 5 8 End of Chapter ...
Page 85: ...Chapter 8 Start Up 8 16 End of Chapter ...
Page 89: ...Chapter 9 1326 AC Servomotors 9 4 End of Chapter ...
Page 107: ...Chapter 11 Troubleshooting 11 12 End of Chapter ...
Page 123: ...Appendix B Interconnect Drawings B 12 End of Appendix ...
Page 127: ...Appendix C Cable Information C 4 End of Appendix ...
Page 135: ...Appendix E Parameter Record E 8 End of Appendix ...
Page 136: ...Notes ...
Page 137: ...Notes ...
Page 138: ...Notes ...
Page 139: ...Notes ...
Page 140: ...Notes ...
Page 141: ...Notes ...
Page 142: ...Notes ...
Page 143: ...Notes ...
Page 144: ...Notes ...
Page 145: ...Notes ...
Page 148: ...IMC is a trademark of Allen Bradley Company Inc ...


