Chapter 8
Start-Up
8-3
10.
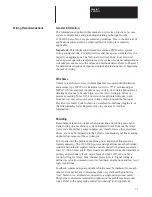
The drive will now prompt you through a start-up procedure. Read
the following important points before continuing.
•
From time to time the drive will display the message “EEprom
Fnction in progress.” This message alerts the user that an
EEprom function is in progress and that operation will return to
normal momentarily. If the message “drive can’t be running for
EE” is displayed, verify that the drive is disabled.
•
If the drive faults during start-up (i.e. feedback miswired, etc.) the
procedure will be continued from the point where you left off,
after the cause of the fault has been resolved.
•
To stop the start-up procedure at any time and restart from this
step: press the first 4 keys on the keypad (Up, Down, Left and
Right Arrow keys ) simultaneously and release.
•
To cancel the procedure and return to the Basic Display at any
time: disable the drive and simultaneously press the last 4 keys of
the keypad (Down, Left, Right and Enter keys) and release.
•
If you wish to repeat the start-up procedure: access the
Maintenance programming level by pressing the Up, Down and
Left Arrow keys, simultaneously – then within 4 seconds –
press the Up, Left and Enter keys. Access parameter 252 and
enter a value of 1, press Enter. Then press the Left or Right
Arrow keys to access parameter 128. Select “Save” to save the
parameters to EEprom, press Enter. Cycle all power and proceed.
11.
The display will now read, “START UP PROCEDURE” – press the
Enter key to continue.
Display: “setup drive with motor data.” Press Enter to continue. If a
custom motor is being used, consult Allen-Bradley for special
instructions before proceeding.
The drive will now allow you to select the catalog number of the
motor being used. Use the Up and Down Arrow keys to select the
appropriate motor catalog number – press Enter to select.
Torque Plus catalog numbers will not be displayed. Use the
following cross reference to select a motor catalog number.
Torque Plus
Use this
Torque Plus
Use this
Catalog Number
Catalog Number
Catalog Number
Catalog Number
1326AB-A410G-21
1326AB-A1G
1326AB-A520E-21
1326AB-B2E
1326AB-A420E-21
1326AB-A2E
1326AB-A530E-21
1326AB-B3E
1326AB-A430E-21
1326AB-A3E
1326AB-A740B-21
1326AB-C4B
1326AB-A515E-21
1326AB-B2E
The drive will respond by displaying “writing data to servo drive.”
12.
The display will show “execute motor rotation test.” This test
assures that the motor cables have been connected correctly – press
Enter to continue.
Summary of Contents for 1391-DES Series
Page 2: ...User Manual 1391 DES Digital AC Servo Drive ...
Page 10: ...Chapter 1 Introduction 1 10 End of Chapter ...
Page 38: ...Chapter 5 Inputs Outputs and Switch Settings 5 8 End of Chapter ...
Page 85: ...Chapter 8 Start Up 8 16 End of Chapter ...
Page 89: ...Chapter 9 1326 AC Servomotors 9 4 End of Chapter ...
Page 107: ...Chapter 11 Troubleshooting 11 12 End of Chapter ...
Page 123: ...Appendix B Interconnect Drawings B 12 End of Appendix ...
Page 127: ...Appendix C Cable Information C 4 End of Appendix ...
Page 135: ...Appendix E Parameter Record E 8 End of Appendix ...
Page 136: ...Notes ...
Page 137: ...Notes ...
Page 138: ...Notes ...
Page 139: ...Notes ...
Page 140: ...Notes ...
Page 141: ...Notes ...
Page 142: ...Notes ...
Page 143: ...Notes ...
Page 144: ...Notes ...
Page 145: ...Notes ...
Page 148: ...IMC is a trademark of Allen Bradley Company Inc ...


