+33 4 7642 9550
www.aaton.com
Cantar-X User Manual v2.26 (r13) 2009 April 27
p.22
p.22
REC 1,
SOLOS & BEEPS
Recording
In REC, a '
•
rec
'
icon is displayed under the active disk drive
and a red LED lights up underneath this icon. While in REC,
both batteries are paralleled for additional safety.
Iso Track modulos
In REC, PPR and TEST, the modulometers display the level of
the signals to the tracks. The circular modulometers' resolu-
tion is 1dB in the -35dBFS to -12dBFS working zone The rect-
angular screen modulometers' resolution is 2dB in the same
zone. The ballistics emulate needle modulometers. The
decay time can be adjusted in TECHSET.12 'Meter Speed'
from '
1 Fast
' to '
5 Slow
'. In a low temperature environment,
'
5 Slow
' is recommended. The default is '
3 Med
'. The peak-
meters are always active, and their 'hold' period can be
adjusted from one-half to five seconds (TECHSET.13).
Soloing inputs
To monitor a questionable input, rotate the [monitor] crown
to
So
and select the desired
input. You can also directly
monitor a microphone by
pressing its [
so
-fil-tom] (2) but-
ton or make a short click to
turn it 'ON', another click turns
it 'OFF'. While [so-fil-tom] is
enabled, its filter setting can be modified using [jog].
Soloing tracks
Pull the [
Solo
MixPan]
slider to Solo (operator side). Press
a [track-solo] button, you
will hear the track's audio
in both ears. While main-
taining pressure on a solo
button, press another one.
You will hear the first soloed
track in the left ear, and the second in the right ear. Use
this feature to compare track levels, phases or differential
delays. When a [track-solo] is activated, the selected
track's modulometer is differentiated from the others by a
'dashed' appearance.
Locking all Faders
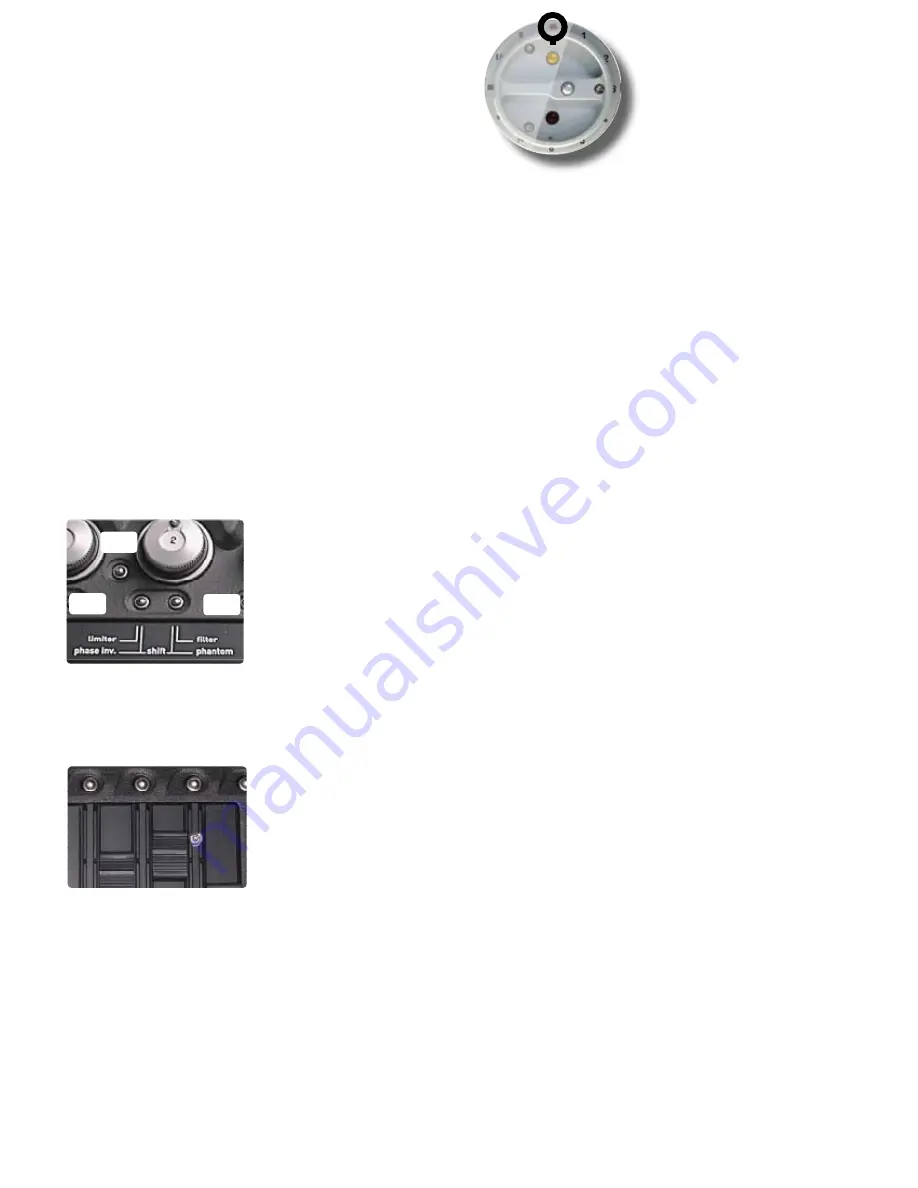
Press the [link-lock] (3) button (between mic 1 & mic 2 faders)
to (dis)able the mixer's linear faders; press the [link-lock] (3)
button (between mic 3 & mic 4 faders) to (dis)able all rotary
faders. Any action on a disabled fader causes the rectan-
gular screen to display '
Locked Fader
' instead of its gain
value. To prevent inadvertent (un)locking, the button must be
pressed for a full second for the action to occur.
Reference Tone generator
In TEST, PPR or REC, [shift] [gold] sends a 1kHz tone to the tracks,
modulometers and mixdown. '
-18dBFS
' or '
-20dBFS
' is selected
in AUDIO/TC.03 'Tone Level'. Releasing [shift] before [gold]
locks the tone 'ON'; pressing [shift] turns it 'OFF'.
Talkback mic
In TEST, PPR or REC, press and hold the [black] button to
send the talkback to the left channel (see AUDIO/TC.04
'TalkbackMic'); quickly press [black] then press and hold it to
send the talkback to the right channel. Press [shift] [black]
to send the talkback to all tracks.
Warning beeps
The beep level is set in TECHSET.11 'Beep Level'.
One beep
:
record start (07), clip detection (08).
Two beeps
: record
stop or low priority problem such as low battery voltage; the
'Lack of external clock' (09) is automatically disabled on 'w'
(wild track) takes.
Three beeps
: high priority problem, e.g.
unplugged external HDD.
Take-type
Press the [gold] button to scroll the '
t p w a n
' take-type
list:
t
=
t
ime sync audio,
p
=
p
ick-up,
w
=
w
ild track,
a
=
a
n-
nounce,
n
=ig
n
ore. The '
n
' takes are greyed in the PDF
sound report, and "
aborted take/false start
" appears in the
comment line.
note:
in case of
false-start,
stay in REC, press [gold], select
'
n
' in the tpwan list, then and only then, go to PPR; the next
take will carry the same take # as the 'ignored' one.
Going to PPR (p.20), you could open the PREVious edit
process to do the same, and even erase the take to save
disk space, but this takes more time, and this is not recom-
mended in the high pressure short time interval following
a false-start.
2
3
1


