background image


87 

Leak Testing


All components of gas supply system, 

including manual shut off valves and the 

piping in the interior of the unit, must be leak 

tested.  At a minimum, the “Bubble Leak 

Test” must be performed before operating the 

appliance, as well as, on an annual basis 

thereafter, if not more frequently.  All leak 

testing must be performed in accordance with 

this instruction manual as well as in 

accordance to the National Fuel Gas Code 

NFPA 54/ANSI-Z223.1, CSA B149.1 

(Canada) and local codes as applicable. 


Bubble Leak Test


Test is performed using a soap solution leak 

detector solution.   With electrical power to 

the unit terminated and the gas supply to the 

unit within the specified pressures provided 

in this IOM, the solution is sprayed at each 

threaded connection of the gas supply piping 

to the unit and internal gas train of the 

unit.   Each connection is observed for 

bubbles, which indicates leaks in the 

connection.   Joints with bubbles appearing 

during the check must be inspected for thread 

engagement and/or damage and tightened as 

needed. 


All gas fired heat exchangers are completely 

tested at the factory before shipment. This 

will remove nearly all of the oils that have 

been used in the manufacturing process. 

However, trace amounts may remain. When 

performing the initial startup at the jobsite, it 

is highly recommended that people or any 

other living animals, which may be sensitive 

to the residual odors or gases, NOT be 

present in the conditioned space during the 

startup. In all cases, including the initial 

factory firing and testing, any of  the gases 

will be under the acceptable level of 

concentration for human occupancy. 


LEAK CHECK GAS PIPE 


The gas pipe in the unit shall be 

checked for leaks before operation 

and startup. Unit must not be placed 

in operation until a leak check has 

been conducted for all gas piping 

connections. All connections shall be 

checked for leaks annually after 

installation. Gas leaks could result in 

fire, explosion, or other hazardous 

situations. 


DANGER


Do not use open flame or other source 

of ignition for leak testing. Fire or 

explosion could result causing 

property damage, personal injury, or 

death. 


DANGER


Some  soaps used for leak detection 

can be corrosive to certain metals. 

Rinse piping thoroughly after leak test 

has been completed. 


CAUTION 


Those sensitive to odors or gases 

from trace amounts of residual oils 

shall  NOT be present in the 

conditioned space during the startup 

of a gas fired installation. 


WARNING


Summary of Contents for RQ NextGen Series

Page 1: ...er from a phone remote from the building Follow the gas supplier s instructions If you cannot reach your gas supplier call the fire department o Startup and service must be performed by a Factory Trai...

Page 2: ......

Page 3: ...rain Piping 37 Draw Through Coils 38 Non Compressorized Liquid and Suction Line Piping 39 Startup 41 Filters 41 Supply Fan EC Motor Startup 42 Adjusting Refrigerant Charge 43 Checking Liquid Sub Cooli...

Page 4: ...Display Screens 78 System Setting Screens 79 LED Flash Alarm Codes 80 Operation 81 Gas Heating 81 Piping Sizing Examples 83 Inlet and Manifold Pressures 83 Gas Pressure Regulator Overpressure Protect...

Page 5: ...able 16 R 454B Refrigerant Temperature Pressure Chart Imperial 49 Table 17 EC Condenser Fan Cycling Options 50 Table 18 Hot Water Coil Connection Sizes 59 Table 19 Steam Coil Connection Sizes 59 Table...

Page 6: ...pen Rain Hood 33 Figure 17 Rain Hood with Metal Mesh Filter Rack Installation 33 Figure 18 Unit Base Utility Entry 34 Figure 19 Back View of Power Switch from Control Compartment 35 Figure 20 Draw Thr...

Page 7: ...Recovery Wheels Modulating Hot Gas Reheat Safety Burglar Bars Freeze Stats Hot Water Steam Preheat Coils Electric Preheat Phase and Brown Out Protection Supply Return Smoke Detectors Supply Return Fi...

Page 8: ...rty damage Improper servicing could result in dangerous operation serious injury death or property damage Before servicing disconnect all electrical power to the furnace More than one disconnect may b...

Page 9: ...ts that can cause serious injury Do not open door containing fans until the power to the unit has been disconnected and fan wheel has stopped rotating WARNING GROUNDING REQUIRED All field installed wi...

Page 10: ...overload feature The overload ampere setting must not exceed 115 of the electric motors FLA rating as shown on the motor nameplate CAUTION UNIT HANDLING To prevent injury or death lifting equipment c...

Page 11: ...refrigerant coils will cause high pressure inside the coil tubing and damage to the coil CAUTION Some chemical coil cleaning compounds are caustic or toxic Use these substances only in accordance wit...

Page 12: ...3 minutes 5 MINUTE MINIMUM ON TIME To maintain the proper oil level compressors must cycle on for a minimum of 5 minutes The cycle rate must not exceed 7 starts per hour WARNING Units with VFD driven...

Page 13: ...nameplate 6 The supply and return air ducts must be derived from the same space It is recommended ducts be provided with access panels to allow inspection for duct tightness When a down flow duct is u...

Page 14: ...6 380V 3 50Hz 8 208V 3 60Hz 9 208V 1 60Hz Model Option A COOLING HEAT PUMP A1 COMPRESSOR STYLE 0 No Compressor F R 454B Two Step Scroll Compressor H R 454B Variable Speed Scroll Compressor G R 454B V...

Page 15: ...Coil B2 HEAT CONSTRUCTION 0 No Heating A Aluminized Heat Exchanger B Stainless Steel Heat Exchanger G Polymer E Coated Heating Coil H 1 Row Coil J 2 Row Coil B3 HEAT DESIGNATION 0 No Heating A 1 Row...

Page 16: ...Fan per VFD Narrow Width Fan 3C SUPPLY FAN SIZE C 18 5 Direct Drive Backward Curved Aluminum D 18 5 Direct Drive Backward Curved Aluminum 3D SUPPLY FAN MOTOR TYPE 0 High Efficiency Open Motor 1200 no...

Page 17: ...6C EXHAUST FAN SIZE A 16 Axial Fan G 10x8 Forward Curved Fan H 15 Backward Curved Plenum K 18 5 Backward Curved Plenum 6D EXHAUST FAN MOTOR TYPE G ECM Motor 1200 nominal rpm H ECM Motor 1800 nominal r...

Page 18: ...it Energy Recovery Filters Feature 10 REFRIGERATION CONTROL 10A REFRIGERATION CONTROL A 5 Minute Compressor Off Timer and 20 Second Compressor Stage Delay D Adjustable Compressor Lock Outs E Freeze St...

Page 19: ...e A Low Limit Control B Phase Brown Out Protection F Option A B E Compressor Sound Blankets Feature 16 UNIT CONTROLS 16A CONTROL SEQUENCE B Single Zone VAV Unit Controller VAV Cool CAV Heat D VAV Unit...

Page 20: ...ONS 0 Standard ETL U S A Listing B ETL U S A Canada Listing 24 SHIPPING SPLITS 0 Standard C Export Crating K Export Crating No Condenser Section 25 AIR COOLED CONDENSER ACESSORIES 0 Standard C ECM Con...

Page 21: ...ion 37 SPECIALS PAINT B Premium AAON Gray Paint Exterior Paint C Premium AAON Gray Paint Exterior Paint Interior Corrosion Protection E Premium Gray Paint Exterior Paint Shrink Wrap F Premium Gray Pai...

Page 22: ...ed as an electric warm air furnace with or without cooling b Certified for outdoor installation only c Certified for installation on a combustible roof with a minimum of 30 5 cm 12 high curb Certifica...

Page 23: ...tch the job requirements If repairs must be made to damaged goods notify the factory before any repair action is taken in order to protect the warranty Certain equipment alteration repair and manipula...

Page 24: ...t be blocked by snow A minimum 30 5 cm 12 curb must be used or the vent outlet must be greater than 30 5 cm 12 off the ground or roof Flue gas is dangerously hot and contains contaminants The user is...

Page 25: ...b All roofing work must be performed by competent roofing contractors to avoid any possible leakage CAUTION Where the supply or warm air duct passes through a combustible roof a clearance of 2 5 cm 1...

Page 26: ...26 Figure 3 RQ Cabinet Standard and Power Exhaust Gasket Locations...

Page 27: ...extend through to the opposite side of the unit When lifting from the end of the unit the forks must extend at least 112 cm 44 under the unit When lifting with 122 48 forks the back of the fork must b...

Page 28: ...ecommended to lift the unit with the outside air hood in the downward shipping position However the unit may be lifted with the outside air hood in the open position Before lifting unit be sure that a...

Page 29: ...se the unit must include the base insulation option or the base must be field insulated Figure 8 Vertical Duct Connection Do not drill or punch holes in the base of the unit from inside the unit or fr...

Page 30: ...ertified to ICC ES AC156 when using a seismic curb for seismic certifications to apply Any deviations or modifications to the unit or curb will void all seismic certification Structural engineer of re...

Page 31: ...31 Figure 10 Seismic Solid Bottom Curb without Filters Cross Section Figure 11 Seismic Solid Bottom Curb without Filters Detail A Figure 12 Seismic Solid Bottom Curb without Filters Detail B...

Page 32: ...ake adjustments must be made according to building ventilation or local code requirements Remove the two screws at the bottom of the rain hood that secure it in the shipping position Remove the screws...

Page 33: ...pen Rain Hood Metal Mesh Filters Metal mesh outside air filters require installation of the filter rack on the intake of the rain hood Clips that hold the metal mesh filters in the filter rack must fa...

Page 34: ...ide of this min and max voltage 2 The Acceptable Performance Range is the min and max voltage for which the unit performance is designed and rated to give acceptable performance Route power and contro...

Page 35: ...uration must be checked by a qualified technician prior to service especially if unit is to be connected to a 208V or 230V supply For 208V service interchange the yellow and red conductor on the low v...

Page 36: ...essors must not be operated outside the factory determined frequency range The factory determined compressor frequency range is given below in Table 5 For more information on the variable speed compre...

Page 37: ...than 21 VAC isolation relays must be installed If under external control 21 VAC must be field verified All external devices must be powered via a separate external power supply Example A total of 8 wi...

Page 38: ...ne half of the X dimension This ensures that enough water is stored in the trap to prevent losing the drain seal during unit startup Note The absolute value of the fan inlet pressure will always be gr...

Page 39: ...Figure 23 When drilling the holes use a 3 2 cm 1 inch hole for the suction line and a 1 inch hole for the liquid line Figure 20 and Figure 21 For pipe sizing refer to appropriate guidelines in the co...

Page 40: ...40 Figure 23 Post Corner Hole Piping Figure 24 Post Back Hole Piping...

Page 41: ...eration of the equipment without filters will result in a clogged evaporator coil Improper installation adjustment alteration service or maintenance can cause property damage personal injury or loss o...

Page 42: ...If a potentiometer is installed in the unit the 10VDC output of the motor electronics will be wired through the potentiometer and then back into pin 8 16 for speed control By adjusting the potentiome...

Page 43: ...closed while the unit is in cooling mode to get the proper charge After charging unit must be operated in reheat dehumidification mode to check for correct operation Units equipped with heat pump opt...

Page 44: ...3 C HP Superheat 4 4 8 3 C Water Cooled Cond Water Source Heat Pump In Cooling Mode Sub Cooling 2 2 4 4 C Superheat 4 4 8 3 C Table 10 Acceptable Refrigeration Circuit Values Imperial Air Cooled Cond...

Page 45: ...e ambient temperature on the first column and follow that across to the SST 4 4 12 8 C 40 55 F 2 Superheat for Microchannel condenser coils must be between 4 4 and 8 3 C 8 15 F Adjusting Sub cooling a...

Page 46: ...30 96 8 57 161 0 84 249 8 111 369 1 138 526 6 31 98 8 58 163 8 85 253 7 112 374 2 139 533 3 32 100 9 59 166 7 86 257 5 113 379 4 140 540 1 33 102 9 60 169 6 87 261 4 114 384 6 141 547 0 34 105 0 61 1...

Page 47: ...0 30 96 8 57 161 0 84 249 8 111 369 1 138 526 6 31 98 8 58 163 8 85 253 7 112 374 2 139 533 3 32 100 9 59 166 7 86 257 5 113 379 4 140 540 1 33 102 9 60 169 6 87 261 4 114 384 6 141 547 0 34 105 0 61...

Page 48: ...2343 5 58 9 3353 2 0 6 615 2 14 4 1029 4 29 4 1603 6 44 4 2376 2 59 4 3396 1 0 0 628 1 15 0 1047 6 30 0 1628 4 45 0 2409 2 60 0 3439 5 0 6 641 2 15 6 1066 0 30 6 1653 5 45 6 2442 6 60 6 3483 3 1 1 65...

Page 49: ...80 2 30 87 4 57 146 7 84 229 0 111 339 9 138 486 3 31 89 2 58 149 3 85 232 6 112 344 6 139 492 6 32 91 1 59 151 9 86 236 2 113 349 4 140 498 8 33 93 0 60 154 6 87 239 8 114 354 3 141 505 2 34 94 9 61...

Page 50: ...the AAON Condenser Head Pressure Module See AAON literature for further information https www aaon com Controls Note High voltage wires out of the motor Black Brown 1 Phase Line Voltage Green Ground...

Page 51: ...ings The switch will come factory set to cut in at 2 93 Mpa 425psi 5psi and a differential of 1 69 Mpa 155psi or open at 1 86 Mpa 270psi 5psi Note 5 psi 34 5 kpa Settings for CUT IN and DIFFERENTIAL P...

Page 52: ...e the pressure set point for the DIFFERENTIAL Gauge turn the adjustable screw clockwise To lower the pressure set point for the DIFFERENTIAL Gauge turn the adjustable screw counter clockwise NOTE The...

Page 53: ...and lowered about 10 F during the heating season Packaged DX Cooling Operation and Control When a call for cooling G and Y1 Y2 etc is made the supply blower motors and compressors will energize Note W...

Page 54: ...ater cooling coils and non compressorized DX coil are by others Maintenance See back of the manual for maintenance log At least once each year a trained qualified service technician must check out the...

Page 55: ...ower assembly wire frame motor mount motor blower wheel inlet and sheet metal slide out of unit through blower access opening see Figure 27 Figure 28 RQ Supply Fan Removal Slide DX Cooling Set unit co...

Page 56: ...ated water temperature not to exceed 54 4 C 130 F will reduce surface tension increasing the ability to remove chlorides and dirt Quarterly cleaning is essential to extend the life of an e coated coil...

Page 57: ...ply the cleaner to unit interior air exiting side coil surfaces first Work in sections panels moving side to side and from top to bottom Allow the cleaning solution to soak for 5 to 10 minutes Then mo...

Page 58: ...a mix of 4 parts water to one part Simple Green spray the air inlet face of the coil Be sure to cover all areas of the face of the coil 3 Allow the coil to soak for 10 15 minutes 4 Rinse the coil with...

Page 59: ...emicals on the roof coating is recommended Commercial roofing material manufacturers using PVC and EPDM have been contacted and indicate that there is no problem with any of the procedures outlined ab...

Page 60: ...han an hour turn the thermostat system switch to OFF or turn the unit off at the control panel and leave the unit off until the main power switch has been turned on again for at least 24 hours for uni...

Page 61: ...if cooling operation below 12 8 C 55 F is expected Note Multiple Units with Multiple Thermostats When several heating and cooling units are used to condition a space all unit thermostat switches must...

Page 62: ...lationship between the demand signal and compressor capacity modulation The compressor controller protects the compressor against high discharge temperature Refer to Appendix B for the relationship be...

Page 63: ...he cuts with polyurethane caulking Attach the filter at the front and back of the evaporation coil Reinstall economizer assembly if necessary Connect the suction and liquid copper connections to the e...

Page 64: ...F with a water loop temperature of 21 1 C 70 F Open Loop Applications This product contains one or more refrigerant to water heat exchangers made of copper which is subject to corrosion and failure w...

Page 65: ...age under AAON warranties and the heat exchanger manufacturer warranties Unit is capable of operating with Entering Water Temperatures EWT as low as 13 9 C 57 F during the cooling mode without the nee...

Page 66: ...hat water flow is present in the refrigerant to water heat exchanger and the unit can operate without damaging unit components Table 24 Condenser Water Connections Model RQ Supply and Return Connectio...

Page 67: ...lines for unit isolation and water flow balancing All manual flow valves must be of the ball valve design Globe or gate valves must not be used due to high pressure drops and poor throttling character...

Page 68: ...ergy Recovery Wheel The Energy Recovery Cassette consists of a frame wheel wheel drive system and energy transfer segments Segments are removable for cleaning or replacement The segments rotate throug...

Page 69: ...pe air seals across both sides of the energy wheel diameter are factory adjusted to provide close clearance between the air seal and wheel Cross Section of Air Seal Structure Racking of the unit or ca...

Page 70: ...ns along the purge seal as you rotate the wheel slowly by hand clockwise when viewed from the pulley side Verify that the media slightly grabs the paper during rotation If it is necessary to adjust a...

Page 71: ...cleaning is largely dependent on the application and air quality Use ASHRAE s Classes of Air categories to create a routine cleaning schedule Class 1 air has low contaminant concentration with inoffe...

Page 72: ...ron sized pores at the surface of the desiccant material reducing the efficiency by which the desiccant can adsorb and desorb moisture and also build up so as to reduce airflow In a reasonably clean i...

Page 73: ...length of the spoke Retighten adjusting screws and recheck clearance with feeler gauge Diameter Seal Adjustment Wheel Drive Components The wheel drive motor bearings are pre lubricated and no further...

Page 74: ...cedure 1 By hand turn wheel clockwise as viewed from the pulley side to verify wheel turns freely through 360 rotation 2 Before applying power to drive motor confirm wheel segments are fully engaged i...

Page 75: ...ower to system 12 Observe the wheel operating under power Wheel Drive Motor and Pulley Replacement 1 Disconnect power to wheel drive motor 2 Remove belt from pulley and position temporarily around whe...

Page 76: ...tallation 5 Loop the trailing end of the belt over the shaft belt is partially through the opening 6 Reinstall the bearing onto the wheel shaft being careful to engage the two locating pins into the h...

Page 77: ...ply fail to shut off shut off the manual gas valve to the furnace before shutting off the electrical supply Prolonged overheating of the heat exchanger will shorten its life If unit has not been selec...

Page 78: ...crolling through the following displays 1 LAT Measured leaving air temperature LAT average of LAT A and B probes MOD Modulation rate currently being applied to stage one SCR 2 WKGset Working LAT setpo...

Page 79: ...the technician password 2425 The screens are scrolled through by pressing either right or left buttons on the controller Adjustment is made by pressing the up and down buttons After a short time of i...

Page 80: ...ion 1 6 to override corresponding stages Range 0 6 and the default is 0 The manual override may be used for unit testing of each stage Stage 1 will be at 50 to test SCR and stages 2 6 will be full cap...

Page 81: ...ctric preheat will be started up and maintain the leaving air temperature setpoint with both SCR controlled and staged electric preheat Both setpoints are set with push button LCD interface on the pre...

Page 82: ...8 m 12 7 3 4 2 1 4 1 1 1 19 7 4 2 2 9 2 4 2 25 4 13 8 5 5 4 5 3 8 31 75 26 9 16 4 11 3 9 2 7 9 38 10 41 3 25 5 17 6 14 2 12 2 50 80 77 9 47 6 32 6 26 9 22 7 63 50 123 2 75 0 52 4 42 5 36 2 Table 30 I...

Page 83: ...sizes listed Piping Sizing Examples A 100 ft pipe run is needed for a 1080 MBH natural gas heater The natural gas has a rating of 1000 Btu ft3 and a specific gravity of 0 6 Obtain these values from t...

Page 84: ...4 5 kpa 5 psi 258 57 mmHg 138 4 w c Piping Supports Gas supply piping shall be supported directly at the connection to the unit and at intervals listed in the following table with metal straps blocks...

Page 85: ...humidity as well as the percentage and temperature of outside air being introduced to the unit This condensate is generally between a 2 9 and 4 pH level Condensation made in the heat exchanger during...

Page 86: ...86 Figure 35 Example 2 6 ton through the Base Gas Piping Note RQ units will only contain one Heat Exchanger...

Page 87: ...is will remove nearly all of the oils that have been used in the manufacturing process However trace amounts may remain When performing the initial startup at the jobsite it is highly recommended that...

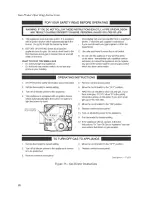
Page 88: ...88 Gas Heater Operating Instructions Figure 36 Gas Heater Instructions...

Page 89: ...t no debris or foreign matter has accumulated in the vent outlet A good practice is to check for debris each time the air filters are changed In the event the vent outlet becomes blocked do not attemp...

Page 90: ...er into opening so that the back of the main plate is against the unit bulkhead Attach the heat exchanger to the bulkhead using the holes around the perimeter Connect wiring per the wiring diagram on...

Page 91: ...power DPM Setup Procedure With the supply voltage active to the module you can setup all of the DPM s settings without the line voltage connected To change the setpoint parameters use the right arrow...

Page 92: ...Screen Vertical Format Default 2 sec Manual 2S 3S 4S 5S 6S 7S 8S 9S 10S 30S 1M 2M 3M 4M Phase Imbalance Percentage Screen Vertical Format Default 5 3 4 5 6 7 8 9 10 Fault Screen Vertical Format 0 most...

Page 93: ...1 Metal Mesh Outside Air C 1 19 5 x 39 x 5 16 Lint Screen Table 36 RQ Series 2 6 ton Unit Filters Feature 6B Quantity Size Type 0 2 20 x 20 x 2 Pleated MERV 8 B 2 20 x 20 x 4 Pleated MERV 8 C 2 20 x 2...

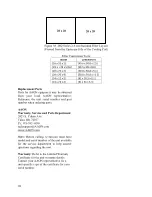
Page 94: ...from your local AAON representative Reference the unit serial number and part number when ordering parts AAON Warranty Service and Parts Department 2425 S Yukon Ave Tulsa OK 74107 Ph 918 382 6450 tech...

Page 95: ...95...

Page 96: ...96...

Page 97: ...d 0 Use is not recommended Water Containing Concentration mg l or ppm Time Limits Analyze Before AISI 316 SMO 254 Copper Alloy Nickel Alloy Alkalinity HCO3 70 Within 24 Hours 0 70 300 300 0 Sulfate SO...

Page 98: ...t 0 2 0 Manganese Mn 0 1 No Limit 0 1 0 Chloride Content Chloride Content Maximum Temperature 60 C 140 F 80 C 176 F 120 C 248 F 130 C 266 F 10 ppm SS 304 SS 304 SS 304 SS 316 25 ppm SS 304 SS 304 SS 3...

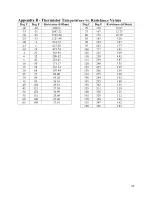
Page 99: ...107 44 25 77 86 00 30 86 69 28 35 95 56 16 40 104 45 81 45 113 37 58 50 122 30 99 55 131 25 68 60 140 21 40 65 149 17 91 Deg C Deg F Resistance kOhms 70 158 15 07 75 167 12 73 80 176 10 79 85 185 9 2...

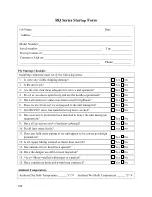
Page 100: ...No 3 Are the unit clearances adequate for service and operation Yes No 4 Do all access doors open freely and are the handles operational Yes No 5 Have all electrical connections been tested for tight...

Page 101: ...ck Rotation Nameplate Amps________ Number hp L1 Volts Amps L2 Volts Amps L3 Volts Amps 1 Band Size_____________________ VFD Frequency________________ Outside Air Economizer Dampers Operation Check Dam...

Page 102: ...re Saturated Temperature Line Temperature Sub cooling Superheat Discharge N A N A Suction N A Liquid N A Refrigeration System 1 Full Capacity Heating Mode Heat Pump Only Pressure Saturated Temperature...

Page 103: ...e water piping been insulated Yes No 7 What is the freeze point of the glycol N A if water ______________________________ Gas Heating Natural Gas Propane Purge Air from Lines Verify Pilot Spark Stage...

Page 104: ...ocument any service repair or adjustments AAON Service and Warranty Departments are available to advise and provide phone help for proper operation and replacement parts The responsibility for proper...

Page 105: ...105 Maintenance Log E Coated Coil...

Page 106: ...ted the Acceptable Refrigeration Circuit Values table and added the Acceptable Microchannel Air Cooled Condenser Coil Liquid Sub Cooling Values table Added a note about drain pan connections are 1 MPT...

Page 107: ...107...
Page 108: ...Technical Support 918 382 6450 Note Before calling Technical Support please have the model and serial number of the unit available Parts For replacement parts please contact your local AAON Representa...

Reviews: