background image


  5. Preparation


    5.1. Installing or Replacing Batteries 


CAUTION 


Batteries are not included. Please purchase them separately.


Insert the batteries in the correct polarity (+/-) as shown the battery compartment. 


Replace all four batteries at the same time.


Be sure to install the battery cover when using the product.


Do not mix different types of batteries and new and old batteries.


Battery life depends on operating conditions and ambient temperature.


Remove the battery if it is not used for a long period of time or if it is used only for USB power supply.


1. Remove the battery cover. 
2. Remove all old batteries. 
3. Note the polarity of the four new AAA batteries when inserting them. 

4. Install the battery cover. 


  5.2. USB Power Supply 


Connect the USB cable to the USB (Micro-B) terminal on the side of the main unit. 


CAUTION 


The USB cable is not included.


Data transfer from the USB terminal is not possible.


Operation is not guaranteed with of all power supply units.


Check the specifications of the power supply unit.


Do not connect to a device other than a power supply. Connecting to other devices may cause damage.


When connecting a USB cable, check the direction of the connection and insert it straight. 


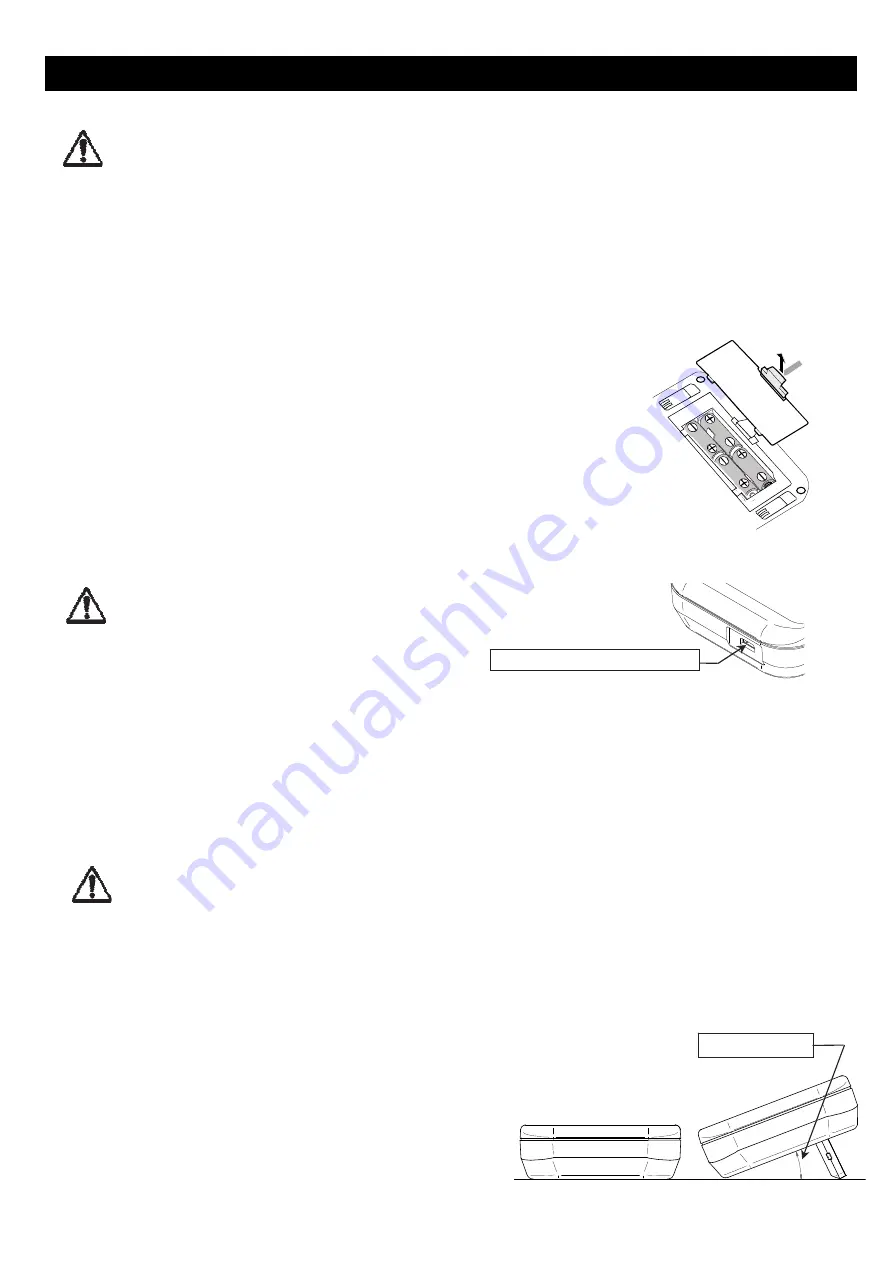
  5.3. Precautions for Use 


  CAUTION 


The stands should be extender fully or not at all.


 Do not use the product with the stands halfway out. 


Be sure to extend both stands when standing the device. 


Prevent foreign matter such as liquid or metal from getting into the body.


Do not handle the product with wet hands.


Do not press the keys with hard or sharp objects.


Do not install or store the product in an unstable location.


Be careful that the product does not fall or is impacted.


5V±0.5V / 50mA 

USB (Micro B) Terminal 

Approximately 20

°


Stand 

Summary of Contents for AD-8931

Page 1: ...1WMPD4003853 Wireless Remote Display AD 8931...

Page 2: ...uch marks by A D is under license WARNING Repairs Do not disassemble the device Contact your local A D dealer if your device needs service or repair Troubleshooting If a problem has occurred and you c...

Page 3: ...hese limits are designed to provide reasonable protection against harmful interference when the equipment is operated in a commercial environment This equipment generates uses and can radiate radio fr...

Page 4: ...ata from the weighing device is displayed The power supply can use four AAA batteries R03 LR03 sold separately or USB power supply Pairing with a weighing device is required to start communication ref...

Page 5: ...ed to the measuring instrument Turn off The instrument is not connected to the measuring instrument Weighing unit Turn on Except for the displayable weighing unit Key operation ON OFF key Turning the...

Page 6: ...B terminal on the side of the main unit CAUTION The USB cable is not included Data transfer from the USB terminal is not possible Operation is not guaranteed with of all power supply units Check the...

Page 7: ...he BT indicator does not light up the power turned off after about 1 minute Repeat from step 1 7 The product is connected to the measuring device If the measuring device s power is disconnected or the...

Page 8: ...p If the BT indicator does not light up turn off the product and the measuring instrument and turn them on again 5 Displays the received measurement data If the measuring device s power is disconnecte...

Page 9: ...3 seconds elapse from the stable indicator lighting up The backlight is always lit in function setting mode Backlight operation 1 Always OFF 2 Auto Clrf Returns the function settings to factory defau...

Page 10: ...t has failed 9 Specification Compatible communication devices A D weighing instruments equipped with Bluetooth 1 Display 7 segment LCD with backlight Character height 26 mm Display update Approximatel...

Page 11: ...etween Bluetooth devices the range of communication will be shorter Interference may be caused near the following devices that use the 2 4 GHz frequency band which is the same as for Bluetooth Therefo...

Page 12: ...550420 Fax 44 1235 550485 A D AUSTRALASIA PTY LTD 32 Dew Street Thebarton South Australia 5031 AUSTRALIA Telephone 61 8 8301 8100 Fax 61 8 8352 7409 A D KOREA Limited 6 33 817 07331 817 Manhattan Bld...

Reviews: