Operating instructions
a-TroniX inverter AX series, 1ph
atx009de0823
Page 24
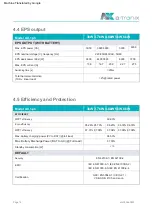
Step 2: Power Wiring
A. EPS wiring
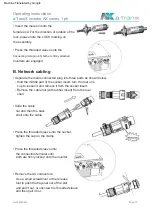
the torque is (0.8+/-0.1N m).
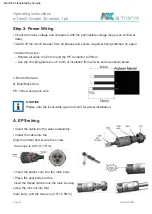
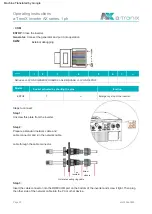
N: Blue/Black Wire
• Insert the plastic core into the main body.
PE: Yellow and green wire
• Place the seal body and the
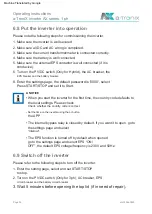
A NOTICE
insert the thread catcher into the main housing,
• Check the mains voltage and compare it with the permissible voltage range (see technical
data).
Please note the local cable type and color for actual installation.
screw the lock nut into that
• Switch off the circuit breaker from all phases and secure it against being switched on again.
main body, and the torque is (2.5+/-0.5N·m).
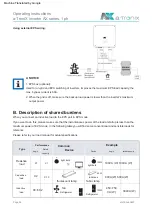
• Shorten the wires:
• Insert the cable into the sleeve assembly.
– Shorten all wires to 52.5mm and the PE conductor to 55mm.
• Install the cable into the
plug-in terminal and secure the screw,
– Use the crimping pliers to cut 12mm of insulation from all wire ends as shown below.
L: Brown/Red wire
Machine Translated by Google


