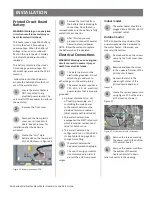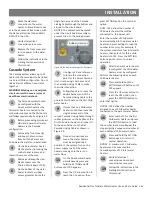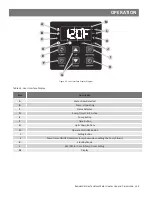
38 • Residen al Gas Tankless Water Heater Use and Care Guide
INSTALLATION
X3® Technology
WARNING! DO NOT operate
water heater un l either the X3®
Cartridge or Bypass cartridge has
been installed into the manifold
located on the underside of the
water heater cabinet. Failure to do
so may result in leaks and poten al
property damage.
This water heater may be equipped
with X3
®
Scale Preven on
Technology to inhibit scale forma on
within the heat exchanger tubing
of this unit. Part of the X3
®
Technology’s an -scale protec on
comes from the special X3
®
Cartridge media. The X3
®
Cartridge
must be installed into the manifold
located on the underside of the
heater cabinet prior to opera on
of the unit (shown as follows). X3
®
Scale Preven on Technology reduces
the forma on of scale in the heat
exchanger, extending the opera ng
life of the unit in typical potable
water installa ons. Speci
fi
c water
condi ons may impact the e
ffi
ciency
of X3
®
, such as excessive iron or
manganese levels.
X3
®
Cartridge
Bypass
Cartridge
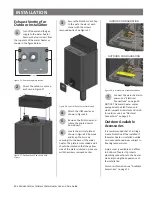
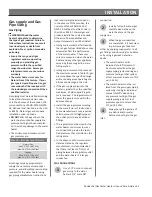
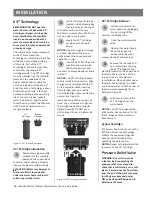
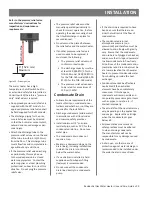
Figure 33 -
X3® & Bypass Cartridges
X3® Cartridge Installa on
1
Remove the plug assembly
installed into the manifold
located on the underside of
the water heater cabinet. Properly
dispose of plug assembly materials.
CAUTION! Water may be present
in the manifold. Place a bucket
under the water heater cabinet to
collect any residual water.
2
Locate the three (3) screws
located in the hardware bag
that is located on the top of
the heater carton. Set the one
M4-12mm screw and two M4-25mm
screws aside in a safe place.
3
Locate the X3
®
Cartridge
provided with the water
heater.
NOTICE:
Inspect o-rings for damage
or debris. Handle with care and
verify lubricant has been properly
applied to o-rings.
4
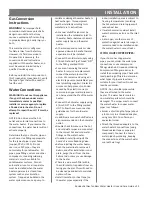
Insert the X3
®
Cartridge into
manifold and secure with
the two long screws and
one short screw previously set aside
in Step 2.
NOTICE:
The X3® cartridge is keyed
to only install in one direc on. Align
the
on the cartridge with the
on the manifold. When inser ng
the cartridge, push up un l the
screw holes align. Some resistance is
normal. See Figure 34.
Insert and snug all three screws by
hand. Use a screwdriver to ghten
the two
1
screws
fi
rst and lastly
ghten screw
2
. DO NOT use a
drill or impact driver to ghten the
screws.
2 1
1
2
1
1
2
1
1
ALIGN
X3
®
CARTRIDGE
MANIFOLD
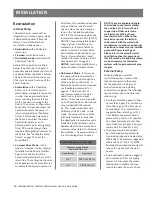
Figure 34 -
X3
®
Cartridge Installa on
X3® Cartridge Removal
1
Disconnect power to the
water heater by unplugging
it or by turning o
ff
the
circuit at the breaker box.
2
Close the cold inlet water
valve.
3
Open all hot water taps in
the house. When the
residual water
fl
ow has
ceased, close all hot water taps.
4
Remove the two long and
one short screws securing
the X3
®
Cartridge to the
manifold located on the underside of
the water heater cabinet. Set the
screws aside in a safe place for
re-installa on. Place a bucket under
the water heater cabinet to collect
any residual water. Note the order of
the screw when removing them.
Reference Figure 34.
5
Pull down to remove the
X3
®
Cartridge from the
water heater.
NOTICE:
The X3
®
Cartridge will be
full of water. Use cau on not to lt
the cartridge un l the water has
been drained.
Bypass Cartridge
If the water heater does not use the
X3
®
Scale Preven on Technology,
con
fi
rm the bypass cartridge has
been properly installed before
opera ng the water heater.
NOTICE:
Bypass cartridge installs the
same way as the X3® cartridge.
Pressure Relief Valve
WARNING! Hot water could be
released. Before opera ng the
pressure relief valve manually,
check that it will discharge in a safe
place. If water does not
fl
ow freely
from the end of the discharge pipe,
turn the gas supply and power
OFF and call a quali
fi
ed person to
determine the cause.

