background image


Quick Installation Guide

Quick Installation Guide

Quick Installation Guide

Quick Installation Guide    

EAP700 Enterprise Access Point

 ENGLISH 

©

 2010 4IPNET, INC.                                           


- 4 - 

Hardware Installation


Please follow the steps mentioned below to install the hardware of EAP700: 

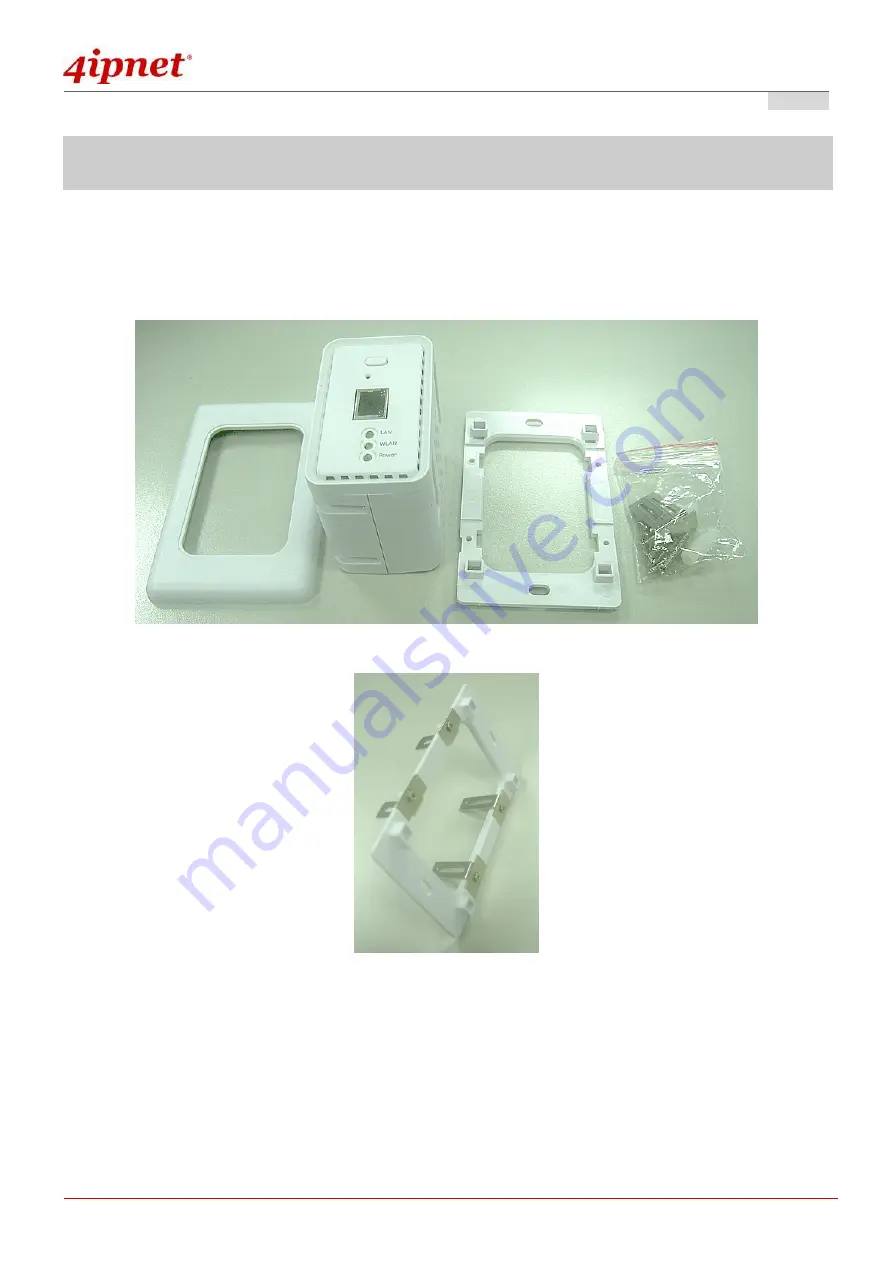
Before the installation, assemble the following parts accordingly for later in-wall placement.   

  Unpack the package and remove the cover and the frame. 


  Lock the screw correctly to the frame. 


Summary of Contents for EAP700

Page 1: ...EAP700 V1 10 ...

Page 2: ...rwise without the prior written permission of 4IPNET INC Disclaimer 4IPNET INC does not assume any liability arising out the application or use of any products or software described herein Neither does it convey any license under its parent rights not the parent rights of others 4IPNET further reserves the right to make changes in any products described herein without notice The publication is sub...

Page 3: ...braries private homes public kiosks etc When working under one of 4ipnet Controllers the combined network turns into an intelligent building solution a managed internet service or a Wi Fi hotspot network of various scales This Quick Installation Guide provides instructions for getting started with EAP700 1 EAP700 x 1 2 Quick Installation Guide QIG x 1 3 CD ROM x 1 4 LED Sticker x 2 It is recommend...

Page 4: ...on Press and release immediately to initiate Slave AP s WDS connection RESET Button Pressing the button more than 3 seconds will reset the system to default settings LAN Port The LAN port is for connection with wired network LED status indication LAN LED OFF indicates no connection ON indicates connection BLINKING indicates transmitting data WLAN LED Green LED ON indicates system ready Power LED G...

Page 5: ...uide Quick Installation Guide Quick Installation Guide EAP700 Enterprise Access Point ENGLISH 2010 4IPNET INC 3 In Wall Panel POWER SOCKET Attach the power adapter here PoE LAN Port The LAN port is for connection with wired networks or PoE Switch ...

Page 6: ...Access Point ENGLISH 2010 4IPNET INC 4 Hardware Installation Please follow the steps mentioned below to install the hardware of EAP700 Before the installation assemble the following parts accordingly for later in wall placement Unpack the package and remove the cover and the frame Lock the screw correctly to the frame ...

Page 7: ...Guide Quick Installation Guide Quick Installation Guide EAP700 Enterprise Access Point ENGLISH 2010 4IPNET INC 5 Slide the frame from the two sides to the front until locked to the fixed point Cover it with faceplate and push the frame to the end ...

Page 8: ...ck Installation Guide Quick Installation Guide EAP700 Enterprise Access Point ENGLISH 2010 4IPNET INC 6 Optional U shaped mounting kit Slide the frame from the two sides to the front until locked to the fixed point and adjust the angel of set to the wall ...

Page 9: ... Connect one end of the Ethernet cable to the LAN port of EAP700 and the other end of the cable to a switch a router or a hub EAP700 is then connected to your existing wired LAN network 3 There are two ways to supply power over to EAP700 1 Connect the power adapter to the EAP700 power socket 2 EAP700 PoE LAN port is capable of transmitting DC currents via its PoE LAN port Connect an IEEE 802 3af c...

Page 10: ...or PC to the LAN port of EAP700 via an Ethernet cable Then set a static IP address on the same subnet mask as EAP700 in TCP IP of your PC such as the following example Please note that the IP address used shall not be duplicated with the IP address of other devices within the same network In the Local Area Connection Properties selecting the Internet Protocol TCP IP Properties use the following IP...

Page 11: ...n Guide EAP700 Enterprise Access Point ENGLISH 2010 4IPNET INC 9 After a successful login into EAP700 a System Overview page of web management interface will appear To logout simply click on the Logout button at the upper right corner of the interface to return to the Administrator Login Page ...

Page 12: ... button and then select the Change Password tab Enter a new password with length up to 32 characters twice and then click SAVE to save the new password Note On each configuration page you may Click SAVE to save the changes but you must reboot the system upon the completion of all configuration settings for the changes to take effect When clicking SAVE the following message will appear Some modific...

Page 13: ...e Access Point ENGLISH 2010 4IPNET INC 11 Step 2 Configure Wireless Settings Click on the Wireless button and then select the General tab Determine the Band and Channel settings Select your preferred Band and Channel for your wireless connection For example select 802 11b 802 11g for the band and Auto for the channel ...

Page 14: ...Settings EAP700 Supports up to 8 virtual APs By default only 1 VAP is enabled Configure VAP profile settings a Select the VAP Config tab to configure the settings for each VAP b An administrator can enable or disable specific VAP from the drop down list box of Profile Name Check VAP status After finishing the above settings the status of enabled Virtual APs shall be reflected on the Virtual AP Ove...

Page 15: ... 13 Step 4 Advanced Optional Choose Security Type Click on the Wireless button Select the Security tab to configure your preferred security type to respective VAP The following uses VAP 1 security configuration as an example 1 Choose WEP as its Security Type While WEP is selected provide the desired Authentication Key Length Key Format Key Index and Keys ...

Page 16: ...stallation Guide Quick Installation Guide EAP700 Enterprise Access Point ENGLISH 2010 4IPNET INC 14 2 Choose 802 1X as its Security Type While 802 1X authentication is selected provide the desired WEP Key Length and the corresponding settings of RADIUS Server ...

Page 17: ...allation Guide Quick Installation Guide Quick Installation Guide EAP700 Enterprise Access Point ENGLISH 2010 4IPNET INC 15 3 Choose WPA PSK as its Security Type When WPA PSK is selected provide the desired Pre shared Key and Cipher Suite ...

Page 18: ... Quick Installation Guide Quick Installation Guide EAP700 Enterprise Access Point ENGLISH 2010 4IPNET INC 16 4 Choose WPA RADIUS as its Security Type While WPA RADIUS is selected provide the Cipher type and the corresponding settings of RADIUS Server ...

Page 19: ...nfigure peer AP s After completing the WDS settings at this EAP700 functioning as a primary WDS station you must also configure the settings of its peer AP s If you use another EAP700 as the peer AP simply repeat the above mentioned steps with the MAC Address of the primary WDS station for setting WDS link parameters of the peer AP s Note Besides setting up your WDS connections manually EAP700 als...

Page 20: ...Link Status If the RSSI is shown as N A check if the wiring is properly connected and please ensure the accurate execution of Step 5 as described above Congratulation Now 4ipnet EAP700 is installed and configured successfully It is strongly recommended to make a backup copy of configuration settings After EAP700 s network configuration is completed please remember to change the IP Address of your ...

Reviews: