background image

www.modellmarkt24.ch

20 


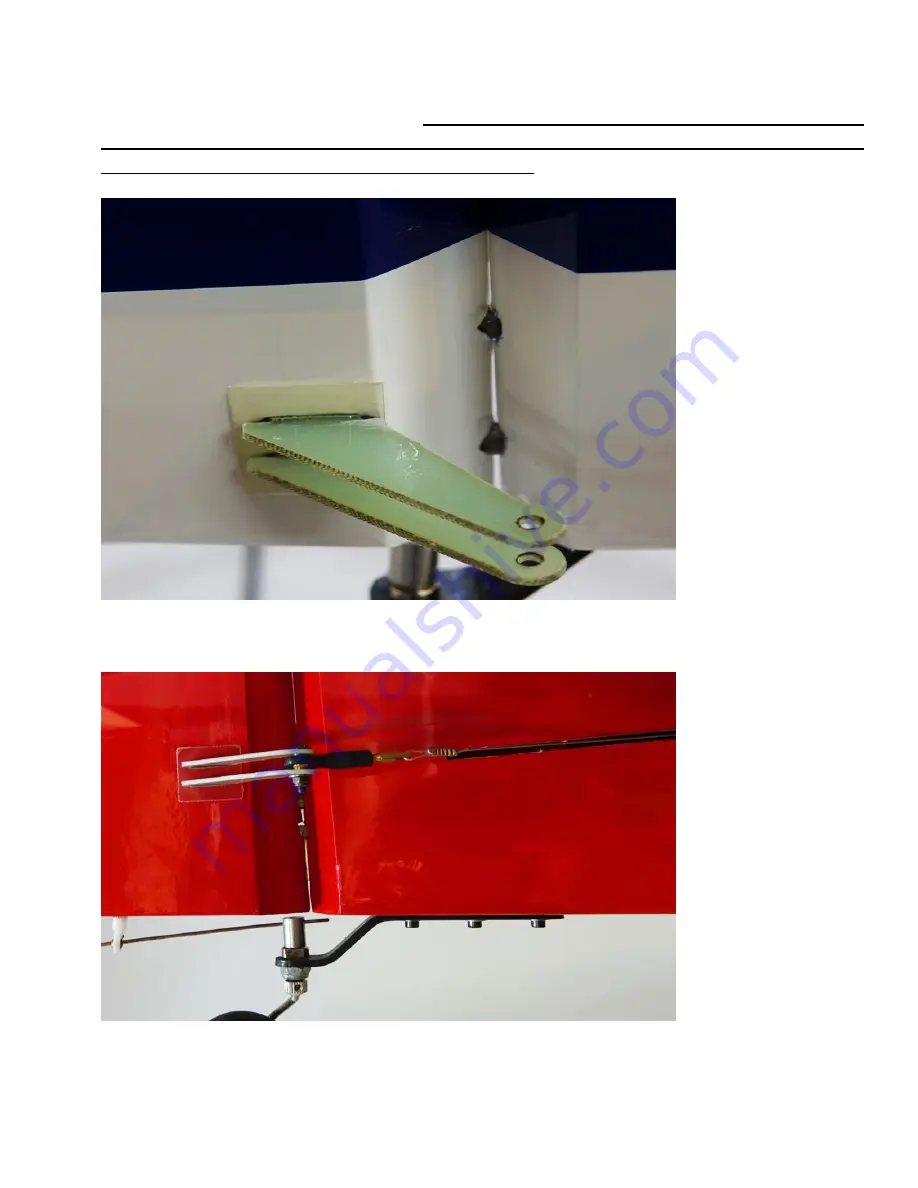
27.  Locate  the  rudder,  the  rudder control  horns  and  the  2  slotted  base  plates.    Use 
sandpaper  to  scuff  the  bottom  of  the  control  horns  as  well  as  the  side  of  the  base 
plates that will attach to the rudder.  If using a direct drive push-pull linkage (which 
is our recommended setup) only glue one set of horns in place on the right side of the 
rudder (pilot's perspective) in the lower position using the same procedure as you did 
with the elevators and ailerons. 


28.    As  mentioned  there  are  two  locations  available  to  install  the  rudder  control 
horns.    If  using  the  pull-pull  system  use  the  upper  horn  location  as  shown  in  this 
photo. 


www.modellmarkt24.ch

Summary of Contents for Extra 330SC

Page 1: ...www modellmarkt24 ch 1 95 Extra 330 E Assembly Manual Copyright 2017 Extreme Flight www modellmarkt24 ch...

Page 2: ...utics in order to be properly insured and operate your model at AMA sanctioned flying fields only If you are not willing to accept ALL liability for the use of this product please return it to the pla...

Page 3: ...ular the Xpwr 60 this vanity project has now become reality Extreme Flight is proud to present the 3DHS 95 EXTRA 330E The EXTRA 330E is a beautiful synergy of advanced composite materials implementati...

Page 4: ...aluminum arm for pull pull rudder 1 1 5 Extreme Flight aluminum servo arm if using push pull rudder 2 x Extreme Flight 6 20 awg Servo Extensions 2 x Extreme Flight 12 20 awg Servo Extensions 1 24 Ext...

Page 5: ...there are small dings or imperfections on some of the surfaces An effective method to restore these imperfections to original condition is to use a very fine tipped hypodermic needle and inject a dro...

Page 6: ...e horizontal stabilizer elevator assemblies as well as the composite control horns and base plates from the elevator hardware package Trial fit the assembly into the slots in the elevator 2 Trace arou...

Page 7: ...he horn assembly and use a 11 blade to remove the covering from inside the ink line you traced around the control horn base 4 Wipe away the ink line with a cotton cloth or paper towel soaked in denatu...

Page 8: ...se sandpaper to scuff the portion of the horns and base plate that will be inserted into the elevator 6 Apply 30 minute epoxy to the elevator slots using a zip tie to ensure the slots are filled will...

Page 9: ...0 control horns and base plate 8 Reinsert the assembly into the elevator and wipe away any excess epoxy with a cloth and denatured alcohol Place a 3mm bolt through the horns to help insure proper alig...

Page 10: ...do it as this method has proven itself over many years of model building 9 Mix a generous batch of 30 minute epoxy Use a zip tie or an old pushrod to thoroughly coat and fill the hinge holes on the st...

Page 11: ...they pivot 90 degrees to the stab 12 Now coat the other side of the hinges as well as the hinge holes in the elevator with epoxy and install the elevator onto the stab Don t forget to apply epoxy in t...

Page 12: ...make sure they are properly secured Note Before installing the servos it s a good time to seal the hinge gap with a strip of Ultracote or Blenderm tape Also I recommend that you dilute a small amount...

Page 13: ...ter the servos Using the manufacturer supplied mounting hardware install the elevator servo with the output shaft toward the rear of the stab and re attach the servo arm 15 Assemble the linkage and in...

Page 14: ...s install the control horns and hinges for both wings 17 Attach a 12 inch EF 20 awg servo extension to the aileron servo lead and secure with a servo safety clip or heat shrink tubing Install the aile...

Page 15: ...dium heat setting to seal all the trim seams and remove any wrinkles in the covering Use caution and avoid excessive heat as this may cause the Ultracote to shrink too much and lift at the seams Fusel...

Page 16: ...ough the hole in the landing gear place a washer onto the axle and secure the axle with a locking nut Repeat this process for the second wheel axle 21 Install one wheel collar on the axel first in ord...

Page 17: ...www modellmarkt24 ch 17 22 Install each wheel pant using the supplied 3mm bolts and washers as shown in the picture below As always use blue Loctite on ALL bolts www modellmarkt24 ch...

Page 18: ...make of electric motor get the mounting template from the manufacturer and align on the laser inscribed crosshairs on the front of the motorbox 24 We highly recommend using the Blazing Star XXL Stando...

Page 19: ...d nuts for mounting our recommended ESC the Castle Creations Edge 160HV Simply bolt it in place with 3mm bolts Remember the Loctite 26 Take a few minutes to secure the motor wires battery leads and re...

Page 20: ...g a direct drive push pull linkage which is our recommended setup only glue one set of horns in place on the right side of the rudder pilot s perspective in the lower position using the same procedure...

Page 21: ...alignment a breeze 29 Once your control horn installation has cured mount the rudder to the fuselage using the same process as you did when gluing on the ailerons and elevators 30 Locate the 2mm ball...

Page 22: ...n the rear of the fuselage as shown if using a direct drive rudder actuation setup and assemble the linkage as shown with the provided hardware 32 If using a pull pull setup now is the time to install...

Page 23: ...bles very easy and is a worthwhile investment Please also note we are using the holes at the 3 5 location for best geometry The cables should be crossed in a X pattern before exiting the rear of the f...

Page 24: ...ured with 3 3mm bolts 2 on the lower external portion of the cowl and one mounted from the interior of the fuselage The cowl hangs on 2 hooks and is secured at these 3 locations I chose to use 2 of th...

Page 25: ...ite on these bolts 37 The wings are mounted on the provided carbon fiber wing tube and retained by inserting a 3mm bolt and washer through the two tabs that protrude from each wing root and into the c...

Page 26: ...he aircraft up with Slide the wings into position install the canopy and pick up the plane with the rope Extra 330E should balance in a horizontal position Move your batteries and radio equipment to a...

Page 27: ...al Aileron 20 degrees low rate 30 40 exponential 38 45 degrees high rate 50 60 exponential Rudder 20 degrees low rate 50 exponential all you can get for high rate 50 60 exponential This completes the...

Reviews: