


UP Plus 2 3D Printer User Manual v 2013.10.24
Base Height:
This is the thickness of the raft of material before the support layer is printed under the part. When
the printer starts printing, it first prints a raft of non-solid material in which all the lines of support
material are horizontal (along the Y axis). It keeps building up horizontal rows of support material
for as many mm as you have chosen. Then, just before it gets to the bottom surface of the real part, it
starts to build support layers perpendicular to the raft layers layer.
The default value is 2mm.
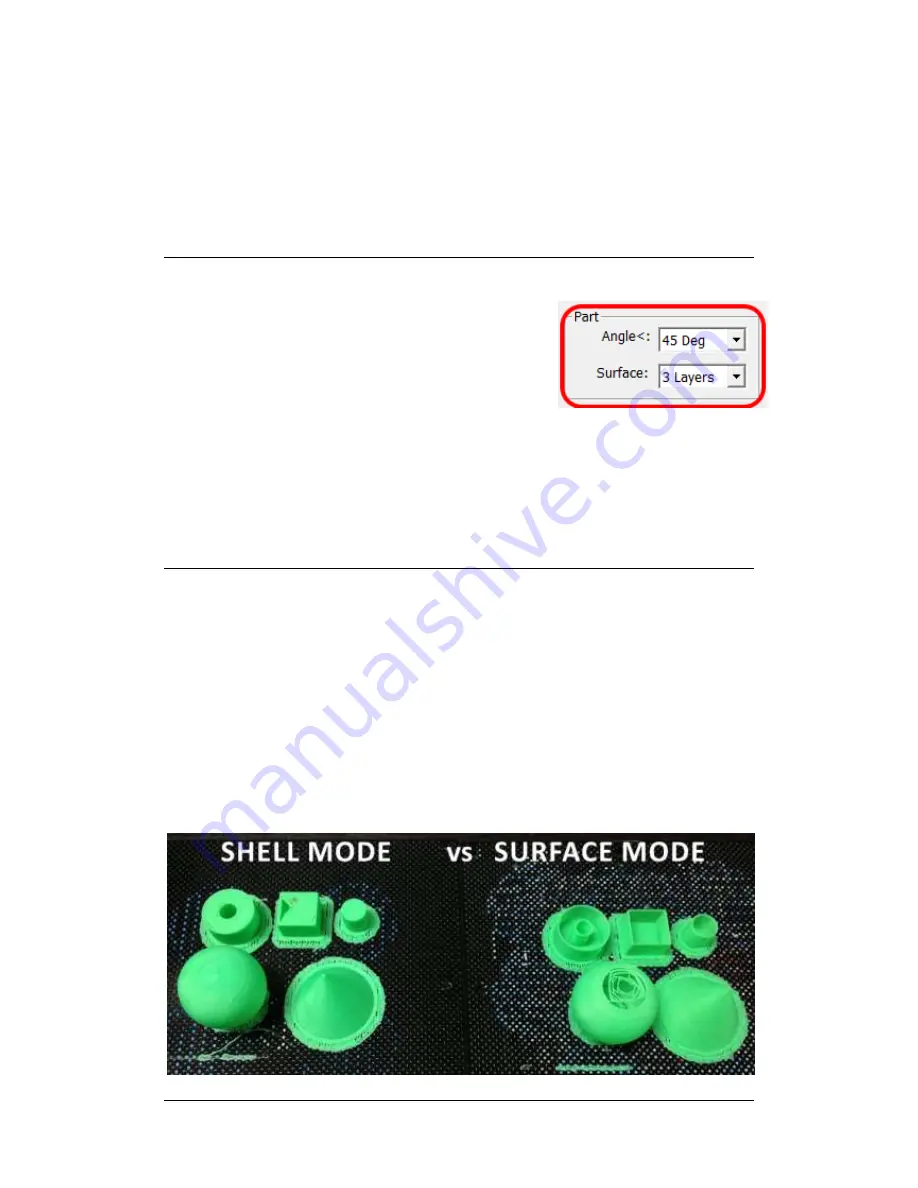
Part - Angle:
The part Angle determines at what point solid (dense) support
material gets used. If the angle is small than the printer will add
solid fill layers under the part surface. The thickness of this
solid (dense) support is determined by the “dense” parameter
under the Support options as described below.
Part - Surface:
This parameter determines how many layers form the bottom face of a part when it is not solid.
For example, if you set it to 3, the machine will print 3 complete layers before going into
non-solid mode. This does not, however, affect the side wall thickness on non-solid parts, which
are all the same thickness (approximately 1.5mm) irrespective of the fill mode.
Stable Support
: Stable support creates support that is more rigid and the model is less likely to
distort, but the support material is more difficult to remove.
Shell
: By selecting this mode, the software will not create the internal honeycomb fill and will
only create an external shell. For example printing the bunny with this selected will print a hollow
bunny, saving material however making it fragile (2 layers thick). The shell option does not work
well for parts with flat surface tops, e.g. a cube as there is nothing to support the top surface.
Surface:
With surface mode, it will print a model only 1 layer thick with no internal fill. It will
also not create a flat bottom surface or the top flat surface. Printing the bunny in this mode will not
create a bottom surface and its back will cave in. See the below comparison.
Summary of Contents for UP Plus 2
Page 1: ...UP Plus 2 3D Printer User Manual v 2013 10 24 ...
Page 8: ...UP Plus 2 3D Printer User Manual v 2013 10 24 2 1 Appearance Figure 1 Front view of printer ...
Page 10: ...UP Plus 2 3D Printer User Manual v 2013 10 24 2 3 Accessories PARTS ...
Page 56: ...UP Plus 2 3D Printer User Manual v 2013 10 24 ...


