


Pannoramic 1000 2.0 – User’s Guide
4 Software and Work-flow
II. Insert magazines
On how to prepare and insert magazines into the device, please read
section 3
.
If the magazines are inserted properly, the LED above/at the side of the slot is lit in white. The status
of the corresponding magazine position that is checked is indicated also in the Home View window –
the gray status bar turns to white, indicating that the position has turned from inactive to active.
Warning!
A laser sensor (Laser Class 1 according to EN 60825-1:2017) detects
misaligned slides in magazines, and a warning message appears on the
screen informing you about the magazine column in which you should
check and fix the error. The system checks for misaligned slides repeatedly
unless each of the slides are inserted properly, so the device cannot be
used if there is an error.
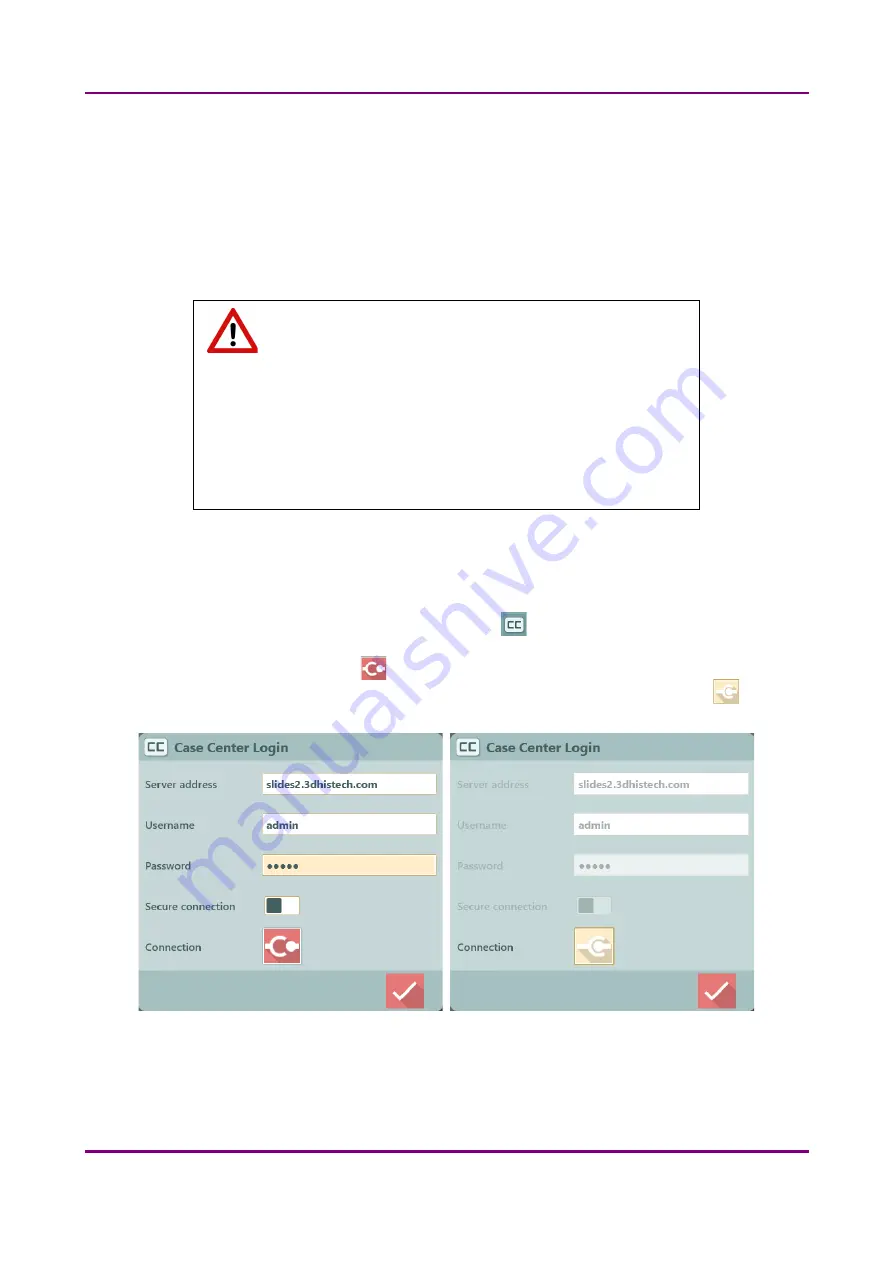
III. Scanning destination
By default, scanning of slides is performed to local destination. If you want to scan directly to the
dedicated CaseCenter server (if available), first click the
button at the bottom left corner of the
window. Fill the required fields such as
Server address
,
Username
, and
Password
, then activate
Secure connection if needed. Click
to establish connection with the dedicated server, and enable
scanning to CaseCenter. If connected to CaseCenter the fields become inactive, and the
button is
visible in the window.
Figure 11 – Login window
May 23, 2019 - Rev. 1
3DHISTECH Ltd.
31
(
79
)


