76
C
HAPTER
7: A
DVANCED
F
EATURES
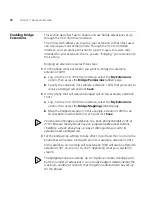
Enabling the Busy
Line Condition
To configure the
Busy Line
forwarding condition from the telephone:
1
Enter the Call Forwarding access code that you set up on the VCX 7000
User Interface for the
Busy Line
condition, for example *74.
2
Use the keypad to enter the number to which you want to forward your
calls.
3
To store the number, press the
OK
button.
4
To disable this feature, dial the access code for the
Busy Line
condition,
for example *74, then press
OK
.
Enabling the All Calls
Condition
To configure the
All Calls
forwarding condition from the telephone:
1
Perform one of the following steps on your telephone:
a
Press the
Call Forward
button (Model 3102 only).
b
Press
P 4
(all phones).
c
Press
F 400
(all phones).
d
Enter the Call Forwarding access code that you set up on the VCX
7000 User Interface for the
All Calls
condition, for example *72 (all
phones).
2
Use the keypad to enter the phone number to which you want to
forward your calls.
3
To store the number, press
OK
.
4
To disable this feature, perform one of the following steps:
a
Press the
Call Forward
button (Model 3102 only).
b
Press
F 400
(all phones).
c
Enter the Call Forwarding access code, for example *72, then press
OK.
Controlling
Caller ID
This section describes how to enable and use Caller ID privacy features set
up through the VCX 7000 User Interface.
By default, the VCX system shows your Caller ID (your name and
extension) on the display panel of the telephone receiving your call. You
can use
Privacy
feature to control whether the VCX system sends your
Caller ID when you make a call. You can choose the default setting
Summary of Contents for V7000
Page 6: ...6...
Page 26: ...26 CHAPTER 2 VCX V7000 BUSINESS TELEPHONE MODEL 2102...
Page 44: ...44 CHAPTER 4 VCX V7000 BUSINESS TELEPHONE MODEL 3102...
Page 54: ...54 CHAPTER 5 VCX V7000 ATTENDANT CONSOLES MODEL 3105 AND COMPLEMENT ATTENDANT...
Page 80: ...80 CHAPTER 7 ADVANCED FEATURES...
Page 84: ...84 INDEX...

