Logging in through the Console Port
25
Figure 4
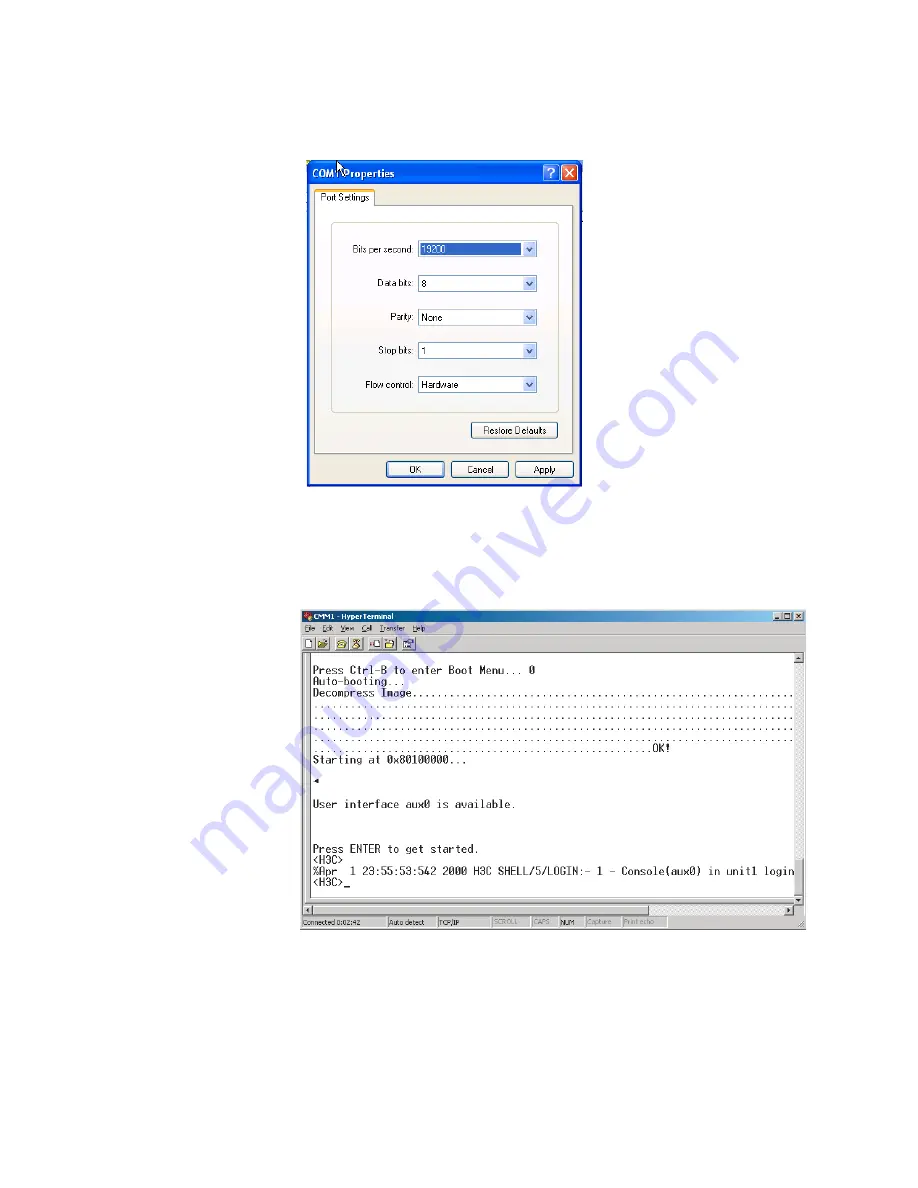
Set port parameters
3
Plug in the switch so it has power. You will be prompted to press the Enter key if
the switch successfully completes POST (power-on self test). The prompt (such as
<4210>) appears after you press the Enter key, as shown in Figure 5.
Figure 5
HyperTerminal CLI
4
You can then configure the switch or check the information about the switch by
executing the corresponding commands. You can also acquire help by typing the ?
character.
Summary of Contents for 4210 PWR
Page 22: ...20 CHAPTER 1 CLI CONFIGURATION...
Page 74: ...72 CHAPTER 3 CONFIGURATION FILE MANAGEMENT...
Page 84: ...82 CHAPTER 5 VLAN CONFIGURATION...
Page 96: ...94 CHAPTER 8 IP PERFORMANCE CONFIGURATION...
Page 108: ...106 CHAPTER 9 PORT BASIC CONFIGURATION...
Page 122: ...120 CHAPTER 11 PORT ISOLATION CONFIGURATION...
Page 140: ...138 CHAPTER 13 MAC ADDRESS TABLE MANAGEMENT...
Page 234: ...232 CHAPTER 17 802 1X CONFIGURATION...
Page 246: ...244 CHAPTER 20 AAA OVERVIEW...
Page 270: ...268 CHAPTER 21 AAA CONFIGURATION...
Page 292: ...290 CHAPTER 26 DHCP BOOTP CLIENT CONFIGURATION...
Page 318: ...316 CHAPTER 29 MIRRORING CONFIGURATION...
Page 340: ...338 CHAPTER 30 CLUSTER...
Page 362: ...360 CHAPTER 33 SNMP CONFIGURATION...
Page 368: ...366 CHAPTER 34 RMON CONFIGURATION...
Page 450: ...448 CHAPTER 39 TFTP CONFIGURATION...
Page 451: ......
Page 452: ...450 CHAPTER 39 TFTP CONFIGURATION...
Page 470: ...468 CHAPTER 40 INFORMATION CENTER...
Page 496: ...494 CHAPTER 44 DEVICE MANAGEMENT...


