5
UA
Motherboard Installation
Every motherboard has different specifications for the installment of stand-offs, it is
strongly recommended that you refer to your motherboard’s instruction manual when
nstalling stand-offs to the case.
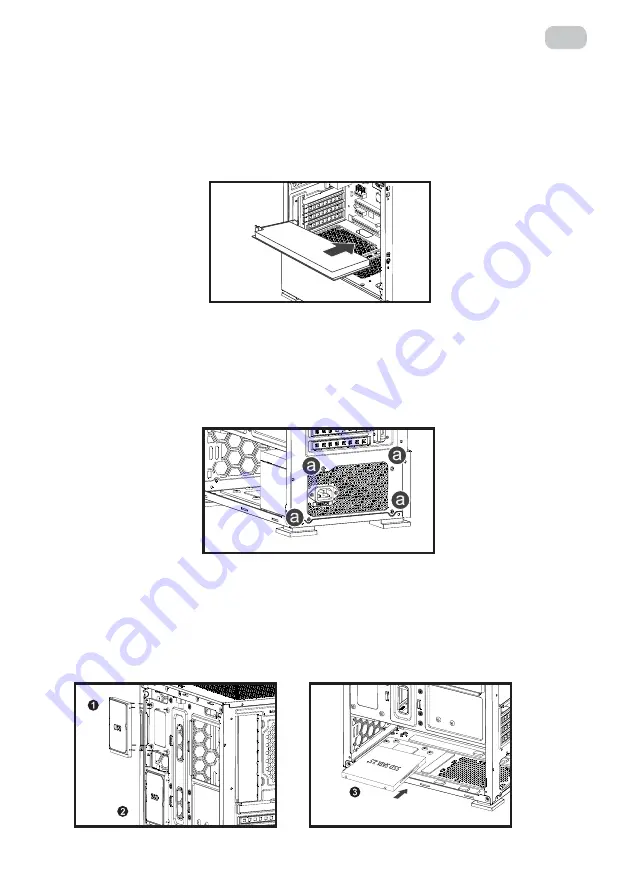
Power Supply Installation
Securely install the power supply at the top of the case and tighten it with screws on
position .
Graphics Card Installation
Install the graphics card on the PCI slot following the indicated direction and tighten it
with screws
3.5’’ HDD Installation
Install the HDD on the indicated position and tighten it with screws.
2.5’’ SSD Installation
Install the SSD on the indicated positions and tighten them with screws
Fans Installation
Front: 120mm fan x 3
Rear: 120mm fan x 1
HDD Installation
(
1
)
HDD Installation
(
2
)
SSD Installation
(
1
)
SSD Installation
(
2
)
(
1
)
Встановлення відеокарти (VGA).
1.
Місце положення слотів розширення - на задній панелі.
2.
Демонтувати відсік (ки) для розміщення відеокарти.
3.
Встановити відеокарту на відведене місце.
4.
Зафіксувати гвинтами.
Встановлення блоку живлення.
1.
Розміщення блоку живлення в нижній частині корпуса.
2.
Встановіть блок живлення зі сторони правої частини корпусу.
3.
Закріпити блок живлення за допомогою гвинтів із сторони задньої панелі.
Встановлення SSD (відсік 2,5’’).
1.
Визначити місця встановлення SSD в корпусі.
2.
Розмістити SSD відповідно до місць закріплення.
3.
Зафіксуйте SSD за допомогою гвинтів.
Summary of Contents for GAMING CALLEO WHITE
Page 1: ...RU UA EN COMPUTER CASE OPERATION GUIDE 2E GAMING CALLEO WHITE GB700W...
Page 8: ...8 RU ARGB LED...
Page 10: ...10 UA 1 2 3 4 5 6 1 2 3 4 3 CR2025...
Page 17: ...17 RU ARGB LED...
Page 19: ...19 RU 1 2 3 4 5 6 1 2 3 4 3 2025...
Page 29: ...2 1 2 3 4 5 6 12 _____________________________________________________________...


