


Copyright 1010music LLC 2020
Page 57 of 88
Bitbox Micro User Manual 1.0.7
3.
On the Pads screen, with the slicer pad selected, touch Keys to go to the
Traditional Keyboard screen.
4.
Play C2 on the Traditional Keyboard screen. You will hear that slice 1 is
played.
5.
Play D#2 and slice 4 will be played. Keys C2 and up are now mapped to
Slices 1 and up for playback.
6.
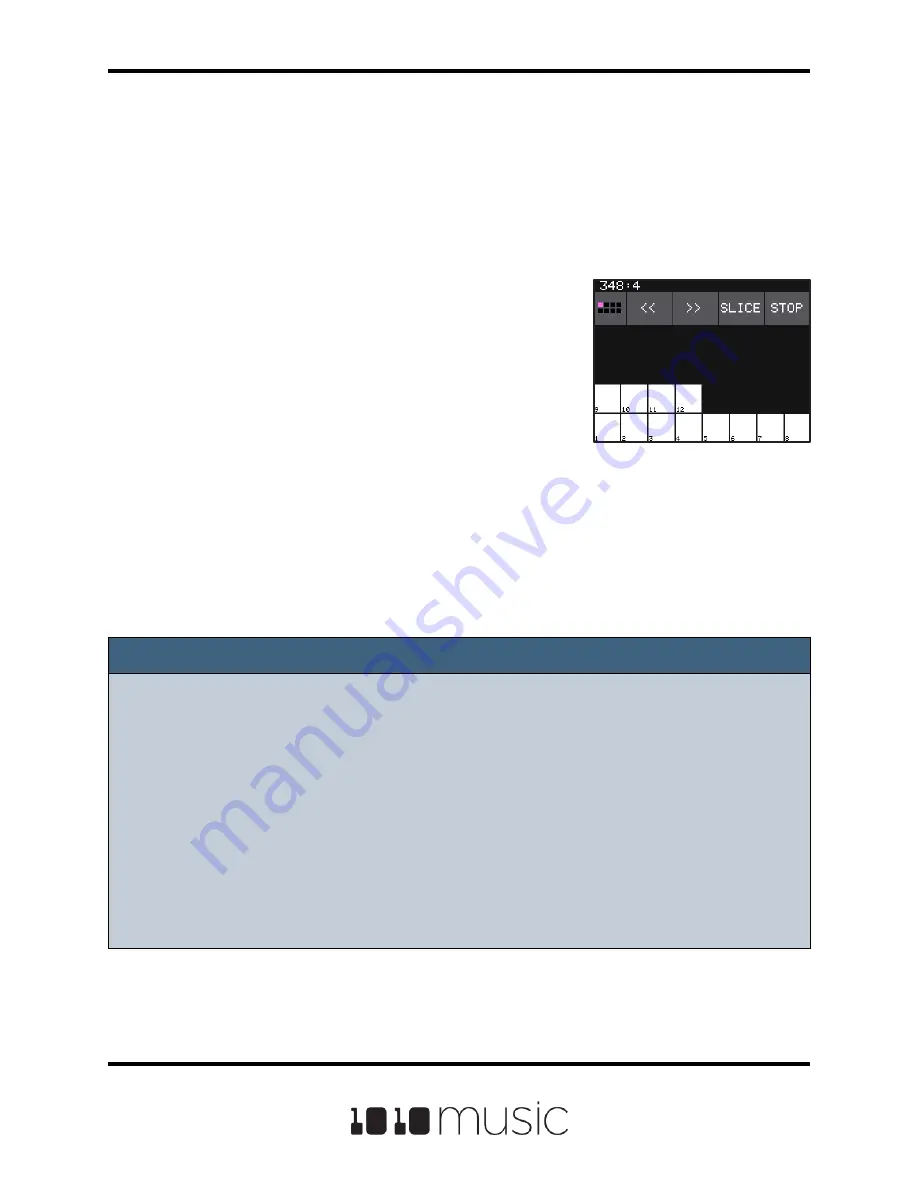
Push the right arrow button to go to the Grid
Keyboard screen. Bitbox micro will display
numbered squares in the grid for each slice in
the WAV file. Use the arrows at the top of the
screen to access additional octaves if needed.
Bitbox micro will display one square on the grid
for each slice in the pad.
7.
Touch a numbered square on the grid to play
that slice.
8.
Touch STOP at the top of the screen to stop
playing all slices. (The SLICE button next to
the STOP button does not do anything, it is just
a reminder that this is a slice pad.)
Grid Keyboard for Slices
Copyright 1010music LLC 2020
Page 57 of 88
Bitbox Micro User Manual 1.0.7
Note:
► On the traditional keyboard, the last slice will be played for all notes above the
last slice. Nothing will play for notes below C2.
► If you use the Grid-based keyboard with a slicer pad, the slices are mapped to
the notes available in the selected scale.
► The steps above show a simple example of using Keys alone to trigger different
slices within one pad. You can use this with Loop Mode ON with Launch Modes
of Gate or Toggle to achieve different effects. You could also use this with Slice
Seq if you wanted to have the Slice Seq control what slices play when a pad
trigger is received.


