


Installing Network Cards in SteelHead GX and xx70, SteelHead SD, SteelCentral, Interceptor 9600, and SteelFusion Core 3500 | 65
Installing network add-on cards in 1U appliances
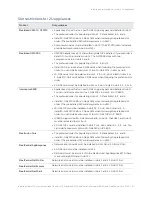
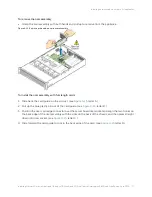
9. Power up the appliance and check the status lights.
For information about the status lights, see
Appendix B, “Network Card Status Lights for SteelHead
GX, xx70, SteelCentral, Interceptor, and SteelFusion Core.”
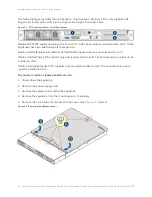
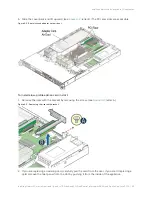
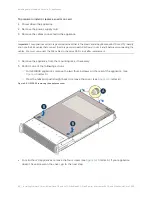
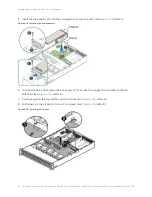
To install an add-on card in slots 2 and 3
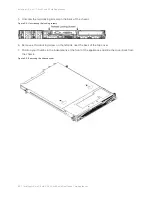
1. Remove the adapter card air duct by lifting it straight up.
2. Remove the plate that holds the cards in place. (see
, letter A.)
Figure 4-7. Installing an adapter to the riser 3 assembly
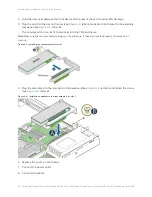
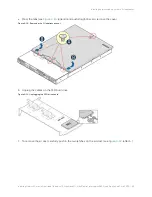
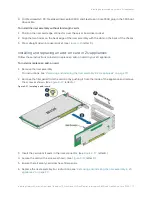
3. If you are replacing an existing PCIe card, carefully pull the card from the riser card.
4. Hold the new card between the front bezel and the rear of the card to avoid ESD damage.
Note:
Make sure the cards are seated properly in the PCIe enclosure. If they aren’t seated properly, the cards don’t
function.
5. Insert the card until it sits in the riser connector. (see
, letter B.)
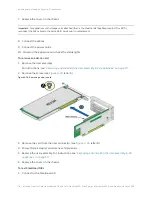
6. For long cards, rotate the PCI card retainer to make sure the card is secure in the slot. (see
,
letter C.)
7. Install the plate. (see
, letter D.)
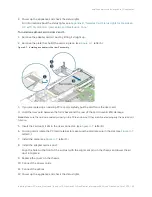
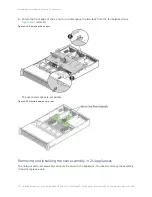
8. Install the adapter card air duct.
Align the hole on the front of the air duct with the alignment pin on the chassis and lower the air
duct into place.
9. Replace the cover on the chassis.
10. Connect the power cords.
11. Connect the cables.
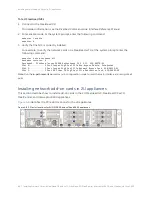
12. Power up the appliance and check the status lights.


