F2302 Installation - pg. 8
Figure 9B
A
BB
Figure 9C
Meduim Tube
Figure 9D
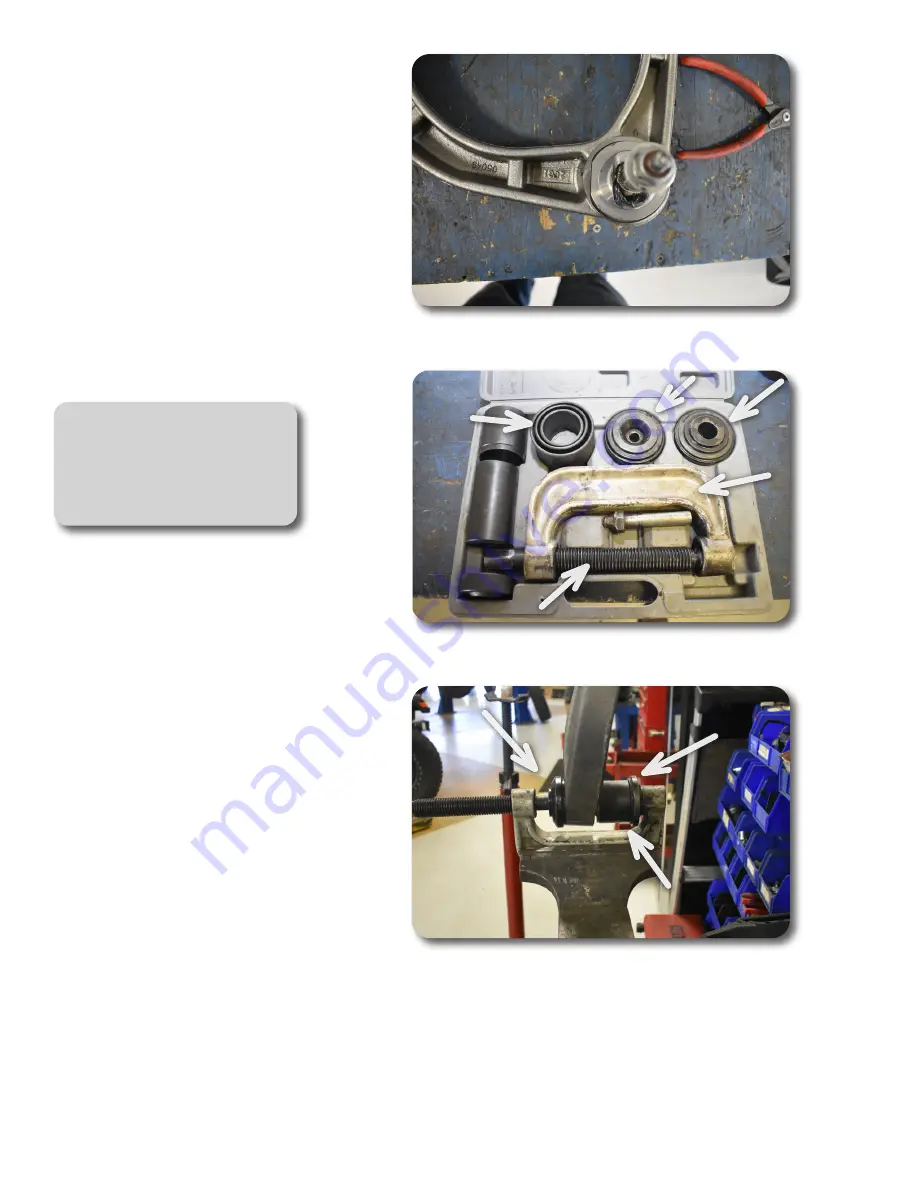
Step 14 Note:
Use the medium sized tube provid
-
ed with the ball joint press to press
the ball joint into the Zone Offroad
upper control arm.
Страница 1: ...for a quick response 888 998 ZONE Call to speak directly with Zone tech support Pre Installation Notes 1 Special literature required OE Service Manual for model year of vehicle Refer to manual for pr...
Страница 2: ...ork with models with a height sensor attached to the UCA 7 Fox Coilovers 883 06 195 883 06 192 will work with these UCAs 8 Stock height Bilstein Sasquatch or Badlands and black body struts without a s...
Страница 3: ...UCA 7 Remove the upper ball joint nut Figure 2 8 Using an appropriate separator dislodge the upper ball joint from the steering knuckle Figure 3 Figure 3 Step 7 Note Use the hex holding feature to pr...
Страница 4: ...rm and into the Zone Offroad arm Figure 5A Step 9 Note When removing the upper control arm bolt on the driver side the steering linkage most likely will need to be disconnected Make sure when removing...
Страница 5: ...ll joint Figure 6 Save for later instal lation Figure 6 12 Using a flat head screw driver carefully remove the OE ball joint boot Figure 7 BE VERY CAREFUL NOT TO PUNCTURE THE BOOT Figure 7A Step 11 No...
Страница 6: ...m Figure 8 Figure 8A Provided Tube Provided Tube Provided Washer Provided Washer Figure 8B Step 13 Note The press tube has a notch cut into it to better fit the profile of the fac tory control arm Be...
Страница 7: ...nt press Figure 9 Figure 9A Step 14 Note The flat side on the ball joint hous ing must line up with the flat side on the Zone Offroad control arm This will ensure the ball joint is installed in the pr...
Страница 8: ...on pg 8 Figure 9B A A B B Figure 9C A A B B Meduim Tube Meduim Tube Figure 9D Step 14 Note Use the medium sized tube provid ed with the ball joint press to press the ball joint into the Zone Offroad u...
Страница 9: ...16 Ensure there is no dirt debris in the ball joint socket Grease the ball joint and ball joint boot Figure 11 17 Install the factory ball joint boot back onto the ball joint using the boot installa...
Страница 10: ...F2302 Installation pg 10 Figure 12A Figure 12B Figure 12C 18 Install new Zone Offroad upper control arm Replace with factory hardware Do not tighten the bushing hardware at this time Figure 13...
Страница 11: ...hardware Torque the upper ball joint nut to 46 ft lbs Figure 14 Figure 14 20 Use the included grease packet to lube the o ring Install o ring onto the cap and install cap into the arm Figure 15 Figur...
Страница 12: ...1 Check all hardware after 500 miles 32 Adjust headlights as necessary Post Installation Warnings 1 Check all fasteners for proper torque Check to ensure for adequate clearance between all rotating mo...