For additional assistance, contact our Technical Support
Department at 1-800-822-7933.
4.3.2 To Set Up the WiFi Parameters
using the OneTouch
1. Make sure the iAquaLink J-Box is connected to the
power center. It takes about ten seconds to find the
WiFi signal.
2. Select REMOTES on the HELP menu. If the power
center has found the iAquaLink, it will show it as
iAQUALINK.
3. Go to SYSTEM SETUP and Select iAQUALINK
SETUP.
4. Enter the homeowner service set identifier (SSID).
Usually, the SSID is located at the bottom of the
home owner's router.
5. Select the type of encryption that the homeowner’s
router is using (NONE,WEP, WPA).
6. Enter the homeowners NET KEY (password). This
also is usually on the bottom of the homeowner’s
router.
NOTE
The next time you go to the screen where the
password is entered, it will be hidden from the
user (as a security measure).
7. When you have entered the parameters select
STORE SETTINGS. This will update the WiFi
settings to the iAquaLink module.
8. When all three status indicator LEDs of the
iAquaLink are turned ON, then you have a
connection to the homeowner's WiFi network and
the iAquaLink is online. It can take up to a minute
to establish a connection.
4.4
To Set Up the J-Box for Wired
Connection
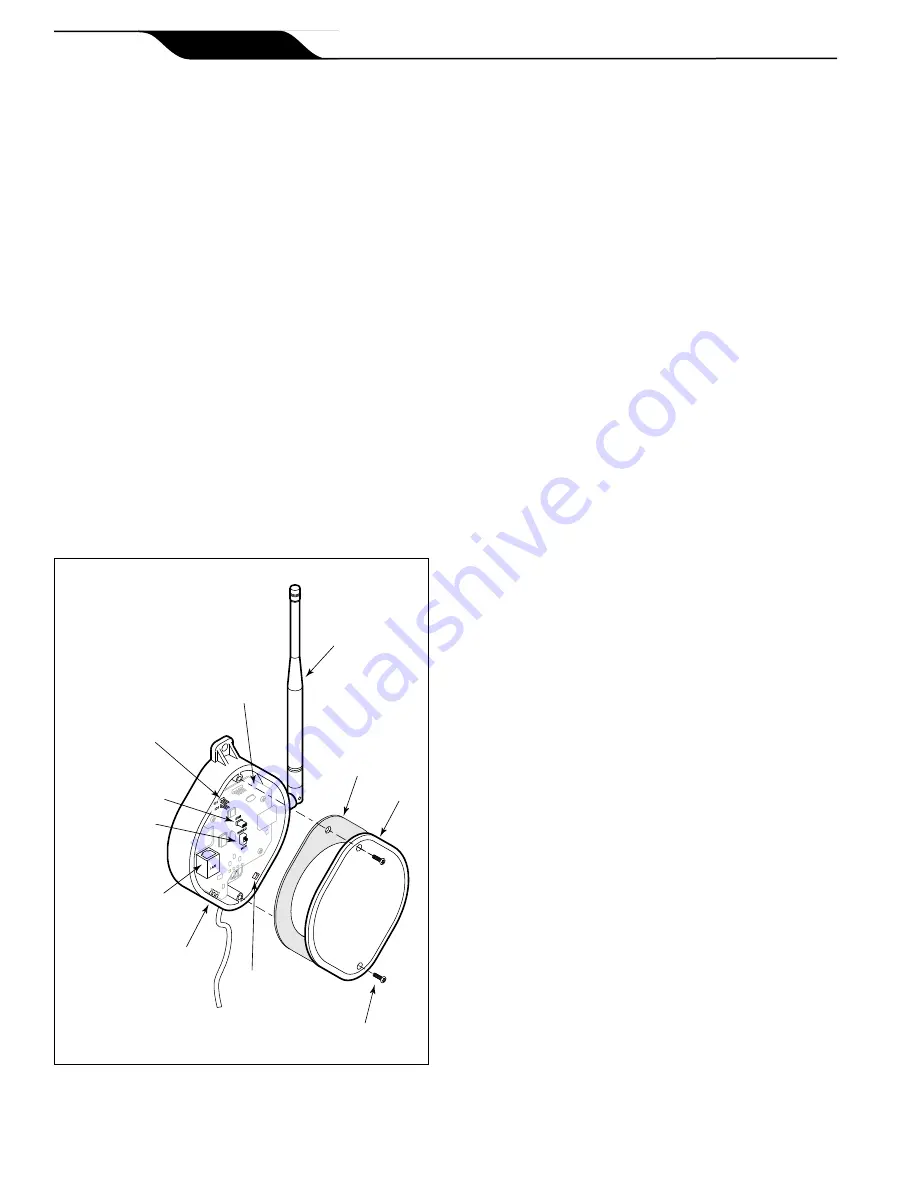
1. Remove the two (2) screws that secure the cover
and gasket on the iAquaLink J-box. Remove the
gasket and cover. See Figure 5.
2. Connect one end of the Ethernet (RJ45) cable to
the Ethernet (RJ45) on the J-box PCB and the other
end to the Ethernet (RJ45) on the router box.
3. Slide the switch to the WIRED position.
4. To allow the cable to exit the device, use a small
pointing tool such as a screwdriver to push and
remove the break-away piece from the J-box. Wrap
the cable inside the J-box and route it through the
break-away hole.
5. Reinstall the cover and gasket on the iAquaLink
J-box with the two (2) screws previously removed.
4.5
Changing the Address
There are two (2) jumpers (ID0 and ID1) that are used
for avoiding any addressing conflicts with the AquaLink
Touch. For most installations you can leave the two
jumpers ID0 and ID1 off.
If an attached AquaLink Touch is not set to address 4
then you do not need to change jumpers ID0 and ID1.
Otherwise, change jumpers ID0 and ID1 to an unused
address.
Figure 5.
iAquaLink J-Box PCB Components
LED Status
Indicator Lights
iAquaLink PCB
Jumpers
ID1 and ID0
Wired/WiFi
Selector
USB
Connector
Ethernet / LAN
(RJ45)
Cover
Screws (2)
Gasket
Antenna
Hole for cabling
(Break-Away Piece)
Page 10
iAquaLink™ Web Connect Device for AquaLink
®
RS and PDA Control Systems
|
Installation Manual
ENGLISH
Содержание iAquaLink
Страница 2: ......


