"ZKTeco SpeedFace M4 - устройство для распознавания лиц с высокой скоростью и точностью. На нашем сайте вы можете бесплатно скачать Руководство пользователя для этого продукта. Посетите manualshive.com для загрузки."
ZKTeco Industrial Park, No. 32, Industrial Road,
Tangxia Town, Dongguan, China.
Phone : +86 769 - 82109991
Fax
: +86 755 - 89602394
www.zkteco.com
Copyright © 2021 ZKTECO CO., LTD. All Rights Reserved.
Страница 1: ...ad the instructions carefully before operation Follow these instructions to ensure that the product is functioning properly The images shown in this manual are for illustrative purposes only For furth...
Страница 2: ...the design and that the said personnel have received thorough training in operating and maintaining the machine unit equipment It is further essential for the safe operation of the machine unit equipm...
Страница 3: ...ne unit equipment and such amendments shall not give any right to claim any compensation or damages under any circumstances ZKTeco shall in no way be responsible i in case the machine unit equipment m...
Страница 4: ...pendent research and development of biometric verification procedures and the productization of biometric verification SDK which was initially widely applied in PC security and identity authentication...
Страница 5: ...and field names are inside square brackets For example pop up the New User window Multi level menus are separated by forwarding slashes For example File Create Folder Symbols Convention Description Th...
Страница 6: ...20 1 6 5 COMBINED VERIFICATION 24 2 MAIN MENU 25 3 USER MANAGEMENT 26 3 1 ADD USERS 26 3 2 SEARCH FOR USERS 30 3 3 EDIT USERS 31 3 4 DELETE USERS 31 3 5 DISPLAY STYLE 31 4 USER ROLE 33 5 COMMUNICATIO...
Страница 7: ...TINGS 64 9 5 ANTI PASSBACK SETUP 66 9 6 DURESS OPTIONS SETTINGS 67 10 ATTENDANCE SEARCH 68 11 AUTOTEST 70 12 SYSTEM INFORMATION 71 13 CONNECT TO ZKBIOACCESS IVS SOFTWARE 72 13 1 SET THE COMMUNICATION...
Страница 8: ...Position Facial Expression and Standing Posture Recommended distance Facial expression and standing posture The distance between the device and a user whose height is within 1 55m to 1 85m is recomme...
Страница 9: ...palm is placed parallel to the device Make sure to keep space between your fingers Note 1 Place your palm within 30 to 50 cm of the device 2 Place your palm in the palm collection area such that the...
Страница 10: ...between the device and the face Be careful not to change the facial expression smiling drawn wink etc If you do not follow the instructions on the screen the face registration may take a longer time...
Страница 11: ...or sunglasses authentication may fail Do not cover the face allow the device to recognize both the eyebrows and the face 1 4 Standby Interface After connecting the power supply the interface appears...
Страница 12: ...upports the input of Chinese and English characters numbers and symbols Click En to switch to the English keyboard Press 123 to switch to the numeric and special character keyboard and click ABC to re...
Страница 13: ...e palm module with all the palm data template in the device The device will automatically distinguish between the palm and face verification mode Place the palm in the area that can be collected by th...
Страница 14: ...ECO CO LTD All rights reserved If the user has registered the card face and password in addition to palm and the verification method is set to Password Face Palm Card the following screen will appear...
Страница 15: ...device compares the collected facial images with all face data registered in the device The following is the pop up prompt of a successful comparison result 2 Enable mask detection When the user enabl...
Страница 16: ...reserved 1 1 Facial Verification In this verification mode the device compares the face captured by the camera with the facial template related to the entered user ID Press on the main interface and...
Страница 17: ...dition to the face and the verification method is set to Password Face Palm Card verification the following screen will appear Select the icon to enter the face verification mode After successful veri...
Страница 18: ...erification This verification mode compares the card number in the Card induction area with all the card number data registered in the device the following is the card verification screen 1 1 Card Ver...
Страница 19: ...1ZKTECO CO LTD All rights reserved If an employee registers palm face and password in addition to card and the verification method is set to Password Face Palm Card the following screen will appear Se...
Страница 20: ...SpeedFace M4 User Manual P a g e 19 Copyright 2021ZKTECO CO LTD All rights reserved 2 Swipe the card above the card area the card must be registered first Successful Verification...
Страница 21: ...s reserved Failed Verification 1 6 4 Password Verification The Password Verification mode compares the entered password with the registered User ID and Password Click the button on the main screen to...
Страница 22: ...KTECO CO LTD All rights reserved If an employee registers palm card and face in addition to password and the verification method is set to Password Face Palm Card the following screen will appear Sele...
Страница 23: ...SpeedFace M4 User Manual P a g e 22 Copyright 2021ZKTECO CO LTD All rights reserved 2 Input the password and press OK Successful Verification...
Страница 24: ...SpeedFace M4 User Manual P a g e 23 Copyright 2021ZKTECO CO LTD All rights reserved Failed Verification...
Страница 25: ...erification methods A total of 12 different verification combinations can be used as shown below Note 1 means or and means and 2 You must register the required verification information before using th...
Страница 26: ...ance Facial templates Palm templates Resetting to factory settings Device type setting and Detection management Personalize This includes user Interface voice bell settings Data Mgt To delete all the...
Страница 27: ...ain menu Click New User Register a User ID and Name Enter the User ID and Name Notes 1 A username may contain 17 characters 2 The user ID may contain 1 to 9 digits by default 3 During the initial regi...
Страница 28: ...l the management privileges If a custom role is set you can also select user defined role permissions for the user Click User Role to select Normal User or Super Admin Note If the selected user role i...
Страница 29: ...SpeedFace M4 User Manual P a g e 28 Copyright 2021ZKTECO CO LTD All rights reserved Register card Press your card above the card area The card number registration will be successful...
Страница 30: ...turn to the New User interface after taking a photo Note While registering a face the system will automatically capture a picture as the profile photo If you do not want to register a profile photo th...
Страница 31: ...ght 2021ZKTECO CO LTD All rights reserved 3 2 Search for Users Click the search bar on the user list and enter the retrieval keyword The keyword may be an ID surname or full name The system will searc...
Страница 32: ...xcept that the user ID cannot be modified when editing a user For further details refers 3 1 Add users 3 4 Delete Users Select a user from the list and click Delete to enter the delete user interface...
Страница 33: ...SpeedFace M4 User Manual P a g e 32 Copyright 2021ZKTECO CO LTD All rights reserved All the Display Styles are shown as below Single Line Multiple Line Mixed Line...
Страница 34: ...u may set the permission scope of the custom role up to 3 roles that is the permission scope of the operation menu Click User Role on the main menu interface 1 Click any user role to set a defined rol...
Страница 35: ...left and its sub menus are on the right You only need to select the features in sub menus If the device has a role enabled you may assign the roles you set to users by clicking User Mgt New User User...
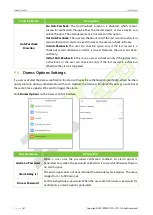
Страница 36: ...r and Wiegand Network Diagnosis Click COMM on the main menu 5 1 Network Settings When the device needs to communicate with a PC over the Ethernet you need to configure network settings and ensure that...
Страница 37: ...esses for clients via server Display in Status Bar To set whether to display the network icon on the status bar 5 2 Serial Comm Menu Description Serial Port Including no using RS232 PC and RS485 PC se...
Страница 38: ...is 0 which can be changed The Comm Key may contain 1 to 6 digits Device ID The identity number of the device which ranges between 1 and 254 If the communication method is RS232 RS485 you need to inpu...
Страница 39: ...he searched network Click the password entry text box to enter the password and click Connect to Wi Fi OK The connection succeeds with status displayed on the icon bar Adding Wi Fi Network If the desi...
Страница 40: ...ECO CO LTD All rights reserved Enter the parameters of Wi Fi network The added network must exist After adding find the added Wi Fi network in list and connect to the network in the above way Advanced...
Страница 41: ...Gateway Gateway address of the Wi Fi network 5 5 Cloud Server Setting This represents the settings used for connecting the ADMS server Click Cloud Server Setting on the Comm Settings interface Menu D...
Страница 42: ...roxy you need to set the IP address and port number of the proxy server HTTPS Based on HTTP transmission encryption and identity authen tication ensure the security of the transmission process 5 6 Wie...
Страница 43: ...2nd to 9th bits is the site codes while the 10th to 25th bits are the card numbers Wiegand34 ECCCCCCCCCCCCCCCCCCCCCCCCCCCCCCCCO It consists of 34 bits of binary code The 1st bit is the even parity bit...
Страница 44: ...Wiegand50 ESSSSSSSSSSSSSSSSCCCCCCCCCCCCCCCCCCCCCCCCCCCCCCCCO It consists of 50 bits of binary code The 1st bit is the even parity bit of the 2nd to 25th bits while the 50th bit is the odd parity bit o...
Страница 45: ...idth us The pulse width represents the changes in the quantity of electric charge with high frequency capacitance regularly within a specified time Pulse Interval us The time interval between pulses I...
Страница 46: ...ECO CO LTD All rights reserved 6 System Settings The System Settings is used to set the related system parameters to optimize the performance of the device Click System on the main menu interface 6 1...
Страница 47: ...date should be displayed on the device Date Format Select the date display format Daylight Saving Time Click Daylight Saving Time to enable or disable the function If enabled click Daylight Saving Mo...
Страница 48: ...s may disable the function or set a valid value between 1 and 9999 Periodic Del of Access Logs When access logs reach its maximum capacity the device automatically deletes a set of old access logs Use...
Страница 49: ...r the misjudgement rate and the higher the rejection rate and vice versa It is recommended to set the default value of 47 1 N Match Threshold for Masked People Under 1 N verification mode the device w...
Страница 50: ...egistration and comparison If a face s rotation angle exceeds this set value it will be filtered by the algorithm i e ignored by the terminal thus no registration and comparison interface will be trig...
Страница 51: ...is fake photo and video The larger the value the better the anti spoofing performance of near infrared spectral imaging WDR Wide Dynamic Range WDR which balances light and extends image visibility fo...
Страница 52: ...reater than this value the verification succeeds Palm 1 N Matching Threshold Under 1 N Verification Method only when the similarity between the verifying palm and all registered palm is greater than t...
Страница 53: ...interface to configure the Device Type Setting settings Function Name Description Time Attendance Terminal Set the device as a time attendance terminal Access Control Terminal Set the device as an acc...
Страница 54: ...to Access It enables or disables the access of unregistered person When enabled the device allows the person to enter without registration Enable Capture of Unregistered Person To enable or disable ca...
Страница 55: ...isplay style of the main interface Click User Interface on the Personalize interface Menu Description Wallpaper To select the main screen wallpaper according to your personal preference Language To se...
Страница 56: ...ed or you may set the interval between 3 and 999 seconds Idle Time To Sleep m If you have activated the sleep mode when there is no operation the device will enter the standby mode You can disable thi...
Страница 57: ...bell Repeat Set the repetition cycle of the bell Ring Tone Select a ring tone Internal bell delay s Set the duration of the internal bell Valid values range from 1 to 999 seconds 2 Back to the Bell Sc...
Страница 58: ...terface Function Name Description Delete Access Records To delete attendance data access records conditionally Delete Attendance Photo To delete attendance photos of designated personnel Delete Blockl...
Страница 59: ...ers in the device Delete Screen Savers To delete the screen savers in the device The user may select Delete All or Delete by Time Range when deleting the access records attendance photos or block list...
Страница 60: ...cess the registered user must meet the following conditions 1 The current door unlock time should be within any valid time zone of the user time period 2 The user s group must be in the door unlock co...
Страница 61: ...time that the device controls the electric lock to be in unlock state Valid value 1 to 10 seconds 0 seconds represents disabling the function Door Sensor Delay s If the door is not locked and is left...
Страница 62: ...85 The verification mode is used when the device is used either as a host or slave The supported verification mode includes Card only and Card Password Speaker Alarm It transmits a sound alarm or disa...
Страница 63: ...Click the grey box to search the required Time Zone and specify the required Time Zone number maximum up to 50 zones On the selected Time Zone number interface click on the required day that is Monda...
Страница 64: ...s after the Start Time such that Start Time is 00 00 and End Time is 23 59 4 The default Time Zone 1 indicates that the door is open all day long 9 3 Holiday Settings Whenever there is a holiday you m...
Страница 65: ...o confirm the deletion After deletion this holiday is no longer displayed on All Holidays interface 9 4 Combined Verification Settings Access groups are arranged into different door unlocking combinat...
Страница 66: ...tion 2 is set as 02 02 04 04 07 indicating that the unlocking combination 2 consists of 5 people the first two are from AC group 2 the next two are from AC group 4 and the last person is from AC group...
Страница 67: ...heck out record must occur alternatively to open the door to represent a consistent pattern This function requires two devices to work together One device is installed on the indoor side of the door m...
Страница 68: ...ord is a check out or the user can check out only if the last record is a check in otherwise the alarm is triggered 9 6 Duress Options Settings If a user activated the duress verification function wit...
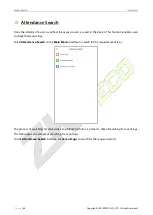
Страница 69: ...function enables users to check their event logs Select Attendance Search on the Main Menu interface to search for the required event logs The process of searching for attendance and blocklist photos...
Страница 70: ...searched and click OK If you want to search for records of all users click OK without entering any user ID 2 Select the time range in which the records you want to search for 3 The record search succe...
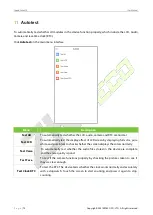
Страница 71: ...automatically test the display effect of LCD screen by displaying full color pure white and pure black to check whether the screen displays the colors normally Test Voice To automatically test whether...
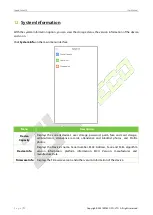
Страница 72: ...ce Menu Description Device Capacity Displays the current device s user storage password palm face and card storage administrators attendance records attendance and blocklist photos and Profile photos...
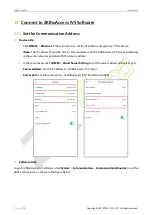
Страница 73: ...o communicate with the ZKBioAccess IVS server preferably in the same network segment with the server address 2 In the main menu click COMM Cloud Server Setting to set the server address and server por...
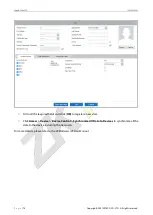
Страница 74: ...e Search Device to open the Search interface in the software 2 Click Search and it will prompt Searching 3 After searching the list and total number of access controllers will be displayed 4 Click Add...
Страница 75: ...served 2 Fill in all the required fields and click OK to register a new user 3 Click Access Device Device Control Synchronize All Data to Devices to synchronize all the data to the device including th...
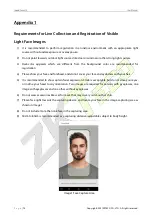
Страница 76: ...Please show your face and forehead and do not cover your face and eyebrows with your hair 5 It is recommended to show a plain facial expression Smile is acceptable but do not close your eyes or incli...
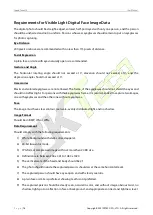
Страница 77: ...reflect light For persons with thick eyeglasses frame it is recommended to capture two images one with eyeglasses and the other one without eyeglasses Face The image must have clear contour real scal...
Страница 78: ...istration the feature template Fingerprint template Face template Palm template will be saved on the device according to the device type you have selected to verify the unique similarity between you a...
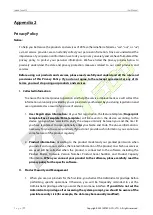
Страница 79: ...ator to our products are automatically encrypted using the AES 256 algorithm and stored securely If the Administrator downloads data from our products we assume that you need to process the data and y...
Страница 80: ...earn more about how we collect use and securely store your personal information To keep pace with the rapid development of technology adjustment of business operations and to cope with customer needs...
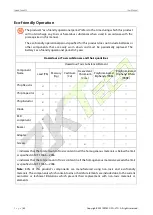
Страница 81: ...nt Name Hazardous Toxic Substance Element Lead Pb Mercury Hg Cadmium Cd Hexavalent Chromium Cr6 Polybrominated Biphenyls PBB Polybrominated Diphenyl Ethers PBDE Chip Resistor Chip Capacitor Chip Induc...
Страница 82: ...ZKTeco Industrial Park No 32 Industrial Road Tangxia Town Dongguan China Phone 86 769 82109991 Fax 86 755 89602394 www zkteco com Copyright 2021 ZKTECO CO LTD All Rights Reserved...