


Hardware installation
30
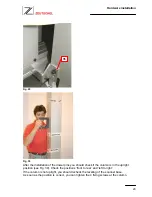
Fig. 48
Remove the hexagon screw [62] which is installed at the front side of the lamp holder [63]
and pull out the metal pin [64]. Put the lamp arm over the lamp holder and reinstall the
metal pin through lamp arm and lamp holder. Reinstall the hexagon screw at the front side
to secure the lamp arm.
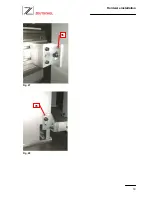
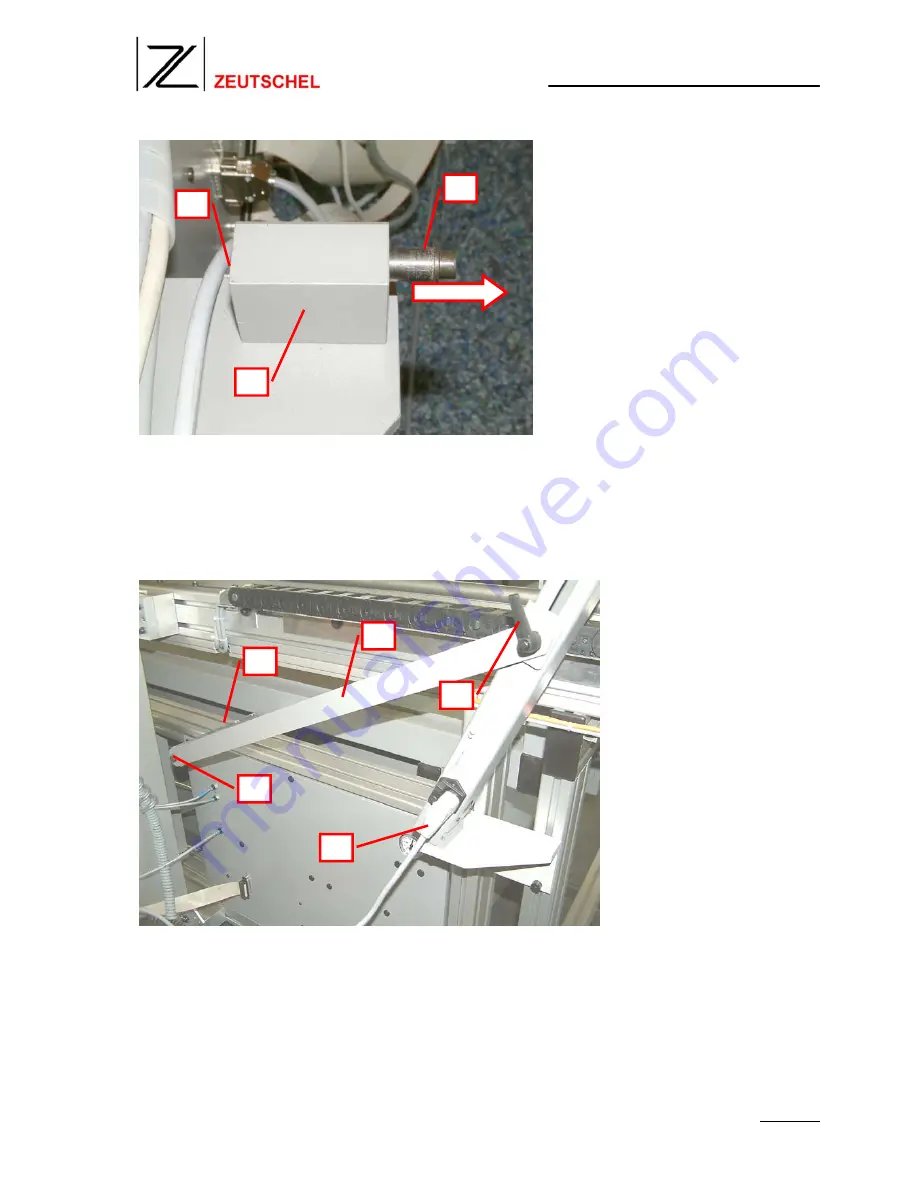
Fig. 49
To make the lamp arm stable and to adjust the angle of the lamp system, a strut [65]
keeps the lamp system in position. It has to be fixed at the fixing pins [66] on the back side
of the scanner base. Remove the locking screw [67], put it through the hole in the strut and
install it at the fixing pin like shown in Fig. 49.
The locking knob [68] on the other end of the strut should be tightened also. You will find
an adjustment table for the light system in your OK 300 user manual. Finally connect the
power cable [69] to the lamp system.
62
63
64
65
66
67
68
69
Содержание OS 11000 Hybrid Color
Страница 4: ...Preparations 4 Fig 2 Fig 3 Fig 4 3 4 5 6 8 7 9 10 11...
Страница 7: ...Hardware installation 7 Fig 7 Fig 8 14 15...
Страница 8: ...Hardware installation 8 Fig 9 Fig 10 16...
Страница 10: ...Hardware installation 10 Fig 12 Fig 13 19 20 21 45mm...
Страница 12: ...Hardware installation 12 After the installation the brackets should look like this Fig 16 Fig 17...
Страница 15: ...Hardware installation 15 Fig 20 Fig 21 29 29 30 29 29...
Страница 19: ...Hardware installation 19 Fig 27 Fig 28 35 35...
Страница 51: ...Software installation 51 Fig 84 4 Click on Finish to complete the installation Fig 85...
Страница 54: ...Software installation 54 6 Execute the file Setup exe Fig 91 7 Click on Next Fig 92 8 Click on Yes Fig 93...


