background image


ePhoto Z300 


Installation 


Usage & Maintenance 

Содержание ePhoto Z300

Страница 1: ...ePhoto Z300 Installation Usage Maintenance ...

Страница 2: ...nts may be prohibited by law and or subject to criminal prosecution We recommend you to be responsible and respectful of the copyrights laws when you are scanning books magazines journals and other materials Environmental Information Recycle or disposal at end of life information please ask local distributors or suppliers for recycle and disposal information The product is designed and produced to...

Страница 3: ...ac OS X Installation 9 CHAPTER II OPERATING THE SCANNER 11 STEP 1 TURN ON YOUR SCANNER 11 STEP 2 LAUNCH PLUSTEK EPHOTO 11 STEP 3 SCAN 12 CHAPTER III CARE AND MAINTENANCE 13 CLEANING THE SCANNER 13 Cleaning Materials 13 Cleaning the Scanner 13 CALIBRATING THE SCANNER 15 USAGE MAINTENANCE TIPS 16 APPENDIX A SPECIFICATIONS 17 APPENDIX B CUSTOMER SERVICE AND WARRANTY 18 SERVICE SUPPORT INFORMATION FOR...

Страница 4: ...tion of this manual describes the box contents and minimum computer requirements to use this scanner Before you start installing your scanner check the box contents to make sure all parts are included If any items are damaged or missing please contact the vendor where you purchased your scanner or our customer service directly Chapter I Installing the Scanner describes how to install scanner s sof...

Страница 5: ...ner Use of other power adapter and cables may lead to malfunction 3 Keep the space around the AC adapter clear in case you need to quickly unplug the AC adapter during emergencies 4 Damaged wire could cause fire or electrical shock Keep the power cord straight and without being twisted bended or scraped 5 Unplug this device if you don t need to use for a certain period of time such as during night...

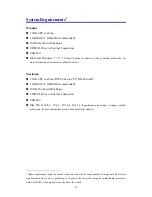
Страница 6: ...d CPU NO PowerPC 2 GB RAM 4 GB RAM recommended 10 GB Free Hard Disk Space CD DVD Drive or Internet Connection USB Port Mac OS X 10 8 x 10 9 x 10 10 x 10 11 x Specifications are subject to change without notification for more information please check our official website 1 Higher requirements might be needed when you scan or edit a large quantity of image data The system requirements here are only ...

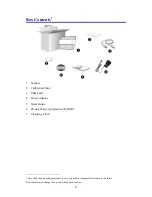
Страница 7: ... USB Cable 4 Power Adapter 5 Quick Guide 6 Plustek Setup Application CD ROM 7 Cleansing Cloth 2 Save the box and packing materials in case you need to transport this scanner in the future Box contents may change at any time without prior notice 4 ...

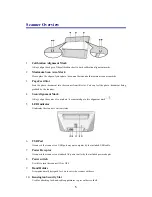
Страница 8: ...n Alignment Mark Always align the center of your photo document edge to this alignment mark 5 LED Indicator It indicates the scanner s current status 6 USB Port It connects the scanner to a USB port on your computer by the included USB cable 7 Power Receptor It connects the scanner to a standard AC power outlet by the included power adapter 8 Power switch Use this to turn the scanner ON or OFF 9 H...

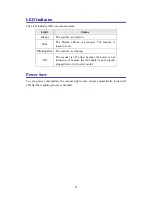
Страница 9: ... scanner is ready to scan Blinking Blue The scanner is scanning Off The scanner is off either because the power is not turned on or because the AC adapter is not properly plugged into an AC power outlet Power Save To save power consumption the scanner light source always automatically turns itself off after the scanning process is finished 6 ...

Страница 10: ...please verify that you have all of the proper components A list of the package contents is provided in the Box Contents section of this guide Installing and Setting up the Scanner Please follow the step by step procedures described below to install the USB scanner 7 ...

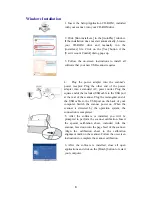
Страница 11: ...outlet Plug the square end of the included USB cable to the USB port at the rear of the scanner Plug the rectangular end of the USB cable to the USB port on the back of your computer Switch the scanner power on When the scanner is detected by the operation system the connection is completed 5 After the software is installed you will be prompted to perform the scanner calibration Insert the special...

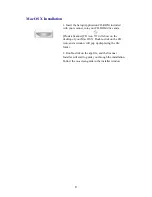
Страница 12: ... and a Plustek Scanner CD icon will show on the desktop of your Mac OS X Double click on the CD icon and a window will pop up displaying the file folder 2 Double click on the app file and the Scanner Installer will start to guide you through the installation Follow the on screen guide in the installer window 9 ...

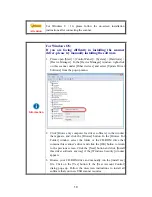
Страница 13: ...from the pop up menu 2 Click Browse my computer for driver software in the window that appears and click the Browse button In the Browse For Folder window select the folder or the CD ROM drive that contains this scanner s driver and click the OK button to return to the previous screen Click the Next button and click Install this driver software anyway if the Windows Security window appears 3 Brows...

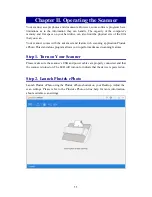
Страница 14: ...rich scanning application Plustek ePhoto This stand alone program allows you to perform advanced scanning features Step 1 Turn on Your Scanner Please make sure the scanner s USB and power cables are properly connected and that the scanner is turned on The LED will turn on to indicate that the device is powered on Step 2 Launch Plustek ePhoto Launch Plustek ePhoto using the Plustek ePhoto shortcut ...

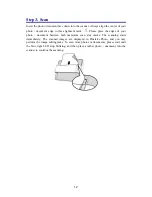
Страница 15: ...edges of your photo document between both maximum scan area marks The scanning starts immediately The scanned images are displayed in Plustek ePhoto and you may perform the image editing tasks To scan more photos or documents please wait until the blue light LED stop blinking and then place another photo document into the scanner to continue the scanning 12 ...

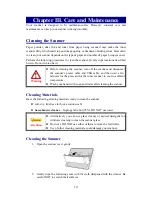
Страница 16: ...sconnect the scanner s power cable and USB cable and then wait a few minutes for the glass and or the inner scanner to cool to ambient temperature Wash your hands with soap and water after cleaning the scanner Cleaning Materials Have the following cleaning materials ready to clean the scanner soft dry lint free cloth or a cotton swab non abrasive cleaner Isopropyl alcohol 95 DO NOT use water Atten...

Страница 17: ...until its entire surface is cleaned Clean Scanner Glass Attention Do not spray cleaner directly onto the scanner glass Excess liquid residue may fog or damage the scanner 3 Wait for cleaned areas to dry completely 4 Close the cover by pushing it back down until it snaps back into place 14 ...

Страница 18: ...nstead however the calibration effect may be less good than the special calibration sheet 2 Click Start All Programs Your scanner model name Calibration Wizard For Windows 8 1 users Point your mouse cursor to the upper or lower right corner of your screen to open the Charm bar Click on the Start charm then click on the downwards arrow button in the lower left corner of the screen The Apps screen w...

Страница 19: ...in use keep the scanner covered Dust particles and other foreign objects may damage the unit Do not attempt to disassemble the scanner There is danger of an electrical shock and opening your scanner will void your warranty Do not subject the scanner to excessive vibration It may damage the internal components Your scanner operates best in temperatures between 10 C to 40 C 50 F to 104 F 16 ...

Страница 20: ...ed 4 x 6 Photo Approx 2 sec Document A4 Approx 5 sec Scanning Area W x L Min 1 x 1 Max 8 5 x 11 7 Acceptable Paper Weight Thickness Non embossed 0 76 mm or less Daily Duty Scan Sheets 500 Power Supply 24 Vdc 0 75 A Interface USB 2 0 Net Weight 1 48 Kg 3 26 Lbs Dimensions W x D x H 289 9 mm x 160 6 mm x 158mm 11 4 x 6 3 x 6 2 3 Hardware specifications may change at any time without prior notice 17 ...

Страница 21: ... package s version or release number and manufacturer of the software Other USB devices installed Service Support Information For EU country only Where appropriate the period of availability of spare parts and the possibilities of upgrading products information Please ask local distributors and suppliers for spare parts information and product upgrade information Information requested by relevant ...

Страница 22: ...service you must remove all programmes data and removable storage media Products returned without guides and software will be replaced without guides and software This Limited Warranty service does not provide for carry in exchange when the problem results from accident disaster vandalism misuse abuse unsuitable environment programme modification another machine or non vendor modification for this...

Страница 23: ...stallation This equipment generates uses and can radiate radio frequency energy and if not installed and used in accordance with the instructions may cause harmful interference to radio communications However there is no guarantee that interference will not occur in a particular television reception which can be determined by turning the equipment off and on the user is encouraged to try to correc...

Отзывы: