


Windows Installation
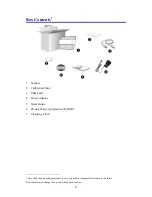
1. Insert the Setup/Application CD-ROM, included
with your scanner, into your CD-ROM drive.
2. Click [Run install.exe] in the [AutoPlay] window.
If the
installation does not start automatically, browse
your CD-ROM drive and manually run the
[install.exe] file. Click on the [Yes] button if the
[User Account Control] dialog pops up.
3. Follow the on-screen instructions to install all
software that your new USB scanner requires.
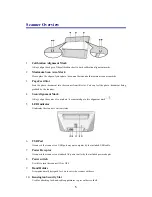
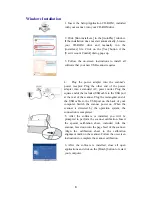
4.
Plug the power adapter into the scanner’s
power receptor. Plug the other end of the power
adapter into a standard AC power outlet. Plug the
square end of the included USB cable to the USB port
at the rear of the scanner. Plug the rectangular end of
the USB cable to the USB port on the back of your
computer. Switch the scanner power on. When the
scanner is detected by the operation system, the
connection is completed.
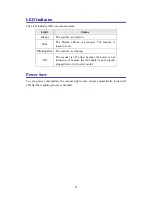
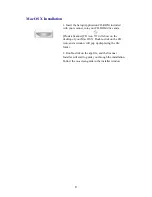
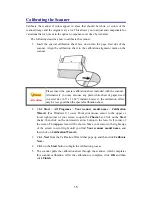
5. After the software is installed, you will be
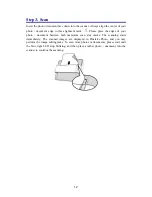
prompted to perform the scanner calibration. Insert
the special calibration sheet, included with the
scanner, face down into the page feed of the scanner.
Align the calibration sheet to the calibration
alignment mark on the scanner.
Follow the on-screen
instructions to complete the scanner calibration.
6. After the software is installed, close all open
applications and click on the [Finish] button to restart
your computer.
8