


Hardware installation
14
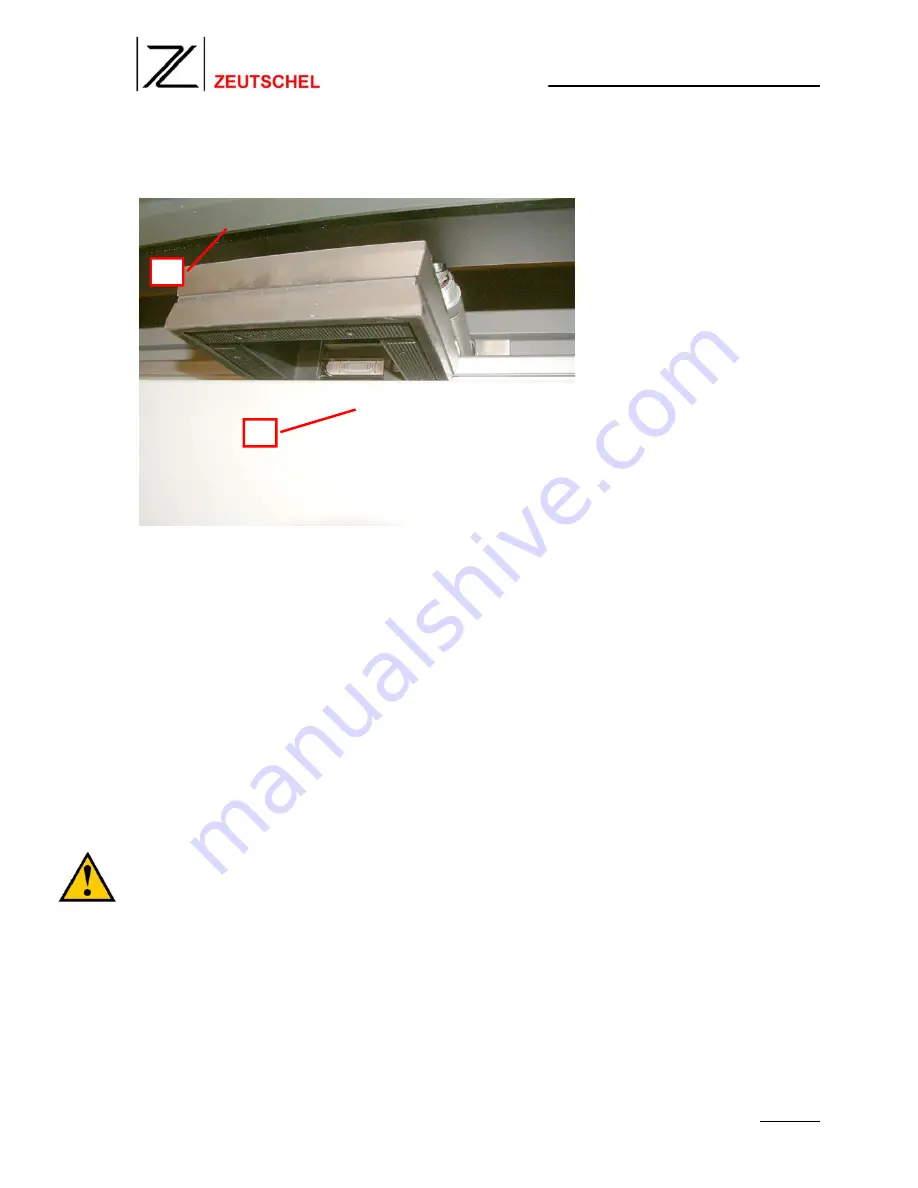
In the next step you should put the spirit level on the aluminum frame at the gap between
glass plate [27] and scanner unit [28].
Fig. 19
Now you can adjust the level from front to back by turning the adjustment screws at the
scanner base up- or downwards (see also Fig. 13).
When this is done, go back to the first position and check again the level left to right.
Repeat this two adjustment steps until both levels are even. Then the scanner base is
leveled.
Make sure that none of the scanner base struts will hang freely in the air! This can happen
if you turn one adjustment screw too much up- or downwards or the floor is very uneven.
Take now the black spacers [29] for adjustment of the book cradle and put them on top of
the glass plate. The spacers have a thickness of 3mm and will help you to adjust the
correct space between bottom of the scanner unit and top of the glass plate.
Put the spacers first at the left edge [30] of the glass plate, one in front and one in rear.
Then move the scanner unit slowly from the ‘home’ position towards the glass plate.
It might be that the scanner unit hits the top of the glass plate when doing this. In
this case the level of the book cradle has to be lowered by turning the adjustment
screws on the support of the book cradle (see Fig. 22).
Move the scanner unit forward until it is in a position like shown in
Fig. 20
. Turn the
adjustment screws on the support of the book cradle (
Fig. 22
[31]) downwards (while
checking the gap between glass and scanner with the spacer.
You should be able to move the spacer without using much power. If the spacer is
clamped, lower the book cradle a little bit.
Do this adjustment for the front and rear side of the scanner unit separately. Then move
the scanner and the spacers to the right edge of the glass plate (like shown in
Fig. 21
and
repeat the adjustment. When finished, turn back to the left edge and check again the
levels.
27
28
Содержание OS 11000 Hybrid Color
Страница 4: ...Preparations 4 Fig 2 Fig 3 Fig 4 3 4 5 6 8 7 9 10 11...
Страница 7: ...Hardware installation 7 Fig 7 Fig 8 14 15...
Страница 8: ...Hardware installation 8 Fig 9 Fig 10 16...
Страница 10: ...Hardware installation 10 Fig 12 Fig 13 19 20 21 45mm...
Страница 12: ...Hardware installation 12 After the installation the brackets should look like this Fig 16 Fig 17...
Страница 15: ...Hardware installation 15 Fig 20 Fig 21 29 29 30 29 29...
Страница 19: ...Hardware installation 19 Fig 27 Fig 28 35 35...
Страница 51: ...Software installation 51 Fig 84 4 Click on Finish to complete the installation Fig 85...
Страница 54: ...Software installation 54 6 Execute the file Setup exe Fig 91 7 Click on Next Fig 92 8 Click on Yes Fig 93...


