SIMPLICITY PLUS INSTALLATION MANUAL
Approved Document No: GLT.MAN-107
PAGE 26
Issue 3.16 Author: NRPJ Date: 21/09/2017
12.7 CHANGING A ZONE BOUNDARY
The Simplicity’s default zone allocation may not be suitable for every installation. The Zone boundaries can now be altered
as follows:-
1. Enter Configuration Menu 2 & select System Menu (option 6)
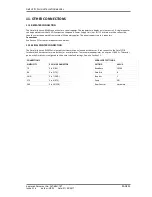
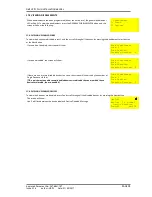
2. Select Option 2 (Zones). The screen will show the Zone boundaries selection screen. The
screen shows the currently selected zone, and the range of addresses within that zone e.g. Zone
1 consists of addresses 1 to 16.
System Menu
1: Clock 4: Timing
2: Zones 5: Misc
3: Alarms 6: Reset
3. Use Previous & Next buttons to select the zone to change, then press ENTER.
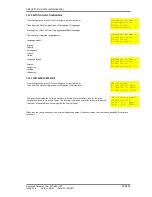
4. The Screen now prompts for the new last address of that zone to be entered. (On a 2 Loop
simplicity, the panel will prompt for the loop number to be entered first).
Zone Boundaries
Zone 1
001 – 016
ENTER to Change
5. Type in the address & press ENTER to save, or press CANCEL to keep the existing Address.
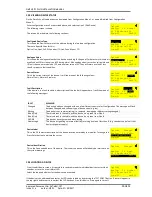
6. The Zone will now change to the selected boundary, with the first device of the next zone
changing accordingly, e.g. just changing zone 1 last device to 10 would result in zone 1 being
addresses 1 to 10, Zone 2 being 11 to 32, zone 3 being the default 33 to 48 etc.
Enter Last Device
Zone 1
010
Press ENTER to Save
NOTE: If the building plans have not been finalised, it would be wise to leave a few spare
addresses at the end of each zone, just in case extra devices need to be added.
The Simplicity Plus COULD use all addresses in a single zone, but it is good practice to limit a
zone to 32 or less detectors (to avoid an unacceptably large zone search area). The minimum
number of addresses per zone is 2.
Zone Boundaries
Zone 1
001 – 010
ENTER to Change
All 8 zones do not need to be use, i.e. the 126 device version could be configured as 6 zones of
21 devices, leaving zones 7 & 8 void.
NOTE: Zones 1 to 7 must have a minimum of 2 addresses per zone.
Zone Boundaries
Zone 2
011 – 032
ENTER to Change
12.8 CHANGING THE ALARM RESPONSE – SOUNDERS
By Default, the Simplicity uses a common alarm configuration, i.e. any alarm sets off all
sounders. This default operation may not be suitable for every installation. As alarms from
Manual Call points often need to be treated differently, the operation of detectors & call points
can be configured separately. Enter the Configuration Menu 2 & select System Menu (option 6)
and select option 3 (Alarms).
System Menu
1: Clock 4: Timing
2: Zones 5: Misc
3: Alarms 6: Reset
Alarm Operation
1: Det 4: Bases
2: MCP 5: I/O
3: Sounder 6: Relay
12.8.1 CHANGING DETECTOR ALARM RESPONSE
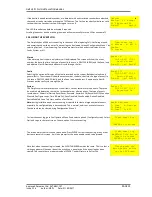
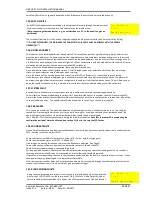
To change the alarm response of detectors, select option 1. The following screen is Shown. Use
Prev/Next buttons to scroll between the options Common and Zonal. Press enter to confirm.
Sounder Operation
Detector Alarm
Common
ENTER to Confirm
12.8.2 CHANGING MCP ALARM RESPONSE
To change the alarm response of manual call points, select option 2. The following screen is
shown. Use Prev/Next buttons to scroll between the options Common and Zonal. Press enter to
confirm.
Sounder Operation
Manual Call Point
Common
ENTER to Confirm
12.8.3 ZONAL SOUNDER TO COMMON SOUNDER DELAY
If Zonal sounder operation is selected, in the event of an alarm, the sounders will only ring in a
certain part of the building (the zone that signalled the alarm). Sometimes there is a
requirement to start all the other sounders if the alarm continues for a given time. On the
Alarm Operation
1: Det 4: Bases
2: MCP 5: I/O
3: Sounder 6: Relay


