background image

32

7.4  LAPSE MODE


 To  use 

LAPSE MODE 

(also know as time lapse mode which takes a 

sequence of photos in a selected interval of time), follow the steps 
under 

“7.0 PICTURE & VIDEO SETTINGS” ON PAGE 25

. Press 

LAPSE

 to activate this mode.


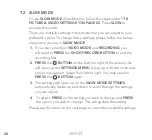
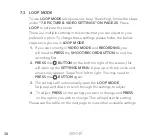
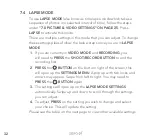
 There are multiple settings in this mode that you can adjust. To change 
these settings please follow the below steps once you are in 

LAPSE 

MODE

1. 

 If you are currently in 

VIDEO MODE

 and 

RECORDING

, you 

will need to 

PRESS

 the 

SHOOT/RECORD BUTTON

 to end the 

recording first.

2. 


PRESS

 the 


BUTTON 

on the bottom right of the screen, this 

will open up the 

SETTINGS MENU

. A pop up with two locks and 

arrows may appear. Swipe from left to right. You may need to 

PRESS

 the 


BUTTON 

again.

3. 

 The settings will open up on the 

LAPSE MODE SETTINGS 

automatically. Swipe up and down to scroll through the settings 
you can adjust.

4. 

 To  adjust, 

PRESS

 on the setting you wish to change and select 

your choice. This will update the setting.


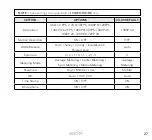
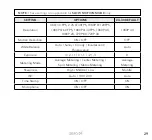
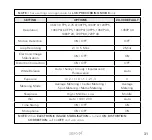
  Please see the table on the next page to view other available settings.

Содержание ZX-30

Страница 1: ...4K UHD Action Camera with Touch Screen WiFi USER MANUAL ZX 30...

Страница 2: ......

Страница 3: ...RY 9 5 2 MICRO SD CARD COMPATIBILITY 10 5 3 TOUCH SCREEN COMPONENTS 10 5 4 POWERING ON YOUR ZX 30 10 5 5 FORMAT YOUR MICRO SD CARD 11 6 0 ZX 30 CONTROLS AND FUNCTIONS 12 6 1 POWER ON OFF BUTTON 12 6 2...

Страница 4: ...TATE IMAGE 20 6 12 DVR MODE 21 6 13 SCREEN SAVER 22 6 14 LED INDICATOR 23 6 15 KEYPAD TONE 24 7 0 PICTURE VIDEO SETTINGS 25 7 1 VIDEO MODE 26 7 2 SLOW MODE 28 7 3 LOOP MODE 30 7 4 LAPSE MODE 32 7 5 PH...

Страница 5: ...D USING THE ZX ACTION APP 45 11 0 MANUAL STEPS FOR CONNECTING TO THE ZX ACTION APP 45 11 1 ZX ACTION APP 46 11 2 SAVING PHOTOS VIDEOS VIA THE APP 48 11 3 REMOTE PHOTO RECORD VIA THE APP 49 11 4 ADJUST...

Страница 6: ...reen Waterproof Case 2 0 ABOUT THE ZX 30 The Zero X ZX 30 shoots footage with dynamic realism where action is effortlessly captured into moments you can keep The ZX 30 comes with a range of included a...

Страница 7: ...3M Adhesive Mounts 3 x 3 Way Mounts 1 x Frame Mount 4 x Straps 1 x Adaptor Mount 1 x Metal Tether 1 x Lens Cleaning Cloth 2 x 3M Adhesive Pads 1 x Tripod Adaptor 1 x Battery 1 Shoot Record Button 2 LE...

Страница 8: ...use in water Do not attempt to open the ZX 30 or modify it in any way If the ZX 30 has been tampered with the warranty will be void Maintenance and repairs should only be performed by Zero X If you h...

Страница 9: ...Check your local recycling facility for more information Only use a certified 5V 1A USB charger to charge the ZX 30 Using non certified chargers could potentially damage the ZX 30 or the ZX 30 batter...

Страница 10: ...your ZX 30 It should easily slide in Do not force the card into the slot as it may damage the unit and the card 5 3 TOUCH SCREEN COMPONENTS 5 4 POWERING ON YOUR ZX 30 To power ON your ZX 30 follow the...

Страница 11: ...turn ON the ZX 30 4 PRESS the BUTTON on the bottom right of the screen this will open up the SETTINGS MENU A pop up with two locks and arrows may appear Swipe from left to right You may need to PRESS...

Страница 12: ...is button is used to shoot images and also record videos start and stop videos The SHOOT RECORD BUTTON is also used to access the navigation settings menus select menu items and confirm your selection...

Страница 13: ...t side of the screen The current section tab will be highlighted blue 4 Scroll down the list by swiping from bottom to top until you reach TIME SETTING PRESS on this option The time settings screen wi...

Страница 14: ...o end the recording first 2 PRESS the BUTTON on the bottom right of the screen this will open up the SETTINGS MENU A pop up with two locks and arrows may appear Swipe from left to right You may need t...

Страница 15: ...ppear Swipe from left to right You may need to PRESS the BUTTON again 3 PRESS the tab on the left side of the screen The current section tab will be highlighted blue 4 Scroll down the list by swiping...

Страница 16: ...recording first 2 PRESS the BUTTON on the bottom right of the screen this will open up the SETTINGS MENU A pop up with two locks and arrows may appear Swipe from left to right You may need to PRESS t...

Страница 17: ...wipe from left to right You may need to PRESS the BUTTON again 3 PRESS the tab on the left side of the screen The current section tab will be highlighted blue 4 Scroll down the list by swiping from bo...

Страница 18: ...right of the screen this will open up the SETTINGS MENU A pop up with two locks and arrows may appear Swipe from left to right You may need to PRESS the BUTTON again 3 PRESS the tab on the left side o...

Страница 19: ...this will open up the SETTINGS MENU A pop up with two locks and arrows may appear Swipe from left to right You may need to PRESS the BUTTON again 3 PRESS the tab on the left side of the screen The cur...

Страница 20: ...2 PRESS the BUTTON on the bottom right of the screen this will open up the SETTINGS MENU A pop up with two locks and arrows may appear Swipe from left to right You may need to PRESS the BUTTON again 3...

Страница 21: ...the SHOOT RECORD BUTTON to end the recording first 2 PRESS the BUTTON on the bottom right of the screen this will open up the SETTINGS MENU A pop up with two locks and arrows may appear Swipe from le...

Страница 22: ...to PRESS the SHOOT RECORD BUTTON to end the recording first 2 PRESS the button on the bottom right of the screen this will open up the SETTINGS MENU A pop up with two locks and arrows may appear Swipe...

Страница 23: ...nge this setting follow the below steps 1 If you are currently in VIDEO MODE and RECORDING you will need to PRESS the SHOOT RECORD BUTTON to end the recording first 2 PRESS the BUTTON on the bottom ri...

Страница 24: ...N on the bottom right of the screen this will open up the SETTINGS MENU A pop up with two locks and arrows may appear Swipe left to right You may need to PRESS the BUTTON again 3 PRESS the tab on the...

Страница 25: ...he screen PRESS the MODE SELECTION drop down See 5 3 TOUCH SCREEN COMPONENTS ON PAGE 10 This will open up the screen image to the right where you can select a MODE from this panel VIDEO SLOW LOOP LAPS...

Страница 26: ...the SHOOT RECORD BUTTON to end the recording first 2 PRESS the BUTTON on the bottom right of the screen this will open up the SETTINGS MENU A pop up with two locks and arrows may appear Swipe from le...

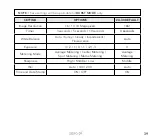
Страница 27: ...0FPS 1080P 4X 1080P 2X 720P 8X 720P 4X 1080P 4X Motion Detection ON OFF OFF White Balance Auto Sunny Cloudy Incadescent Fluorescence Auto Exposure 3 2 1 0 1 2 3 0 Metering Mode Average Metering Center...

Страница 28: ...ESS the SHOOT RECORD BUTTON to end the recording first 2 PRESS the BUTTON on the bottom right of the screen this will open up the SETTINGS MENU A pop up with two locks and arrows may appear Swipe from...

Страница 29: ...P 30FPS 1080P 4X 1080P 2X 720P 8X 720P 4X 1080P 4X Motion Detection ON OFF OFF White Balance Auto Sunny Cloudy Incadescent Fluorescence Auto Exposure 3 2 1 0 1 2 3 0 Metering Mode Average Metering Cen...

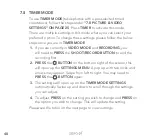
Страница 30: ...u will need to PRESS the SHOOT RECORD BUTTON to end the recording first 2 PRESS the BUTTON on the bottom right of the screen this will open up the SETTINGS MENU A pop up with two locks and arrows may...

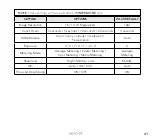
Страница 31: ...2 Mins Electronic Image Stabilisation ON OFF ON Distortion Correction ON OFF OFF White Balance Auto Sunny Cloudy Incadescent Fluorescence Auto Exposure 3 2 1 0 1 2 3 0 Metering Mode Average Metering...

Страница 32: ...MODE and RECORDING you will need to PRESS the SHOOT RECORD BUTTON to end the recording first 2 PRESS the BUTTON on the bottom right of the screen this will open up the SETTINGS MENU A pop up with two...

Страница 33: ...onds 10 seconds 30 seconds 60 seconds 0 5 seconds White Balance Auto Sunny Cloudy Incandescent Fluorescence Auto Exposure 3 2 1 0 1 2 3 0 Video Length Unlimited 6 seconds 8 seconds 10 seconds 20 secon...

Страница 34: ...the SHOOT RECORD BUTTON to end the recording first 2 PRESS the BUTTON on the bottom right of the screen this will open up the SETTINGS MENU A pop up with two locks and arrows may appear Swipe from lef...

Страница 35: ...gapixels 16M White Balance Auto Sunny Cloudy Incandescent Fluorescence Auto Exposure 3 2 1 0 1 2 3 0 Metering Mode Average Metering Center Metering Spot Metering Matrix Metering Average Metering Sharp...

Страница 36: ...RECORDING you will need to PRESS the SHOOT RECORD BUTTON to end the recording first 2 PRESS the BUTTON on the bottom right of the screen this will open up the SETTINGS MENU A pop up with two locks an...

Страница 37: ...terval 3 seconds 10 seconds 15 seconds 20 seconds 30 seconds 3 seconds White Balance Auto Sunny Cloudy Incandescent Fluorescence Auto Exposure 3 2 1 0 1 2 3 0 Metering Mode Average Metering Center Met...

Страница 38: ...will need to PRESS the SHOOT RECORD BUTTON to end the recording first 2 PRESS the BUTTON on the bottom right of the screen this will open up the SETTINGS MENU A pop up with two locks and arrows may a...

Страница 39: ...xels 16M Timer 3 seconds 5 seconds 10 seconds 3 seconds White Balance Auto Sunny Cloudy Incandescent Fluorescence Auto Exposure 3 2 1 0 1 2 3 0 Metering Mode Average Metering Center Metering Spot Mete...

Страница 40: ...RDING you will need to PRESS the SHOOT RECORD BUTTON to end the recording first 2 PRESS the BUTTON on the bottom right of the screen this will open up the SETTINGS MENU A pop up with two locks and arr...

Страница 41: ...M Count Down 3 seconds 5 seconds 10 seconds 20 seconds 3 seconds White Balance Auto Sunny Cloudy Incadescent Fluorescence Auto Exposure 3 2 1 0 1 2 3 0 Metering Mode Average Metering Center Metering S...

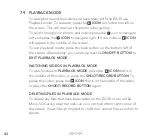
Страница 42: ...ton on the bottom left of the screen Alternatively you can also press the ON OFF BUTTON to EXIT PLAYBACK MODE WATCHING VIDEOS IN PLAYBACK MODE To watch videos in PLAYBACK MODE press the ICON that is i...

Страница 43: ...creen this will open up the SETTINGS MENU A pop up with two locks and arrows may appear Swipe from left to right You may need to PRESS the BUTTON again 3 PRESS the tab on the left side of the screen T...

Страница 44: ...de of the screen The current section tab will be highlighted blue 3 Scroll down the list by swiping from bottom to top until you reach DEVICE INFO Press on this option 4 To exit press the ON OFF BUTTO...

Страница 45: ...e or Android 5 0 to run When using the App please note Android users will be taken to a home screen before entering the shoot screen iPhone users will be taken straight to the shoot screen once they h...

Страница 46: ...using an iPhone go to the Apple store 2 Search for the App ZX ACTION Once you have found this App download and install it Alternatively you can scan the above QR code to take you directly to the App C...

Страница 47: ...and refresh the search To see how to turn on the WiFi for the ZX 30 6 8 WIFI ON PAGE 17 Do not connect to any other WiFi when you are connecting the ZX 30 to its App 3 The App will prompt you to conne...

Страница 48: ...e in it this is on the left of the mode icon within the App 3 Once you are in the gallery you will see tabs on the top bar of the App One will be highlighted If ZX 30 is not highlighted PRESS this tab...

Страница 49: ...The App will open with the Remote Shooting screen 3 You can choose between video camera and slow motion by clicking on the matching icons The large video or photo icon on the screen Each icon will ha...

Страница 50: ...ell as the software settings for the ZX 30 Follow the below steps 1 PRESS the ICON on the top right of the App screen to edit the PHOTO MODE settings OR 1 PRESS the ICON on the top right of the App sc...

Страница 51: ...the period stated on the packaging This warranty is only valid where you have used the product in accordance with any recommendations or instructions provided by Directed Electronics This warranty exc...

Страница 52: ...Zero X warrants to you and only to you that this Zero X Action Camera will be free from defects in materials and workmanship for one 1 year from the date of your purchase unless a longer warranty per...

Страница 53: ...m for loss damage or injury Zero X equipment and services do not cause and cannot eliminate occurrences of certain events including and Zero X makes no guarantee or warranty including any implied warr...

Страница 54: ...warranty and warranty disclaimer give you specific legal rights and you may have other rights that vary by state province or country Other than as permitted by law Zero X does not exclude limit or su...

Страница 55: ...iability for negligence is limited to direct losses usually and typically foreseeable in such case Should the claim for damages be based on wilful or grossly negligent breach of contractual duty or ob...

Страница 56: ...56 13 0 NOTES...

Страница 57: ...57...

Страница 58: ...58...

Страница 59: ......

Страница 60: ...zero x com au www zero x co nz Zero X v1 0 2021 All Images Information and Content are Copyright 2021 Directed Electronics Australia Pty Ltd All Rights Reserved Capture the action ANOTHER DIRECTED BR...

Отзывы: