background image

36

Directed Electronics will repair, replace or refurbish the product at its 
discretion. The retailer will contact you when the product is ready for 
collection. All costs involved in claiming this warranty, including the cost 
of the retailer sending the product to Directed Electronics, will be borne 
by you.
Email: [email protected] 

INDEMNITY

You agree to defend, indemnify and hold harmless Zero-X and 
its subsidiaries and affiliates from and against any and all claims, 
proceedings, injuries, liabilities, losses, costs and expenses (including 
reasonable legal fees), including but not limited to, claims alleging 
negligence, invasion of privacy, copyright infringement and/or trademark 
infringement against Zero-X and its subsidiaries and affiliates, relating to 
or arising out of your breach of any provision of these terms, your misuse 
of Zero-X or its services, or your unauthorized modification or alteration of 
products or software.

WARRANTY AND WARRANTY DISCLAIMER

Zero-X has a limited warranty, whereby Zero-X  warrants to you and only 
to you that this Zero-X gimbal will be free from defects in materials and 
workmanship for one (1) year from the date of your purchase (unless a 
longer warranty period is required by law). The specifics of this Zero-X 
limited warranty are covered in this manual. 

Содержание ZX-20

Страница 1: ...USER MANUAL ZX 20...

Страница 2: ......

Страница 3: ...5 1 BATTERY CHARGING 8 5 2 MICRO SD CARD COMPATIBILITY 9 5 3 POWERING YOUR ZX 20 9 5 4 FORMAT YOUR SD CARD 9 6 0 ZX 20 CONTROLS AND FUNCTIONS 11 6 1 POWER ON OFF BUTTON 11 6 2 SHOOT RECORD BUTTON 11 6...

Страница 4: ...9 7 1 PHOTO MODE 19 7 2 IMAGE RESOLUTION 20 7 3 TIMER MODE 20 7 4 CONTINUOUS PICTURE MODE 21 7 5 BURST MODE 22 8 0 VIDEO SETTINGS 23 8 1 VIDEO MODE 23 8 2 VIDEO RESOLUTION 23 8 3 LOOP RECORDING 24 8 4...

Страница 5: ...SING THE ZX 20 APP 30 12 0 MANUAL STEPS FOR CONNECTING TO THE ZX 20 APP 30 12 1 ZX 20 APP 31 12 2 SAVING PHOTOS AND VIDEOS VIA THE APP 32 12 3 REMOTE PHOTO RECORD VIA THE APP 33 12 4 ADJUSTING SETTING...

Страница 6: ...erproof Case 2 0 ABOUT THE ZX 20 The ZX G2 has been designed to turn your smartphone into a stable smooth and lightweight 3 axis camera High precision motors and aerospace grade aluminium arms make th...

Страница 7: ...ount 1 x Quick Release Mount 1 x 3M Adhesive Mount 1 x 3 Way Mount 1 x Frame Mount 4 x Straps 1 x Helmet Base 1 x Adapter Mount Metal Teether 2 x 3M Adhesive Pads 1 Shoot Record Button 2 Micro USB Cha...

Страница 8: ...en the ZX 20 or modify it in any way If the ZX 20 has been tampered with the warranty will be void Maintenance and repairs should only be performed by Zero X If you have wet hands do not handle or cha...

Страница 9: ...certified 5V 1A USB charger to charge the ZX 20 Using non certified chargers could potentially damage the ZX 20 or the ZX 20 battery Do not leave the battery charging overnight If the ZX 20 is still...

Страница 10: ...unit and the card 5 3 POWERING YOUR ZX 20 To power ON your ZX 20 follow the below steps 1 Insert the battery into the unit 2 Press and hold the ON FF button on the front of the unit until the start up...

Страница 11: ...e settings menu 5 Press the down button twice on the right side of the unit to navigate down the menu to Format 6 Press the shoot trigger button again to open the Format section 7 Press the up down bu...

Страница 12: ...p of the ZX 20 This button is used to shoot images and also record videos start and stop videos The shoot record button is also used to select menu items and confirming 6 3 ACCESSING SYSTEM SETTINGS Y...

Страница 13: ...this will open up the settings menu Press the shoot record button to activate the settings page 2 Press the ON OFF button three times this will open up the ZX 20 hardware settings menu 3 Press the do...

Страница 14: ...6 5 AUTO POWER OFF The auto power OFF function is designed to help keep the battery charged longer during use The ZX 20 will automatically power OFF after a selected period of inactivity 1 3 5 minutes...

Страница 15: ...ns 6 6 WIFI The ZX 20 comes with inbuilt WiFi allowing you to easily access your footage and photos through your smartphone The ZX 20 default setting is OFF To change this setting follow the below ste...

Страница 16: ...xit out of this mode and continue using your ZX 20 7 To exit out of Wifi mode press the up button 6 7 ROTATE IMAGE You have the ability to flip the image vertically upside down when you are using the...

Страница 17: ...w steps 1 Press the ON OFF button four times this will open up the settings menu Press the shoot record button to activate the settings page 2 Press the ON OFF button twice this will open up the ZX 20...

Страница 18: ...ngs page 2 Press the ON OFF button twice this will open up the ZX 20 system settings menu 3 Press the down button x times to navigate down the menu to Screen Saver You will see this option highlight 4...

Страница 19: ...default setting is set to ON To change this setting follow the below steps 1 Press the ON OFF button four times this will open up the settings menu Press the shoot record button to activate the setti...

Страница 20: ...video is currently zoomed in To zoom out press the up button this will incrementally zoom out If you want to zoom out completely long press the up button 7 0 PICTURE SETTINGS 7 1 PHOTO MODE Before you...

Страница 21: ...l see this highlighted Press the shoot record button to open up this setting 4 Press the up down button to the option you require you will see this highlight To select this option press the shoot reco...

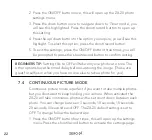
Страница 22: ...to OFF will take only one photo at a time The other options have the timed delay before capturing the image These are great for selfies or when you have no one else to take a photo for you 7 4 CONTINU...

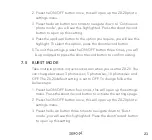
Страница 23: ...prompted to press the shoot record button to confirm exiting 7 5 BURST MODE Take multiple photos in quick succession when you use the ZX 20 You can change between 3 photos sec 5 photos sec 10 photos s...

Страница 24: ...e icon on the top left corner on the screen there will be a video camera icon in video mode Once you are in the correct mode to begin recording press the shoot record button The blue LED light on the...

Страница 25: ...record button to confirm exiting 8 3 LOOP RECORDING The loop recording function allows for the ZX 20 to record continuously using footage intervals of 2 3 or 5 minutes When the loop recording function...

Страница 26: ...over a period of time merging them seamlessly into a sped up video There are 8 options to choose from 0 5 secs 1 second 2 seconds 5 seconds 10 seconds 30 seconds and 60 seconds The ZX 20 default setti...

Страница 27: ...steps 1 Press the ON OFF button four times this will open up the settings menu Press the shoot record button to activate the settings page ZX 20 video settings is the first menu that comes up 2 Press...

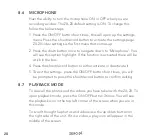
Страница 28: ...this function is activated there will be a tick in the box 4 Press the shoot record button to either activate or deactivate it 5 To exit the settings press the ON OFF button four times you will be pro...

Страница 29: ...tton and then follow the below steps 1 To delete the file press and hold the shoot record button A delete screen will be pop up 2 You will be prompted with the option to confirm or cancel deletion Pre...

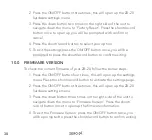
Страница 30: ...to confirm exiting 10 0 FIRMWARE VERSION To check the current firmware of your ZX 20 follow the below steps 1 Press the ON OFF button four times this will open up the settings menu Press the shoot re...

Страница 31: ...ease search the App store or Google Play Store for ZX 20 NOTE The ZX 20 App requires iOS 10 0 and above or Android 5 0 device to run 12 0 MANUAL STEPS FOR CONNECTING TO THE ZX 20 APP Turn on your phon...

Страница 32: ...one go to the Apple store 2 Search for the App ZX 20 Once you have found this App download and install it Alternatively you can scan the above QR code to take you directly to the App CONNECTING TO THE...

Страница 33: ...VIA THE APP All files that are taken on the ZX 20 will be automatically saved to the Micro SD card that is currently inserted into it However you can also save these files wirelessly onto your smartp...

Страница 34: ...choose between video camera and slow motion by clicking on the matching icons Each icon will have the different options applicable come up Select your preferred option 4 Press the same icon for the m...

Страница 35: ...lia Pty Ltd Directed Electronics warrants that this product is free from defects in material and workmanship for a period of 12 months from the date of purchase or for the period stated on the packagi...

Страница 36: ...nable legal fees including but not limited to claims alleging negligence invasion of privacy copyright infringement and or trademark infringement against Zero X and its subsidiaries and affiliates rel...

Страница 37: ...does not warrant that the Zero X or the Zero X servers that provide you with data and content are free of viruses or other harmful components Zero X also assumes no responsibility for and shall not b...

Страница 38: ...er expressly disclaims all liability for any claims for service failures that are due to normal product wear product misuse abuse product modification improper product selection or your non compliance...

Страница 39: ...iability for negligence is limited to direct losses usually and typically foreseeable in such case Should the claim for damages be based on wilful or grossly negligent breach of contractual duty or ob...

Страница 40: ...40 14 0 NOTES...

Страница 41: ...41...

Страница 42: ...42...

Страница 43: ......

Страница 44: ...zero x com au www zero x co nz Zero X v1 0 2021 All Images Information and Content are Copyright 2021 Directed Electronics Australia Pty Ltd All Rights Reserved Capture the action ANOTHER DIRECTED BR...

Отзывы: