


5-38
Upgrades and Options
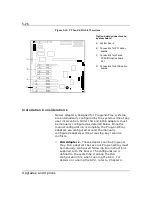
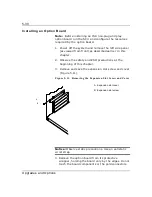
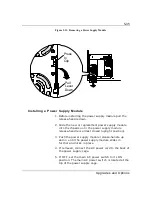
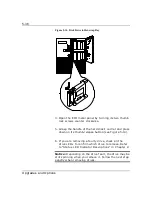
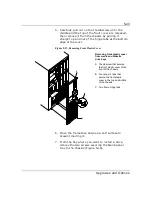
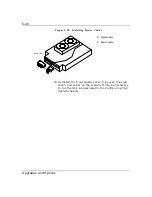
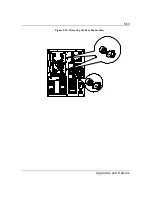
Figure 5-14. Disk Drive in Hot-swap Bay
4.
Open the EMI metal panel by turning its two thumb
lock screws counter clockwise.
5.
Grasp the handle of the hard disk’s carrier and press
down on its thumb-release button (see Figure 5-14).
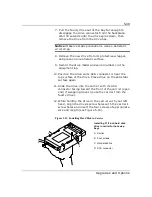
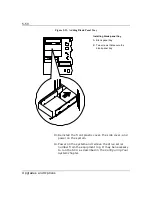
6.
If you are removing a faulty drive, check all the
drive LEDs to confirm which drive to remove. Refer
to “Status LED Indicator Descriptions” in Chapter 2.
Notice: Depending on the drive fault, the drive may be
still spinning when you remove it. Follow the next step
exactly when removing drives.
Содержание MT2000
Страница 1: ...Server MT2000 U s e r s G u i d e...
Страница 6: ...raham...
Страница 8: ...Bill Graham...
Страница 9: ...Chapter 1 Introduction Contents Organization 1 Notational Conventions 3...
Страница 10: ...Bill Graham...
Страница 53: ...1231231 Billy Graham...
Страница 81: ...4 28 Configuring Your System Figure 4 2 System Board Jumpers...
Страница 141: ...5 53 Upgrades and Options Figure 5 25 Removing the Rear Fan modules...
Страница 143: ...dfgdfg...
Страница 171: ...Bill GrahamBill Graham...
Страница 182: ...Appendix B Memory Configurations Contents Memory DIMM Configurations 1...
Страница 183: ...Bill Grahamaerrterterter...
Страница 186: ...Appendix C Option Boards Contents Introduction C 1...
Страница 188: ...Appendix D Devices Contents Introduction 1...
Страница 190: ...Appendix E Network Operating Systems Contents Introduction 1...
Страница 193: ...rtyrtyrtyrtyry...
Страница 203: ...8 Glossary...
Страница 204: ......
Страница 205: ...101843 1...


