START-UP
Colibri 7
Configuring Colibri 7 with MicroToolBox (MTB)
ZEISS
02/2017
423052-7344-001
21
3.4
Configuring Colibri 7 with MicroToolBox (MTB)
If the installed lamp module has been connected to the PC via the CAN bus of the motorized
stand, it will be automatically recognized and registered by the
Auto Configuration
function.
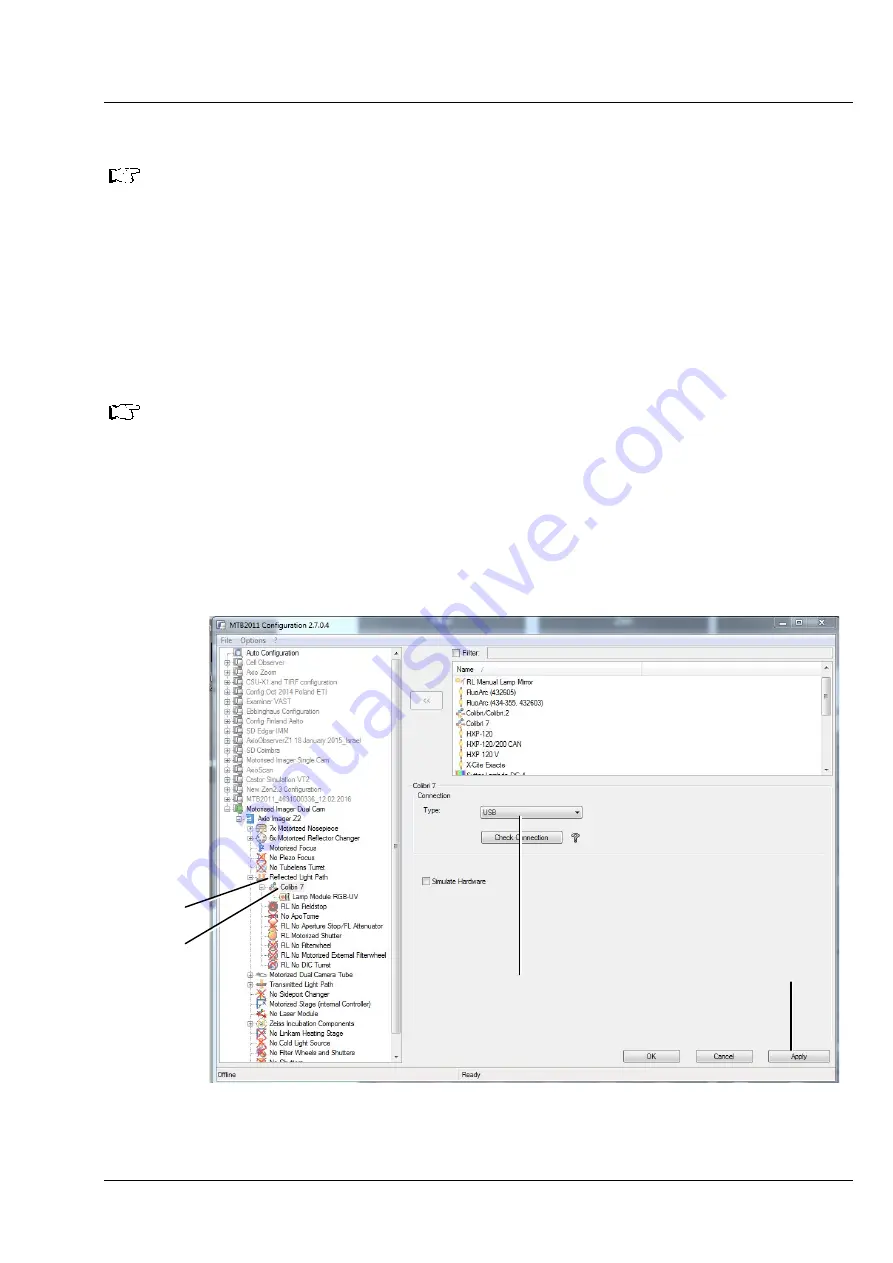
If Colibri 7 is connected directly to a PC via USB, the connection type and the lamp module type must be
selected manually in the MTB and transferred to the hardware configuration.
Please proceed as follows for manual configuration:
•
Start
MTB2011 Configuration
by double-clicking on the corresponding icon on the desktop.
•
Alternatively, launch the program with:
Start
->
All programs
->
Carl Zeiss
->
MTB 2011 – 2.x.x.x
->
MTB2011 Configuration
Like other fluorescence illuminators, Colibri 7 will be used in the reflected light path and will be
displayed in the
Reflected Light Path
directory (Fig. 11/
1
) of the microscope.
•
Select the
Reflected Light Path
folder (Fig. 11/
1
) and then
Colibri 7
2
) in the window of the
MTB which will be displayed upon selecting the configuration in the microscope directory (e.g.
Axio Imager.Z2
).
•
Select the
USB
connection type (Fig. 11/
3
) in the selection list under
Colibri 7 / Connection / Type:
and click on
Check Connection
, if required.
•
Then click on
Apply
4
).
1
2
3
4
Fig. 11
MTB – Configuring the connection type
Содержание Colibri 7
Страница 1: ...Colibri 7 Operating Manual ...


