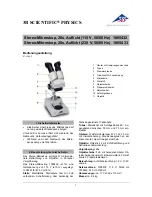
Axiovert 40
B 46-0031 e 11/03
3Ć3
(2) Replacing the halogen bulb
CAUTION
Hot surfaces on bulb housing (3Ć2ā/ā
1
), heat sink (3Ć2ā/ā
2
and halogen bulb:
Make sure to let them cool down sufficiently!
Replace the halogen bulb following this procedure:
•
Disconnect the power cable and let the halogen bulb cool down for about 15 minutes.
•
Unlock the bulb housing (3Ć2ā/ā
1
) by slightly turning it anticlockwise.
•
Withdraw the heat sink (3Ć2ā/ā
2
) upward.
•
Remove the halogen bulb with alignment base (3Ć2ā/ā
3
).
•
Remove new 12 V 35 W halogen bulb with adjustment base from the packing box. Insert it in the mount
taking care that the tip of the mount engages in the centering notch of the carrier plate.
CAUTION
Do not touch the bulb with your bare hands; if required, clean the bulb using pure alcohol
before
switching the lamp on for the first time in order to prevent contaminations from burnĆ
ing in.
•
After you have replaced the halogen bulb, fit on the heat sink, attach the bulb housing and lock it.
Fig. 3Ć2
Replacing the halogen bulb
1
2
3
Содержание Axiovert 40
Страница 1: ...Operating Manual Axiovert 40 Inverted Microscope...
Страница 2: ......
Страница 3: ......
Страница 11: ...Axiovert 40 B 46 0031 e 11 03 VII GENERAL VIEW Axiovert 40 CFL...
Страница 12: ...Axiovert 40 11 03 B 46 0031 e VIII...
Страница 16: ...Axiovert 40 11 03 B 46 0031 e XII...
Страница 24: ...Axiovert 40 11 03 B 46 0031 e 1 8 1 4 System overview Fig 1 3 1 Axiovert 40 system overview...
Страница 25: ...Axiovert 40 B 46 0031 e 11 03 1 9 Fig 1 3 2 Axiovert 40 system overview...
Страница 26: ...Axiovert 40 11 03 B 46 0031 e 1 10 Fig 1 3 3 Axiovert 40 system overview...
Страница 65: ...Axiovert 40 B 46 0031 e 11 03 A 1 ANNEX Index List of abbreviations...
Страница 66: ...Axiovert 40 11 03 B 46 0031 e A 2...
Страница 72: ...Axiovert 40 11 03 B 46 0031 e A 8...