22
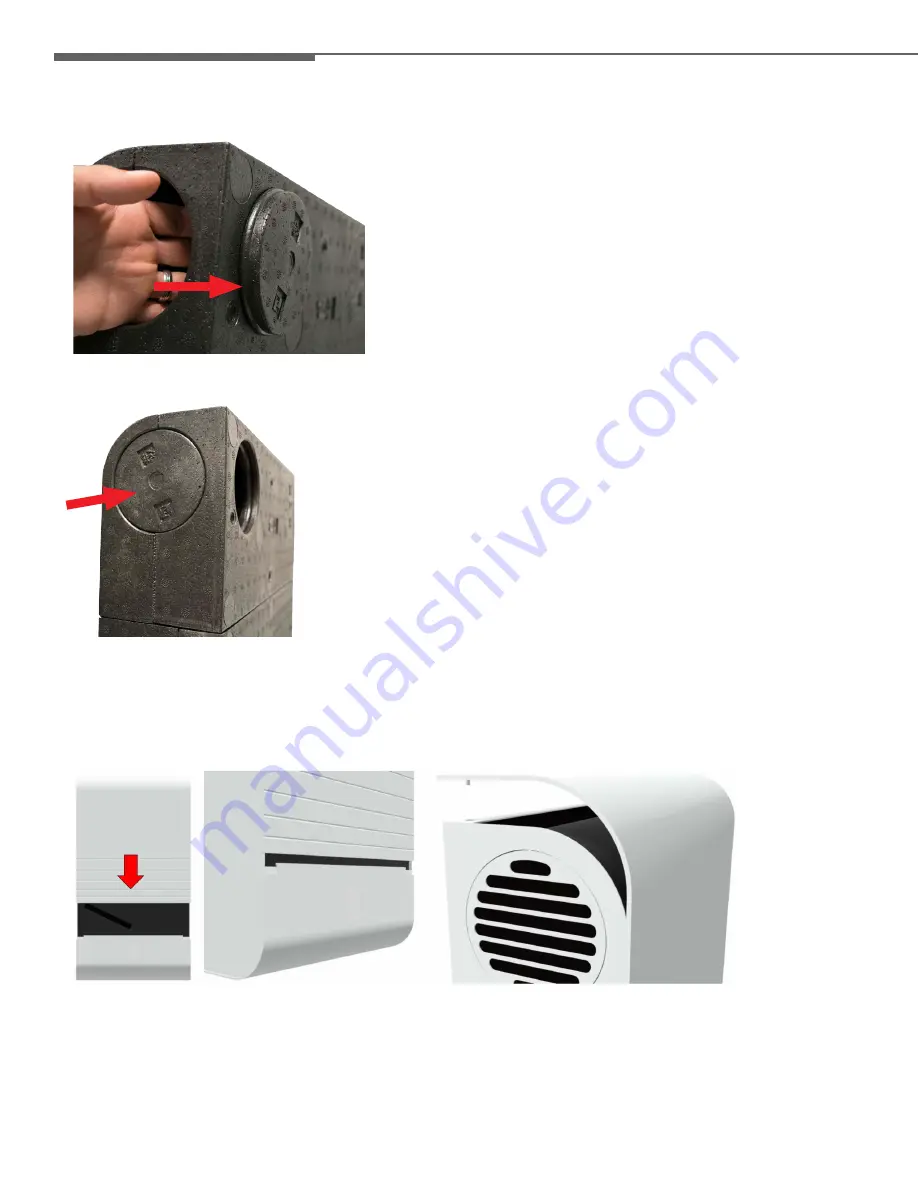
6. Reaching through the side duct opening that is to be converted to a rear duct connection, carefully push the EPP rear duct
plug out of the EPP body as shown below.
7. Using the duct plug just removed from the rear of the EPP body, carefully press into the side opening so that it is sealed. Note:
the supply and exhaust openings can be either side or rear facing, not both.
8. Slide the EPP body of the unit back into the metal wall bracket.
9. Fasten the lower canopy with the left-hand screw. The lower canopy can now be pivoted. While wearing a ESD band plug the
ribbon cable into the control panel in the position shown in step 3, above.
10. Attach the lower canopy in place on the wall bracket with the remaining right-hand screw.
11. Place the upper canopy onto the unit from above. Make sure that it engages into the guide for the lower canopy and the
upper pins into the designated spring clips of the wall bracket.
INSTRUCTIONS FOR SKILLED INSTALLERS


