background image

22

23

EN

EN

40005904

40005904

3. Operating the electronic control

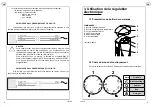
3.1 Description of control unit

CONTROLS:

1

    Mode selector

2

    Temperature adjustment knob

3

    Status indicator LED

4

    Protective cover*

5

    Drilling mark

6

    Ventilation inlets

* depending on model

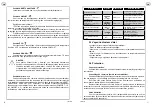
3.2 Operating mode selection

Turn the selector 

1

 to one of the 5 possible operating modes.

1

Auto

Pilot wire

Heating stop

Comfort

Eco

Frost

protection

.

. .

.

2

3

2

4

5

6

1

HEATING STOP position:

The radiator does not heat up. The status indicator lamp (

3

) will be unlit.

CONFORT position:

This is your radiator’s normal operating mode.

You can select the room temperature using the adjustment knob (

2

).

Setting the temperature:

1) Turn the adjustment knob 

2

 to position 8 to start your radiator heating up. The 

status indicator lamp (

3

) will be lit red.

2) When the desired ambient temperature is reached, turn the knob (

2

) left until 

the status lamp turns green.

3) After a few hours in operation, you can fine-tune the temperature setting. 

Turn the knob right (clockwise) to increase, or left to decrease. In this way you can 

achieve perfect comfort.

ECO position:

This is the «Economy» position intended for nighttime use; the temperature 

setting selected for the COMFORT position is automatically reduced by around 3.5°C.

FROST PROTECTION position:

Your radiator is set to ensure a minimum temperature of 7°C in your room, to 

prevent any risk of frost.

NOTE:

You can use the "frost protection" command on your appliance’s

electronic thermostat for load-shedding (option available with some

programming units). When using the programming function, it is vital to 

use appliances of equivalent technology to ensure optimum levels of

comfort.

Pilot wire position: 

Auto

This position makes it possible to select the operating setting for your radiator 

remotely, using a programming device. A pilot wire programming unit sends an instruc-

tion via the black pilot wire to which your radiator is connected. It switches your radiator 

to one of its settings (NO HEAT, FROST PROTECTION, ECO, COMFORT) and can 

also switch your radiator to two additional settings (COMFORT -1°C and COMFORT 

-2°C). See the instructions with your pilot wire programmer for how to use your radiator 

with a pilot wire programmer.

AUT

O

Содержание ComfoAir 2200

Страница 1: ...hoix de l emplacement 7 2 3 Raccordement de l appareil 7 3 Utilisation de la r gulation lectronique 3 1 Pr sentation du bo tier de commande 9 3 2 Choix du mode de fonctionnement 9 3 3 Voyant indicateu...

Страница 2: ...isateur Cet appareil peut tre utilis par des enfants g s d au moins 8 ans et par des personnes ayant des capacit s physiques sensorielles ou mentales r duites ou d nu es d exp rience ou de connaissanc...

Страница 3: ...e surface du radiateur n at teint un niveau optimal qu au bout de 10 mn environ ce temps variant suivant les mod les et la temp rature ambiante de la pi ce lors de la mise en chauffe de l appareil ce...

Страница 4: ...se de courant est interdit 2 2 Choix de l emplacement Pour profiter pleinement de votre appareil et pour votre plus grand confort nous vous recommandons de r aliser l installation si possible proximit...

Страница 5: ...Votre appareil est muni d un fil pilote lui permettant d tre raccord une centrale de programmation fil pilote non fournie avec l appareil NOTER Votre appareil tant muni d une r gulation lectronique in...

Страница 6: ...NFORT 2 C Veuillez vous reporter la notice de votre centrale fil pilote pour l utilisation de votre radiateur avec celle ci 3 3 Voyant indicateur d tat Le voyant 3 vous indique l tat de votre radiateu...

Страница 7: ...robl me assurez vous d avoir bien relev les l ments figurant sur l tiquette signal tique de l appareil la r f rence commerciale figurant sur votre facture d achat dat e Garantie Voir conditions g n ra...

Страница 8: ...ur radiator we advise you to read these instructions carefully and keep them to hand Thank you for your purchase 1 2 Warnings CAUTION To avoid overheating do not cover the heating appliance Do not sit...

Страница 9: ...a power outlet IMPORTANT This appliance is not intended for use at altitudes exceeding 2000 m NOTE Before carrying out any maintenance operation on your appliance ensure that it is switched off This...

Страница 10: ...d with rules of good professional practice in the country of use IMPORTANT The example shown only concerns a bathtub For other bathroom fixtures please consult your installer IMPORTANT The system must...

Страница 11: ...n Appliance reference number Class II double insulated OF serial number Manufacturer code ATTENTION NE PAS COUVRIR IP 34 ACOVA XXXX XXX XXX 230V XXXXW OF XXXXXXXXXXXXXXXX NCONSTRUCTEURXXXXXX CONNECTIN...

Страница 12: ...increase or left to decrease In this way you can achieve perfect comfort ECO position This is the Economy position intended for nighttime use the temperature setting selected for the COMFORT position...

Страница 13: ...n no current 4 57 phase 230 V 3 Comfort 1 C The temperature obtained is that of the thermostat setting 1 C Alternation no current 4 53 phase 230 V 7 Comfort 2 C The temperature obtained is that of the...

Страница 14: ...e guarantee does not cover radiator transport removal and installation costs The guarantee shall not apply if the appliance is installed used or maintained in a way that does not comply with standards...

Страница 15: ...pparaat niet aansluiten instellen of reinigen en geen onderhoud uitvoeren Dit apparaat kan worden gebruikt door kinderen in de leeftijd van minimaal 8 jaar en door personen met een verminderde sensori...

Страница 16: ...rikant worden uitge voerd of door zijn after sales service die gewoonlijk dient te worden ge nformeerd bij olielekkage Neem de voorschriften in acht betreffende het verwi jderen van olie als het verwa...

Страница 17: ...2 Een plaats kiezen Om volledig te kunnen genieten van het toestel en voor het meeste comfort raden wij het volgende aan installeer het toestel indien mogelijk in de buurt van plaat sen waar sprake i...

Страница 18: ...s ontvangt zal het toestel als het in de AUTO modus staat in de COMFORT modus gaan werken Dit duurt totdat de programmeercentrale een nieuwe modus doorzendt AANSLUITPRINCIPE ZONDER STUURDRAAD Indien d...

Страница 19: ...gelieve u de technische beschrijving van de constructeur te raadplegen 3 3 Controlelampje Lampje brandt niet uw apparaat staat in de stop stand Lampje brandt groen de radiator werkt de gewenste tempe...

Страница 20: ...van het toestel de verkoopreferentie die op uw aankoopfactuur vermeld staat Garantie Zie de algemene verkoopvoorwaarden voor het betreffende land Het verwarmingselement van uw elektrische radiator is...

Страница 21: ...kennen zu lernen und bestm glich nutzen zu k nnen lesen Sie bitte diese Anleitung aufmerksam durch und bewahren Sie sie in der N he des Heizk rpers auf Wir danken Ihnen f r Ihr Vertrauen 1 2 Warnhinw...

Страница 22: ...dendienst oder von einer entsprechend qualifizierten Person ausgewechselt werden BITTE BEACHTEN Den Heizk rper nicht direkt unte rhalb einer Steckdose montieren BITTE BEACHTEN Dieses Ger t ist nicht f...

Страница 23: ...wird entsprechen BITTE BEACHTEN Das hier abgebildete Beispiel betrifft lediglich den Fall eines Raums mit Badewanne Bei anderen Badkonfigurationen wenden Sie sich unbe dingt an Ihren Montagefachmann...

Страница 24: ...ON NE PAS COUVRIR IP 34 XXXXXX XXXX XXX XXX 230V XXXXW OF XXXXXXXXXXXXXXXX NCONSTRUCTEURXXXXXX F r den Anschluss an das Stromnetz beachten Sie bitte Folgendes die auf dem Typenschild angegebene Spannu...

Страница 25: ...ert werden F r mehr Leistung nach rechts drehen im Uhrzeigersinn oder nach links f r geringere Leistung Dann tritt der ideale Komfort ein Position Spar Dies ist die Position Sparbetrieb f r die Nacht...

Страница 26: ...trom Komfort Die erzielte Temperatur ist die am Thermostat eingestellte Abwechselnd Kein Strom 4 57 Phase 230 V 3 Komfort 1 C Die erzielte Temperatur ist die am Thermostat eingestellte 1 C Abwechselnd...

Страница 27: ...Garantie ausgeschlossen ist eine Benutzung Inbetriebnahme Instal lation oder Wartung die gegen die g ltige Norm im jeweiligen Einsatzland gegen die anerkannten Fachregeln und gegen die Bedienungsanle...

Страница 28: ...enzione prevista da parte dell utente Questo apparecchio pu essere utilizzato da bambini a partire da 8 anni e da persone con capacit fisiche sen soriali o mentali limitate o con esperienza e conoscen...

Страница 29: ...erbatoio dell olio devono essere effettuate esclusivamente dal fabbricante o dal suo servizio post vendita che buona norma contattare in caso di perdite di olio Quando l apparecchio di riscaldamento v...

Страница 30: ...2 2 Scelta della collocazione Per sfruttare al meglio l apparecchio e per un comfort ottimale raccomandiamo di effettuare l installazione se possibile nelle vicinanze di zone a forte dispersione fine...

Страница 31: ...istruzioni il radiatore in modalit AUTO funzioner in modalit COMFORT fino alla ricezione di una nuova modalit fornita dalla centrale di program mazione PRINCIPIO DI COLLEGAMENTO SENZA FILO PILOTA Se i...

Страница 32: ...d un contatore o ad una centralina di programma zione leggere le avvertenze d uso del costruttore 3 3 Spia indicatrice dello stato Spia spenta l apparecchio in posizione di arresto Spia accesa verde i...

Страница 33: ...i riferimento commerciale indicato sulla fattura d acquisto datata Garanzia Vedere le condizioni generali di vendita relative al proprio paese Il corpo riscaldante del radiatore elettrico garantito pe...

Страница 34: ...ades le invitamos a leer atentamente estas instrucciones y a conservarlas cerca de su radiador Gracias por su confianza 1 2 Advertencias ADVERTENCIA Para evitar el sobrecalen tamiento no cubra el apar...

Страница 35: ...vitar cualquier peligro IMPORTANTE No instalar el radiador justo debajo de un enchufe IMPORTANTE Este aparato no est dise ado para utili zarse en altitudes superiores a los 2000 metros NOTA Antes de r...

Страница 36: ...normativa vigente del pa s en el que se realice IMPORTANTE El ejemplo que se muestra aqu se refiere solamente al caso de una ba era Para los dem s tipos de equipamiento de cuarto de ba o consulte con...

Страница 37: ...igo ATTENTION NE PAS COUVRIR IP 34 XXXXXX XXXX XXX XXX 230V XXXXW OF XXXXXXXXXXXXXXXX NCONSTRUCTEURXXXXXX La conexi n a la red el ctrica debe realizarse respetando la tensi n indicada en la etiqueta d...

Страница 38: ...ionamiento puede ajustar la regulaci n de la temperatura girando el bot n hacia la derecha en el sentido de las agujas del reloj para aumentar la temperatura o hacia la izquierda para reducirla De est...

Страница 39: ...La temperatura obtenida es la regulada en el termostato En alternancia sin corriente 4 57 fase 230 V 3 Confort 1 C La temperatura obtenida es la regulada en el termostato 1 C En alternancia sin corrie...

Страница 40: ...relativa al material el ctrico destinado a utilizarse con determinados l mites de tensi n y con las normas europeas EN 60 335 1 y EN 60 335 2 30 incluidas las enmiendas sucesivas La garant a se aplic...

Страница 41: ......
Отзывы: