11
6.1.8 Remove the Valve GRATE (41) from the BODY (25) by turning the GRATE counter-clockwise.
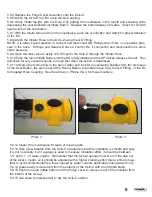
6.1.9 Temporarily flip the edges of the EXHAUST VALVE (40) to expose the legs of the Valve SUPPORT (39)
underneath. Use your fingers or needle nosed pliers to turn the Valve SUPPORT counter-clockwise until it
is out of the BODY (25). (See Photo 7)
6.1.10 Unscrew the Cover RING (33) and remove the Purge Cover (34) and DIAPHRAGM (35). If the Cover
RING is difficult to remove even after soaking in hot water, try slipping a long thin Screwdriver under the face
of the Purge Cover through the slots in the cover and turning the whole cover assembly counter-clockwise.
6.1.10 Remove the flat GASKET (38) from the BODY (25). The GASKET will be re-used.
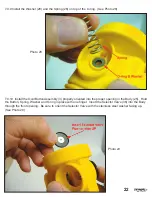
6.1.11 Hold the oval Deflate BUTTON in
place with one finger, while loosening the
NUT (37) with a 1/4” nutdriver (See Photo
8)
6.1.12 When the NUT (37) is disengaged
from the threads of the Deflate Shaft (3),
remove the Deflate BUTTON assembly
(3), and SPRING (26), from one side of
the BODY (25) and the NUT (37) from the
other side.
6.1.12.1 Unscrew the Cover Ring (33)
and remove the Purge Cover (34) and
Diaphragm (35). It the Ring is too tight, see
Step 5.0.3.1 on Page 7.
Photo 7
Photo 8

