9
CONFIDENTIAL
DOC-USR-0054-02
____________________________________________________________________________________
Z3 Technology, LLC
♦
100 N. 8th St. STE 250
♦
Lincoln, NE 68508-1369 USA
♦
+1.402.323.0702
5.0
GETTING STARTED AND RUNNING THE Z3-DME-02
For these steps, you will need: a computer, an SDI source (or HDMI source with HDMI->SDI converter plus
HDMI cable), a BNC-BNC cable, an Ethernet cable, and a Z3-DME-02 with 12V power supply.
5.1
Setting up the Video Source
(1)
Set up the SDI source to output 1080p or 1080i output.
If you do not have an SDI source, you can also use an HDMI source with non-DHCP output (for
example, in Z3’s testing, the Brite-View BV-5005HD is used). If you go this route, do the following:
-Power on the HD Source
-Connect an HDMI cable from the HD Source to a monitor
-Set the HD Source to 1080p30 or 1080i output
-Select and begin playback of the content
-Take the HDMI cable connected to the monitor and connect it to “HDMI In” of the HDMI->SDI
converter box.
(2)
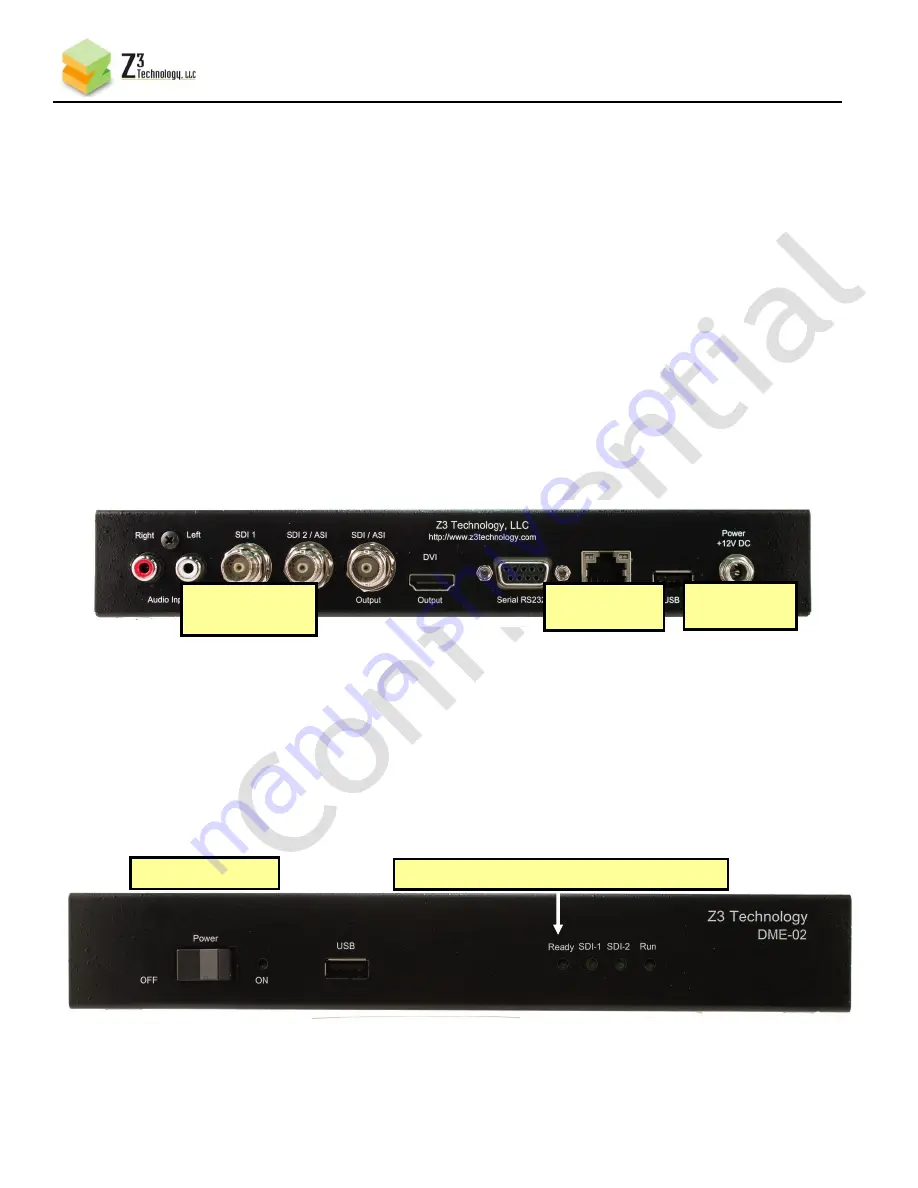
Connect the BNC cable from the SDI source to the Z3-DME-02 “SDI1 Input” port (see
5.2
Connecting and powering up the Z3-DME-02
(3)
Connect an Ethernet cable to “Ethernet” on the Z3-DME-02 (see
). Connect the other end of
the Ethernet cable directly to a PC. You will use this PC to control the Z3-DME-02 and to decode the
output stream.
(4)
Connect the 12V power supply to “+12VDC” (see
(5)
Power on the Z3-DME-02:
(6)
Wait around 1 minute for the “status” LED to light up
Figure 4 Z3-DME-02 Rear Panel Example Encode Connections
(1) Connect to
SDI source
(2) Connect
Ethernet
(3) Connect
Power
Figure 5 Z3-DME-02 Power Switch and Status Light
(1) Turn on PWR
(2) “Ready” lights up after around 1 minute


