background image

12

zcentral.zcorp.com

8.   Replace a Print Head

For more details on performing these steps, refer to the 

Addi-

tional Operations

 section of the 

Hardware Manual

 for your 

printer. 

1.

On the Control Panel select 

BUILD CHAMBER

, then 

LOWER PLATFORM

. Lower the build platform about 6 

inches below the top. 

2.

Select 

PRINT HEAD


then


CHANGE PRINT HEAD


on 

the LCD menu. The fast axis moves to the service position. 

3. Open the printer top cover. 
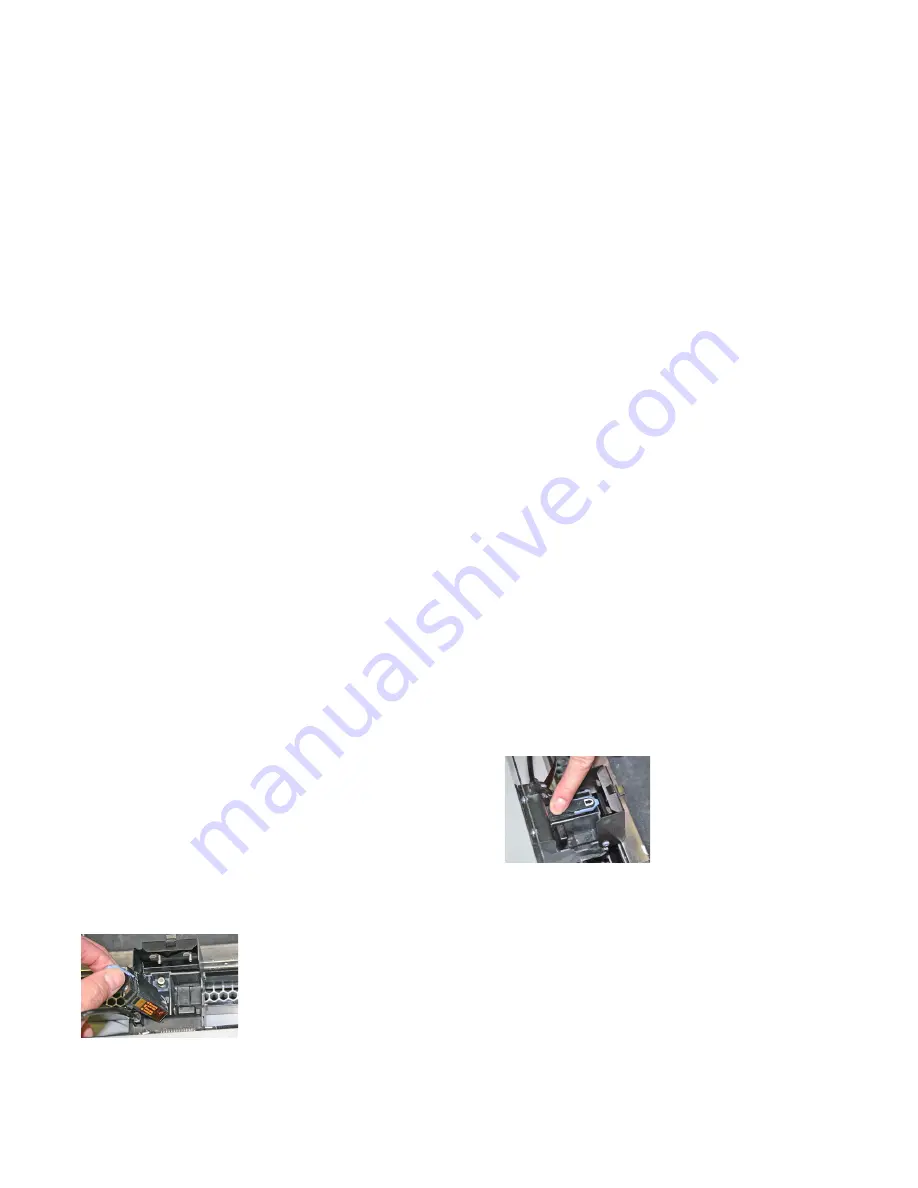
Open the carriage cover and lift 
the print head out of its slot. 
Properly recycle or dispose of 
the empty cartridge. 
4. Using a paper towel damp-
ened with distilled water, clean 
the carriage as appropriate for 

your printer. Dry with a clean paper towel.

5.

Using an alcohol snap swab, clean the pogo pins for that 
head. Use additional swabs if needed. 

6.

Remove the new printhead from its packaging. 

Be sure to 

pull the tape tab off of the new printhead.

7. Insert the new printhead. 
Press down firmly on the top of 
the printhead, on the same side 
as the pogo pins, to securely fit 
the printhead into its slot. 
8. Close the carriage cover by 
pressing down until you hear it 
click shut. Be sure the latch is 

engaged.

9.

Close the printer top cover. Select 

CONTINUE


then


EXIT


on the LCD. 

Содержание zprinter 350

Страница 1: ...ZPRINTER 350 ZPRINTER 450 QUICK START GUIDE Part Number 09569 Rev D...

Страница 2: ...mber Binder Cartridge Debris Separator Vacuum Hose Fast Axis Deck Service Station Top Cover Control Panel Air Wand Heater 450 only Build Bed Arm Holes Glove Box 450 only Control Knob LCD Display Fine...

Страница 3: ...on Turn the Control Knob left right to highlight menu items When selecting the Raise Lower Platform commands hold the Control Knob down to raise lower the platform Rear View External Connections Power...

Страница 4: ...s routine maintenance The printer is connected to the same network as the com puter that is running ZPrint For more details please refer to the ZPrinter 350 Hardware Manual or the ZPrinter 450 Hardwar...

Страница 5: ...the steps in Section 6 1 Vacuum Up Excess Powder 2 Check that the Debris Separator the Rails and Carriage the Service Station and Parking Caps are clean If any of these need cleaning follow the proce...

Страница 6: ...y OK the Print button is enabled If any items need attention the Print button is disabled If the printer only needs a new print head and you are comfortable performing the steps required see the Repla...

Страница 7: ...ning before the part is dry 1 Close the top cover then select VACUUM DEPOWDER on the LCD menu Open the cover The vacuum starts 2 Vacuum powder from around the part Be careful around delicate sections...

Страница 8: ...Bed but not the Feeder side The deck around the Build Bed Note Be careful not to vacuum inside the service sta tion itself 3 Press the Control Knob once to turn off the vacuum 6 2 Empty The Debris Se...

Страница 9: ...he Build Bed 3 Pull the Service Station wiper lever all the way forward until the rubber squeegees are fully exposed Hold the lever in this position while you clean the squeegees 4 Squirt water on and...

Страница 10: ...the Parking Cap cover to a horizontal position and place dry paper towels underneath 2 Squirt the distilled water onto the caps Do not squirt water onto the Build Bed 3 Use a cotton swab and dry paper...

Страница 11: ...free of loose pow der before infiltrating 1 Pour enough Z Bond into the container to completely sub merge the part 2 Gently submerge your part into the liquid for several seconds 3 Remove the part and...

Страница 12: ...or dispose of the empty cartridge 4 Using a paper towel damp ened with distilled water clean the carriage as appropriate for your printer Dry with a clean paper towel 5 Using an alcohol snap swab clea...

Страница 13: ...uals are also available on the Support section of our 3DP User Web site at zcentral zcorp com About Post Processing Learn more about the different post processing products that are available to use wi...

Страница 14: ...herein is for the use of Z Corporation customers who are permitted to create brief excerpts for the purposes of training and review This informa tion may not be incorporated in any commercial program...

Страница 15: ...Avenue Burlington MA 01803 USA Phone 1 781 852 5005 Fax 1 781 852 5100 Service Phone 1 781 852 5050 Fax 1 781 852 5055 E mail service zcorp com Denmark Z Corporation Svanevang 2 DK 3450 Alleroed Denm...

Страница 16: ...Z Corporation 2009 All Rights Reserved...

Отзывы: