manualshive.com logo in svg
background image

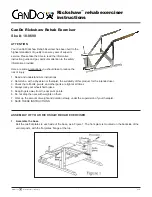
6. Directions For Use

Adjustment  of  pedal  height:  loosen  the 
set  screws  on  the  fastener  with  a 
hexagon wrench, adjust the pedal to the 
appropriate  height  according  to  the 
height  of  the  occupant  and  lock  the  set 
bolts, see Figure 9.

Installation  and  removal  of  anti-roll 
wheel:  hold  the  marble  on  the  anti-roll 
wheel  with  your  fingers  while  installing 
and insert it into the frame hole until the 
marble  fastens  into  the  marble  hole  of 
the wheelchair. While removing, hold the 
marble  with  one  hand  and  pull  the 
anti-roll  wheel  off  backwards  with  the 
other hand, see Figure 10 (Note: tighten 
the cap nut on the inside while installing).

Note

To avoid pinching, do not put your 
fingers into the folded backrest .

Figure 9

Figure 11

Figure 12

Figure 14

Figure 15

Figure 10

Use of movable leg: when the electric wheelchair is provided with a 
movable leg, turn the movable leg from the position in Figure 11 to the 
position in Figure 12 along the rotational axis, ensuring that it rotates 
into  the  groove  of  the  plastic  part  and  open  the  pedal;  the  action 
sequence is reversed to folding back up. (Note: the function is only 
suitable for models provided with a movable leg)

Adjustment of controller: sit on the 
electric wheelchair, loosen the torx 
bolt,  push  the  fixing  rod  of  the 
controller backwards and forwards 
to the proper position and lock the 
torx  bolt,  see  Figure  13.  (The 
adjustment  method  is  same  if  the 
controller  is  installed  on  the  left 
side)

Figure 8

Figure 13

(1). Function description of controller

Power button

Battery gauge

Horn button

Speed indicator

Acceleration 
button

Deceleration 
button

08

09

Charger/
programming port

UDB interface

Joystick control panel

Joystick


Содержание Electric-TIM II

Страница 1: ...ion Address Yunyang Industrial Park Danyang Tel 0511 86900833 Fax 0511 86900878 Revision Date October 2017 530800 1A Electric Wheelchair Product Operation and Technical Instructions Please carefully r...

Страница 2: ...nsure that the wheelchair is in good condition For any questions please contact the dealer or manufacturer and we will serve you wholeheartedly Do not operate your electric wheelchair before reading a...

Страница 3: ...to avoid moisture Before powering on the controller confirm that the Manual Electric clutch of the left and right motors or the handle is in the Electric gear Do not switch the Manual Electric clutch...

Страница 4: ...ry DC 24Vx18Ah lead acid battery DC 24Vx21Ah 11 Obstacle clearance height 40mm 12 Groove clearance width 100mm 13 Gradeability 6 14 Hill holding performance 9 15 Static stability 9 16 Dynamic stabilit...

Страница 5: ...terclockwise direction after confirming that the eject pin has left the eject pin hole see Figure 8 To avoid pinching do not hold the seat tubes with your hands when pressing down the seat cushion Fig...

Страница 6: ...igure 14 Figure 15 Figure 10 Use of movable leg when the electric wheelchair is provided with a movable leg turn the movable leg from the position in Figure 11 to the position in Figure 12 along the r...

Страница 7: ...The gear increases by 1 each time you press this button and won t change after it reaches 5th gear Deceleration button Press this button to decrease the speed setting The gear decreases by 1 each tim...

Страница 8: ...irection and the electric wheelchair will start moving increase the pushing range of the joystick to accelerate decrease the range to decelerate If it is necessary to stop the moving electric wheelcha...

Страница 9: ...turer or purchase a battery of the same specification locally Tire pressure it is rec ommended to inflate the tires of 200 X 45 110 and 310 X 50 203 to 260 kpa maximum 325 kpa and inflate the tires of...

Страница 10: ...s life 2 The battery is marked with obvious positive and negative electrode signs and a reliable connector is provided to ensure the normal 16 17 connection of the circuit Non specialized persons sho...

Страница 11: ...in unchanged c Pay attention to distinguish between the positive and negative electrodes on both sides of the wiring harness For the right hand battery connecting wires connect the red wire with the p...

Страница 12: ...is eliminated press the button to reset manually see Figure 23 Note only the lead acid battery is provided with an overload protector If a lithium battery is used it will cut off the power during ove...

Страница 13: ...is not connected reliably Please connect it again 4 The motor does not work 10 Electromagnetic Compatibility This product complies with the requirements of the related content in the EMC electromagnet...

Страница 14: ...mmunication 4 Do not use products other than special accessories otherwise ithey may increase the radiation and decrease the immunity Warning apart from the cables sold by the equipment or system manu...

Страница 15: ...ment guidelines RF conduction GB T17626 6 GB T18029 21 RF radio frequency radiation charger GB T17626 3 GB T18029 21 RF radio frequency radiation wheelchair GB T17626 3 GB T18029 21 3V m 150kHz 80MHz...

Страница 16: ...e 204 in YY0505 2012 This electric wheelchair is intended to be used in an electromagnetic environment with controlled radioactive radiation The purchaser or user of the electric wheelchair can preven...

Страница 17: ...l and human factors Faults caused by failing to comply with the correct operation methods in these instructions Damage caused by unpredictable natural No 1 2 3 Parts Frame Controller Motor Warranty pe...

Страница 18: ...7 Model Total length mm Total width mm Total height mm Seat width mm Seat height mm Seat depth mm Handrail height mm Handrail spacing mm Seatrest height mm Ground clearance of foot support mm Front wh...

Отзывы: