25
Table C-3: R7184 Troubleshooting
continued from previous page
Procedure Status Corrective
Action
Indicator light is on.
Remount control onto burner housing. Go to step 6.
10. Check cad cell.
•
Disconnect line voltage
power and open line switch.
•
Remove existing cad cell
and replace with new cad
cell.
•
Disconnect all wires from
thermostat terminals to en-
sure that there is no call for
heat.
•
Reconnect line voltage
power and close line switch.
•
Expose new cad cell to
bright light such as a flash-
light.
Indicator light is off.
Go to step 11.
Indicator light is on.
Replace cad cell bracket assembly.
11. Check cad cell bracket as-
sembly.
•
Disconnect line voltage
power and open line switch.
•
Remove cad cell wires from
quick connect connectors
and leave control lead wires
open.
•
Apply power to device.
•
Place jumper across cad
cell terminals after burner
motor turns on.
Indicator light is off. Replace
R7184.
NOTE: Restricted Mode - (Limited Reset): In order to limit the accumulation of unburned oil in the combustion chamber, the con-
trol can be reset only 3 times, after which, the control locks out. The reset count returns to zero each time a call for heat
is successfully completed.
To reset from R
ESTRICTED
M
ODE
: press and hold the reset button for 30 seconds. When the LED flashes twice, the de-
vice has reset.
NOTE: Disable function: Pressing and holding the reset button will disable all functions until the button is released. The burner
will restart at the beginning of the normal heat cycle on
SAFETY CHECK
.
Table C-4: System and General Troubleshooting
Problem Possible
Cause
Remedy
Thermostat not calling for heat.
Check thermostat and adjust. Also, check thermostat for accu-
racy; if it is a mercury switch type, it might be off level.
No power to furnace.
Check furnace switch, main electrical panel furnace fuse or cir-
cuit breaker. Also look for any other hand operated switch, such
as an old poorly located furnace switch, which was not removed
during furnace replacement.
Thermostat faulty.
Remove thermostat wires from oil primary control terminals T-T.
Place a jumper across T-T. If furnace starts, replace thermostat,
thermostat sub-base (if equipped), or both.
Furnace will not start.
Oil primary control faulty.
Check reset button on oil primary control. Remove thermostat
wires from oil primary control terminals T1 - T2. Check for 24v
across T -T. If no voltage is present, check for 115v to oil pri-
mary control. If 115v is present, go to Table C-3.
Continues on next page
Содержание P3HMX12F08001
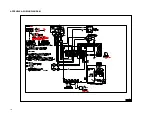
Страница 16: ...16 APPENDIX A WIRING DIAGRAM ...


