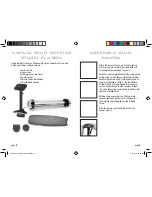
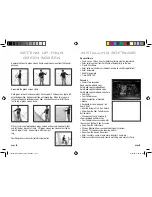
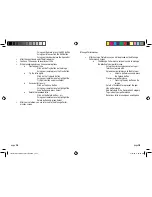
Yoostar YS1000 Скачать руководство пользователя страница 4

poSition yoUr 

yooStar Camera

The Yoostar camera is designed to stand vertically on your desk and/or 

tabletop next to your computer or laptop.
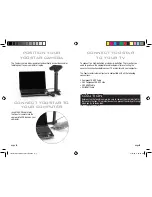
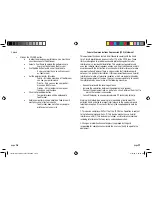
ConneCt yooStar to 

yoUr CompUter

Insert the USB cable form 

the Yoostar camera into the 

appropriate USB dock on your 

computer.

page

 4

page

 5

ConneCt yooStar         

to yoUr tV

To connect to a high-definition or standard-definition TV or monitor, you 

need to purchase the appropriate cables below after evaluating the 

necessary connections between your TV or monitor and your computer.

The Yoostar entertainment system is compatible with all the following 

connections:

• Component HD AV Cabl

e

• 360 Component HD AV Cabl

e

• 360 HDMI Cabl

e

• DVi/HDMI Cable

CaUtion

Before using the Yoostar camera, be sure to remove the clear plastic film 

that covers the lens. This protective seal can prevent the clarity of filming 

when you try to load a disc.

Yoostar Owners Manual booklet.indd   6-7

4/16/09   9:22:20 AM

Содержание YS1000

Страница 1: ...YOOSTAR Owner s manual Everything YOO need to know about your YOOSTAR ENTERTAINMENT SYSTEM Yoostar Owners Manual booklet indd 1 4 16 09 9 22 15 AM...

Страница 2: ...nd Frequently Asked Questions FAQs Prevent the Camera from Falling Prevent the Camera from Overheating Connect YOOSTAR to your TV Electrical Safety To avoid damaging the USB camera cord Federal Commun...

Страница 3: ...e stand completed connect the camera head on top of the neck by squeezing the clips located beneath the camera head Place camera head on top of pivot located in center of the red platform on top of ne...

Страница 4: ...on TV or monitor you need to purchase the appropriate cables below after evaluating the necessary connections between your TV or monitor and your computer The Yoostar entertainment system is compatibl...

Страница 5: ...utions can result in serious injury or death from electric shock or fire or damage to the Yoostar entertainment system To avoid damaging the USB camera cord Protect the USB cord from being pinched or...

Страница 6: ...rom Certificate of Authenticity in the box Create User Name Enter valid e mail address address is used to confirm registration Enter password Confirm password Press REGISTER Cascade Explain two cascad...

Страница 7: ...ibe pick a role screen Description of the clip Preview of the clip Roles available from this clip Print Script Show camera setup Select a role to play Double click on a role image Highlight a role ima...

Страница 8: ...of a Recording Using your Remote navigate to the Add Intro Button o and press Select Using your Mouse click the Add Intro button o Using your keyboard navigate to the Add Intro Button o and press Ent...

Страница 9: ...o Click on the Delete button or Using your remote move to highlight the Delete button and press Select After your selection you are returned to the Manage Perfor mances screen Manage Performances Afte...

Страница 10: ...ance with the instruction may cause harmful interference to radio communications However there is no guarantee that interference will not occur in a particular installation If this equipment does caus...

Страница 11: ...Back cover Yoostar Owners Manual booklet indd 20 4 16 09 9 22 25 AM...

Отзывы: