70
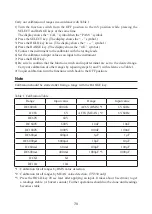
Carry out calibration of ranges in accordance with Table 1.
1) Turn the function switch from the OFF position to the mV position while pressing the
SELECT and RANGE keys at the same time.
The display shows the “ CAL ” symbol then the “ PASS ” symbol.
2) Press the SELECT key. (The display shows the “ - ” symbol.)
3) Press the HOLD key twice. (The display shows the “ - - - ” symbol.)
4) Press the RANGE key. (The display shows the “ mV ” symbol.)
5) Connect the instrument to the calibrator with the testing leads.
6) Set the calibrator to Input value as an input to the instrument.
7) Press the HOLD key.
8) Be sure to confirm that the function switch and input terminal are set to the desired range.
Carry out calibration of other ranges by repairing steps 6) and 7) with reference to Table 1.
9) To quit calibration, turn the function switch back to the OFF position.
Note
Calibration should be started after fixing a range with the RANGE key.
Table 1. Calibration Table
Range
Input value
Range
Input value
DC600mV
600mV
AC6V (RMS) *1
6V 60Hz
DC6V
6V
AC6V (MEAN) *2
6V 60Hz
DC60V
60V
DC600V
600V
10nF
10nF
DC1000V
1000V
100nF
100nF
DC600μA
600μA
1μF
1μF
DC6000μA
6000μA
10μF
10μF
DC60mA
60mA
100μF
100μF
DC600mA
400mA
1000μF *3
1000μF
DC6A
6A
DC10A
10A
*1 : Calibration for all ranges by RMS value detection
*2 : Calibration for all ranges by MEAN value detection. (TY530 only)
*3 : Press the HOLD key 20 sec later after applying an input. It takes about 8 sec(max) to get
a readings stable. (A buzzer sounds.) Further operations should not be done until readings
becomes stable.


