4
3. Assembly
In order for you to be able to take your Crossbuggy wherever you go, we
have reduced the amount of space it requires as far as possible. Simply re-
move the wheels, collapse the backrest and fold in the pull-bar – and your
Crossbuggy is ready to transport. Please follow the instructions carefully.
3.1 Attaching and removing the wheels
Your YippieYo Crossbuggy is equipped with two high-quality disc wheels
with quick-release axles (QR axles), enabling them to be attached or
removed quickly and simply. The tyres require no maintenance and the
axles do not need to be oiled or greased. In order to keep the wheels
maintenance-free the QR axles and the bearings need to be regularly
cleaned. If the wheels show sign of wear or become damaged, it is
essential that they are replaced with original parts.
Assembly:
1. Place the chassis carefully on a
flat surface with the axle pointing
down. Ensure that the brake is
not engaged, otherwise the disc
will not fit between the pads.
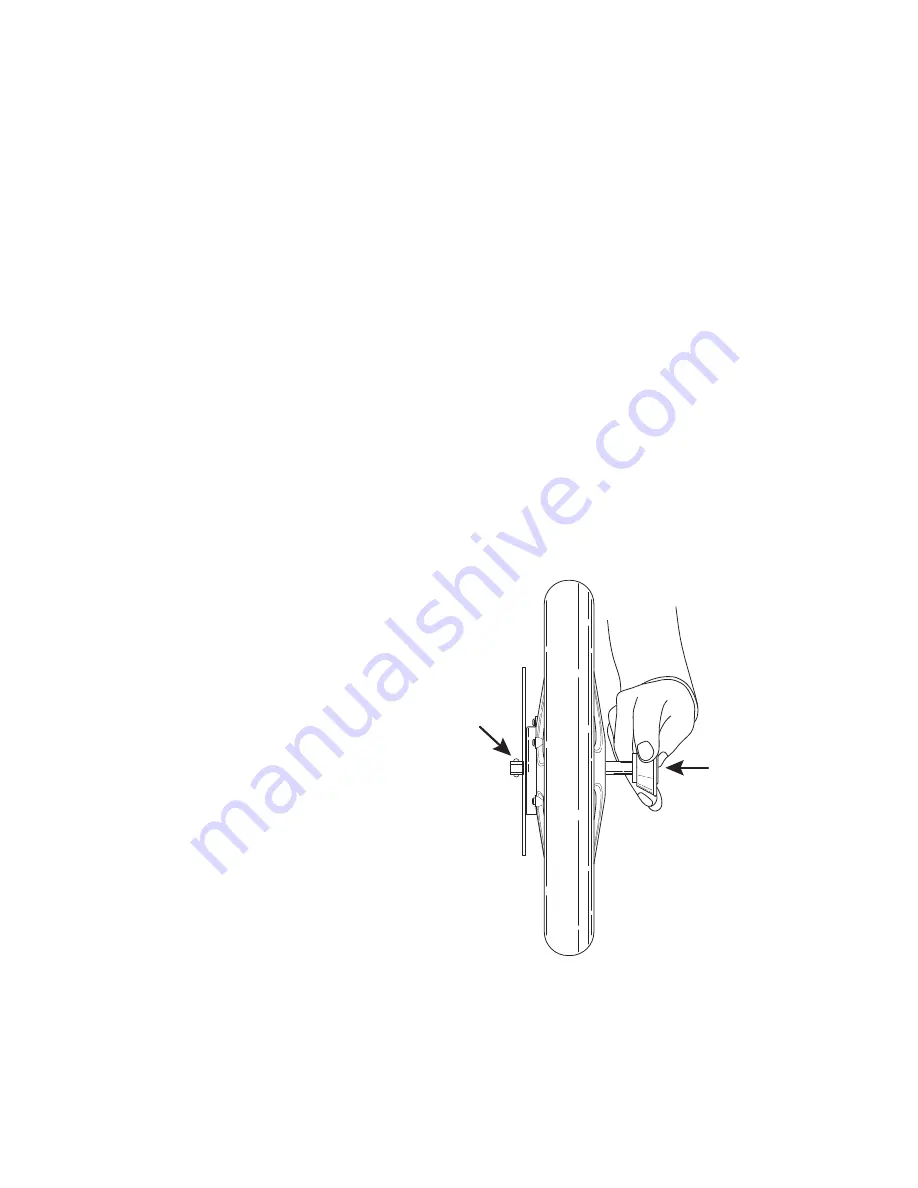
2. Using your thumb press the
black button on the QR axle and
push it through the wheel so that
a small part of the axle with the
two balls protrudes on the inner
side of the wheel (Fig. 1).
Fig. 1
Содержание CROSSBUGGY
Страница 1: ...INSTRUCTIONS FOR USE FOR YOUR CROSSBUGGY...
Страница 17: ...13 Edition February 2016...
Страница 18: ...14...
Страница 19: ...15 Edition February 2016...
Страница 20: ...YippieYo AG Kobiboden 63 CH 8840 Einsiedeln Switzerland...


