User Guide for SIP VP-T49G IP Phone
146
5.
Enter the desired value in the
Label
,
Display Name
,
Register Name
,
User Name
,
Password
and
SIP Server1/2
field respectively. Contact your system administrator for
more information.
6.
If you use the outbound proxy servers, do the following:
1)
Tap the
Outbound Status
field.
2)
Tap
Enabled
in the pop-up dialog box.
3)
Enter the desired value in the
Outbound Proxy1/2
and
Proxy Fallback Interval
field
respectively. Contact your system administrator for more information.
7.
Tap the
Save
soft key to accept the change or to cancel.
You can repeat steps 2 to 7 to register more accounts.
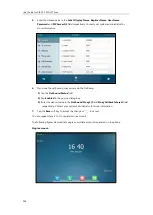
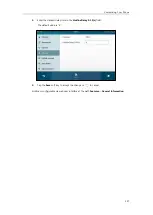
The following figures demonstrate single or multiple accounts registered on the phone:
Single account:
Содержание SIP VP-T49G
Страница 1: ...nime VC_ Clou d ...
Страница 8: ...User Guide for SIP VP T49G IP Phone viii ...
Страница 14: ...User Guide for SIP VP T49G IP Phone xiv ...
Страница 30: ...User Guide for SIP VP T49G IP Phone 30 ...
Страница 158: ...User Guide for SIP VP T49G IP Phone 158 ...
Страница 228: ...User Guide for SIP VP T49G IP Phone 228 ...
Страница 313: ...Appendix 313 Appendix B Menu Structure ...
Страница 314: ...User Guide for SIP VP T49G IP Phone 314 ...


