

16
17
GB
GB
Troubleshooting
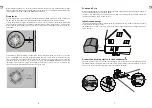
Robotic Mower cannot dock with docking station
•
Check that the boundary wire in front and underneath the charger is in a straight line.
•
Check that the docking station's position is suitable as explained in this manual.
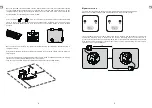
Robotic Mower runs in circles while mowing or while following
boundary wire back to docking station.
•
Verify that no power cable runs parallel and in close proximity the boundary wire. If necessary,
reposition the boundary wire.
•
Check if a front wheel is stuck.
•
If a neighbor has a similar Robotic Mower, the signals may interfere. Try setting your docking
station and Robotic Mower are set to the alternative boundary signal.
•
Driving motor may be damaged, please contact customer support/
The Robotic Mower is noisy.
•
Inspect the blade fixing screws; tighten if necessary.
•
Inspect the blades for damage; replace if necessary.
•
Grass may be too high. Try increasing the cutting height, or mow the lawn with an ordinary
lawnmower first.
•
Cutting motor failure, please call after sales service.
Mower remains at or returns to docking station when pressing START
button
•
Check if the mower has already completed the programmed working time for that day.
•
Battery is low, let give the Robotic Mower time to charge and try again.
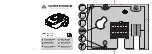
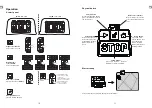
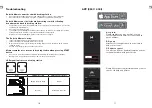
LED signal indicator on docking station
Status
LED Indicator ON
LED Indicator flashing
Battery charging faulty
Normal
Normal
Boundary wire broken
S1
S2
S1
S2
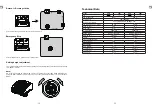
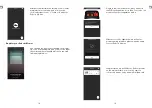
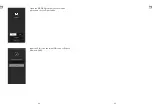
APP (350I / 400I)
A. Login in:
Please register your account first, you can
choose register with email account or mobile
phone number.
B. Sign up
After successful registration, you can login in
with your account.
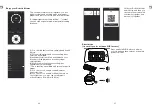
C. Explore as guest
You also can find our dealer information and our
technical knowhow with guest mode.
Please fill your personal information and you also
can choose Skip and fill later.


