2-13
Controls and features
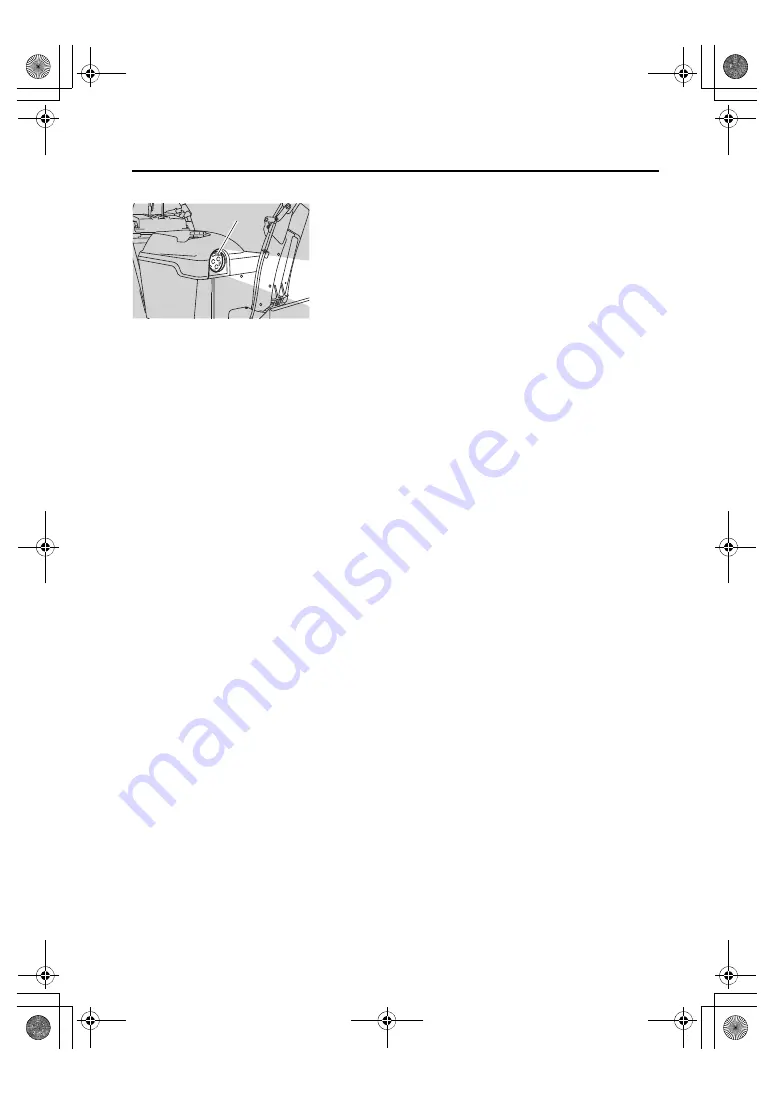
Working light
When starting the engine, the working light comes on automatically and illuminates the front of the Snow-blower.
1
1. Working light
7XE-28199-U6-E0.book 13 ページ 2020年5月1日 金曜日 午後3時43分
Страница 1: ...RJA Read this manual carefully before operating this machine Il convient de lire attentivement ce manuel avant la premi re utilisation de la machine Bitte lesen Sie diese Bedienungsanleitung sorgf lti...
Страница 2: ...7XE 28199 U6_cover_24mm indd 4 6 2020 05 11 15 41 44...
Страница 3: ...Read this manual carefully before operating this machine OWNER S MANUAL YS1070T 7XE 28199 U6 E0 7XE 28199 U6 E0 book 1...
Страница 4: ...the essential health and safety requirements of Directive 2006 42 EC and to the other relevant Directives of EC 2006 42 EC 2014 30 EU 2000 14 EC Amd 2005 88 EC 2011 65 EU E Outer noise Directive Meas...
Страница 5: ...hen depositing the product batteries oil or other components consult a Yamaha dealer for guidelines on protecting the environment All Yamaha products have warranty cards Read the warranty card careful...
Страница 6: ...rdous situation which if not avoided could result in death or serious injury A NOTICE indicates special precautions that must be taken to avoid damage to the machine or other property A TIP provides k...
Страница 7: ...for poor starting or abnormal noise 3 6 Checking the exhaust system 3 6 Checking the auger clutch and drive clutch for operation malfunction 3 7 Checking the chute operation 3 7 Checking any troubles...
Страница 8: ...5 19 Replacing the fuse 5 20 Lubricating each part 5 22 Storage 6 1 Short term 6 1 Long term 6 5 Trouble recovery 7 1 Troubleshooting 7 1 Specifications 8 1 YS1070T 8 1 Noise and vibration 8 2 Consume...
Страница 9: ...wer Be sure to perform the pre operation checks and periodic maintenance Do not allow children or anyone who does not under stand how to operate the Snowblower correctly to operate it Never operate th...
Страница 10: ...or in the chute before operating Never start the engine indoors except when you are moving the Snowblower Exhaust fumes contain harmful chemicals such as carbon monoxide Open the doors and adequately...
Страница 11: ...housing and ground to pre vent gravel from being blown together with snow Do not allow anyone except the operator of the Snowblower near the place you wish to clear snow from Do not look in the rotat...
Страница 12: ...roof or steep slope If abnormal vibrations noises or odors are noticed coming from the Snowblower stop the engine and ask a Yamaha dealer to check and or perform main tenance When you park the Snowbl...
Страница 13: ...re pedestrians are not likely to touch the Snowblower Do not use the Snowblower for purposes other than clearing snow To dislodge snow from the chute stop the engine and use the clean out tool To atta...
Страница 14: ...s To use the product safely read the labels affixed to the machine and use according to the instructions on the labels TIP If these important labels are damaged or missing contact a Yamaha dealer for...
Страница 15: ...1 7 Safety information 1 2 3 5 6 7 4 7XE 28199 U6 E0 book 7...
Страница 16: ...to touch the Snowblower Severe injury could occur if caught in the rotating parts of the chute Do not look into or put hands in the chute while the engine is running To dislodge snow from the chute s...
Страница 17: ...ntrols and features Description 1 Fuel gauge 7 Left side cover 2 Fuel tank 8 Auger 3 Top cover 9 Impeller 4 Transmission HST oil reservoir 10 Auger housing 5 Muffler 11 Chute 6 Fuel cock 2 4 5 6 11 10...
Страница 18: ...s and features 1 Working light 6 Track 2 Clean out tool lodged snow remover 7 Battery 3 Right side cover 8 Control panel 4 Scraper 9 Handlebar 5 Skid 10 Fuel tank cap 1 10 9 3 6 7 8 2 5 4 7XE 28199 U6...
Страница 19: ...te direction control lever 9 Auger housing height control lever 5 Chute deflector control lever 10 Engine switch Engine switch key 1 Fuel cock lever 6 HOSE DRAIN 2 RUN 7 Fuel tank 3 STOP 8 Fuel tank c...
Страница 20: ...Inside the left side cover 1 Fuse 3 Engine oil filler cap 2 Electric starter 4 Engine oil drain bolt 1 Spark plug cap Spark plug 4 Fuel drain hose 2 Carburetor 5 Fuel strainer cup 3 Air filter 6 Fuel...
Страница 21: ...to start the engine The starter motor cranks the engine When releasing the grip the key returns to the ON position auto matically The key cannot be removed TIP Remove the engine switch key when you a...
Страница 22: ...s on Throttle lever Controls the engine speed FAST START Lever position to start the engine and to start snow clearing or moving SLOW Lever position to idle the engine Shift lever Used to switch to fo...
Страница 23: ...moves upward to blow snow long distances 5 4 6 3 1 2 1 Chute direction control lever 2 Right 3 Left 4 Chute 5 Clockwise 6 Counterclockwise Do not press the chute direction control lever forcefully Doi...
Страница 24: ...sed to change the direction R Used to turn right L Used to turn left Auger clutch lever Used to rotate the auger Pull the auger clutch lever The auger rotates TIP It is impossible to pull the auger cl...
Страница 25: ...l tank cap Turn the fuel tank cap counterclockwise to remove Fuel gauge Indicates the fuel level in the fuel tank Refuel when the needle of the fuel gauge is near E Empty TIP This mark identifies the...
Страница 26: ...n to drain the fuel in the fuel hose between the fuel cock and the carbure tor For storage turn the fuel cock lever to this position Skid Skid is used to determine a clearance between the auger end an...
Страница 27: ...and protect the auger If any strong impact is added to the auger the shear bolt will break to protect the auger and the auger shaft Clearance between the au ger end and the road surface Factory set S...
Страница 28: ...keep operating the Snowblower with the damper protruding from the shear bolt guard the shear bolt could break Use genuine shear bolts when replacing A Normal B Time of replacement 3 Shear bolt guard...
Страница 29: ...2 13 Controls and features Working light When starting the engine the working light comes on automatically and illuminates the front of the Snow blower 1 1 Working light 7XE 28199 U6 E0 book 13...
Страница 30: ...Be sure to carry out regular checks and mainte nance of your Snowblower For safe use conduct checks according to your own knowledge and ability Consult a Yamaha dealer about any check related issues t...
Страница 31: ...tank cap and refill the tank TIP This mark identifies the recommended fuel for this machine as specified by European regulation EN228 Check that gasoline nozzle has the same identifier when fueling 2...
Страница 32: ...cause a spark Only refuel outdoors Do not fill gasoline above the specified level up to the base of the filler neck If any gasoline spills wipe it up completely using dry rags After refueling make su...
Страница 33: ...ller cap 4 Make sure that the engine oil is at the correct engine oil level 5 If the engine oil is below the correct engine oil level fill up to the brim of the oil filler hole with the recommended en...
Страница 34: ...the oil level 1 1 Oil level warning light If the oil level warning light comes on while you are operating the Snowblower stop the engine immediately and add sufficient oil to the correct level Otherw...
Страница 35: ...or play is found consult a Yamaha dealer Checking the starter motor operation Turn the engine switch key to the START position and make sure that the starter motor cranks the engine normally Checking...
Страница 36: ...ops See page 4 5 Checking the chute operation After starting the engine make sure that the chute direction control lever and the chute deflector control lever operate normally See page 2 7 Checking an...
Страница 37: ...e START position When the engine has started release this key The key will return to the ON position automatically Never operate the engine in a closed area Exhaust fumes contain harmful chemicals suc...
Страница 38: ...gain to start the engine 5 After starting the engine allow the engine to warm up for a while until the engine speed stabilizes If the oil level warning light comes on when you turn the engine switch k...
Страница 39: ...the fuel cock lever to the STOP position Moving the snowblower 1 Use the auger housing height control lever to raise the auger housing to the highest position 2 1 3 1 Throttle lever 2 FAST START 3 SL...
Страница 40: ...everse position 1 2 4 3 5 1 Shift lever 2 N Neutral 3 Throttle lever 4 FAST START 5 SLOW 1 1 1 Drive clutch lever Move the shift lever to the N Neutral position first and then hold the drive clutch le...
Страница 41: ...l lever See page 2 9 2 Adjust the direction to blow the snow by using the chute direction control lever 1 1 Turning switch Do not point the discharge chute toward people buildings or cars Otherwise it...
Страница 42: ...ttle lever can be controlled with your right hand 6 Move the throttle lever to the FAST START position TIP When you want to blow snow farther away or to oper ate the Snowblower at increased engine spe...
Страница 43: ...wn more effectively when the Snow blower is driven slowly 8 When releasing the drive clutch lever the auger clutch lever automatically returns to its original position the auger rotation stops and the...
Страница 44: ...snow from the auger Hold the drive clutch lever and pull back the auger clutch lever Move the shift lever to the N Neutral position hold the drive clutch lever and pull back the auger clutch lever Re...
Страница 45: ...clutch lever to clear the snow on the auger and impeller Leaving snow on the auger and impeller could cause freeze and damage 4 Release the drive clutch lever The auger clutch lever automatically retu...
Страница 46: ...Remove the sprocket pin from the both side of the wheels 3 The sprocket wheel is now freed from the wheel axle Move the Snowblower by pushing and pull ing holding the handles 4 After moved the Snowbl...
Страница 47: ...4 11 Operation Do not hammer the sprocket pins Doing so may break the pins Always fold and close the ring to prevent it from coming loose NOTICE 7XE 28199 U6 E0 book 11...
Страница 48: ...perform the pre operation check See page 3 1 If any problems are discovered during the inspection contact a Yamaha dealer and request an inspection or maintenance Periodic inspection Yamaha dealers pe...
Страница 49: ...Item Routine Pre operation check Initial Every 1 month 6 months 12 months Handlebar Looseness and play Turning switch Operating conditions Skid Mounting and parallel layout Auger height control Workin...
Страница 50: ...hecking the spark plug Battery Fluid level and specific gravity Motor unit Electric starter working conditions Engine starting condi tions and abnormal noise Measurement of rated engine idle and opera...
Страница 51: ...evel Fuel hose replacement Every 4 years Muffler Check mounting for looseness Muffler condition Chassis and moving parts Damage including cracks and loose parts Lubricating each part Any troubles noti...
Страница 52: ...he engine and warm up for 2 3 minutes 2 Stop the engine and remove the engine switch key 3 Remove the bolts 4 Detach the upper projections from the rubber grommets of the body by pulling down the righ...
Страница 53: ...spills wipe it up immediately using dry rags 10 Install and tighten the engine oil filler cap securely 11 Install the engine oil drain cover by installing the bolts 12 Install the right side cover to...
Страница 54: ...orque Engine oil drain cover bolt 10 N m 1 0 kgf m Right side cover bolt 10 N m 1 0 kgf m Position the Snowblower on a level surface WARNING 1 2 1 Oil reservoir cap 2 Diaphragm 1 2 3 1 Transmission HS...
Страница 55: ...plug is an important component that can be checked relatively easily As the effectiveness of the spark plug gradually falls over time and according to how it is used periodic inspections involving rem...
Страница 56: ...plug wrench 6 Check the spark plug for any signs of burns Burn marks on spark plugs are usually medium to light tan If there are any black or white burn marks consult a Yamaha dealer 7 Remove deposit...
Страница 57: ...pecified torque as soon as possible 10 Install the spark plug cap 11 Install the left side cover to the original position by inserting the projections into the rubber grommets of the body and then ins...
Страница 58: ...sition Gasoline is a highly volatile and flammable fuel When handling gasoline be sure to observe the following points Do not smoke while carrying out a service Also never put any other open flames cl...
Страница 59: ...fuel leaks out 10 Install the left side cover to the original position by inserting the projections into the rubber grommets of the body and then install the bolts and tighten them to the specified to...
Страница 60: ...sing height control lever 7 Check the clearance between the auger end and the road surface 1 2 3 4 1 Skid 2 Auger end 3 Road surface 4 Clearance Clearance between the au ger end and the road surface F...
Страница 61: ...w shear bolts with their washers 5 Install the new locknuts and then tighten them to the specified torque Tightening torque Nut 16 N m 1 6 kgf m Do not look into or put your hands near the impeller or...
Страница 62: ...rt If you keep operating the Snowblower with the damper protruding from the shear bolt guard the shear bolt could break Tighten the locknuts to the specified torque Shear bolts may be damaged if they...
Страница 63: ...orque Adjusting the scraper 1 Stop the engine and remove the engine switch key 2 Loosen the nuts 3 Loosen the left and right bolts 2 3 1 1 Locknut 2 Shear bolt 3 Impeller Tightening torque Locknut 10...
Страница 64: ...rack is correct If the tension of the track is not correct the track may slip or it may fall off Adjust the slack if necessary Checking 1 Stop the engine and remove the engine switch key 2 Check the s...
Страница 65: ...and wheel nuts to the specified torques Replacing the sprocket pin If an excessive load is applied to the driving system for example when the Snowblower is stuck in a rut the sprocket pin will be cut...
Страница 66: ...s since it contains sulfuric acid which causes severe burns Avoid any contact with skin eyes or cloth ing and always shield your eyes when working near batteries In case of contact administer the foll...
Страница 67: ...maha dealer add distilled water Replacing the fuse 1 Stop the engine and remove the engine switch key Position the Snowblower on a level surface WARNING 1 2 1 Minimum level mark LOWER LEVEL 2 Maximum...
Страница 68: ...e electrical system 5 Install the right side cover to the original position by inserting the projections into the rubber grom mets of the body and then install the bolts and tighten them to the specif...
Страница 69: ...f chute deflector control lever Shift lever moving parts Drive clutch lever moving parts Auger clutch lever moving parts Throttle lever moving parts Chute assembly moving parts Chute motor gears and r...
Страница 70: ...5 23 Periodic maintenance 6 Chute assembly moving parts 7 Chute motor gears and ring gears 6 7 6 7XE 28199 U6 E0 book 23...
Страница 71: ...ore starting the service discharge any static electricity on yourself by touching a metal chas sis or other metal object When you extract the gasoline from the fuel tank place the Snowblower in a well...
Страница 72: ...battery fluid on page 5 19 4 Empty the fuel tank TIP Prepare a suitable container to collect the extracted gasoline 5 Turn the fuel cock lever from the RUN position to the STOP position 6 Remove the b...
Страница 73: ...l cock to collect the drained gasoline Remove the ring nut of the fuel cock and then remove the fuel strainer cup TIP If the ring nut is too tight loosen it using a wrench or other tool 10 Turn the fu...
Страница 74: ...stall the top cover to the original position 15 Tighten the fuel tank cap securely 16 Install the fuel strainer cup and the ring nut then tighten the ring nut securely 17 Make sure that the fuel cock...
Страница 75: ...wer in a low humidity and well ventilated space indoors Long term If the Snowblower is not used for a long period of time follow the steps below to keep it in good condition 1 Follow steps 1 21 under...
Страница 76: ...ch at the ON position Turn the engine switch to the ON position Then turn the engine switch to the START position to start the engine 2 5 4 1 Did you operate the starter motor for more than 5 seconds...
Страница 77: ...than the top of the au ger housing Item Check Action Page Auger shear bolt Is the auger shear bolt bro ken Replace the auger shear bolt 5 14 Impeller shear bolt Is the impeller shear bolt bro ken Repl...
Страница 78: ...0 r min 1 Fuel type Unleaded regular gasoline Fuel tank capacity 6 7 L Lubrication system Wet sump forced spray type Recommended engine oil YAMALUBE SAE 5W 30 API Service SE type or higher Engine oil...
Страница 79: ...conditions a parent engine representative of the engine family and shall not imply or express any guarantee of the performance of a particular engine Noise and vibration YS1070T Drive V belt Mitsubos...
Страница 80: ...eck the product serial number label and fill the prod uct name and the product serial number columns at below Also record the product name and product serial num ber separately in case of theft or eme...
Страница 81: ...l lever 2 7 Cleaning the fuel strainer 5 11 Clean out tool Lodged snow remover 2 12 Clearing snow 4 5 Control function 2 5 D Description 2 1 Drive clutch lever 2 8 E Engine switch 2 5 F Fuel cock 2 10...
Страница 82: ...Printed in Japan 2020 05 0 1 1 E 7XE 28199 U6 E0 book 1...
Страница 83: ...7XE 28199 U6_cover_24mm indd 4 6 2020 05 11 15 41 44...
Страница 84: ...RJA Read this manual carefully before operating this machine Il convient de lire attentivement ce manuel avant la premi re utilisation de la machine Bitte lesen Sie diese Bedienungsanleitung sorgf lti...