PERIODIC MAINTENANCE AND MINOR REPAIR
6-33
1
2
3
4
5
6
7
8
9
EAU25080
Rear wheel
EAU25280
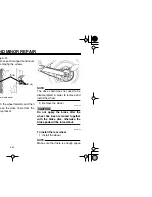
To remove the rear wheel
WARNING
EWA10820
●
It is advisable to have a Yamaha
dealer service the wheel.
●
Securely support the machine
so that there is no danger of it
falling over.
1. Remove the axle nut cotter pin,
and then loosen the axle nut.
2. Lift the rear wheel off the ground
according to the procedure on
page 6-31.
3. Remove each swingarm end cover
by removing the screws.
4. Push the wheel forward, and then
remove the drive chain from the
rear sprocket.
NOTE:
The drive chain does not need to be
disassembled in order to remove and
install the wheel.
5. Remove the wheel.
CAUTION:
ECA11070
Do not apply the brake after the
wheel has been removed together
with the brake disc, otherwise the
brake pads will be forced shut.
EAU25630
To install the rear wheel
1. Install the wheel.
NOTE:
Make sure that there is enough space
1. Axle nut cotter pin
2. Axle nut
1
2
1. Swingarm end cover
2. Screw
1
(
×
2
)
2
(
×
2
)
2
(
×
2
)
Содержание TT-R250
Страница 1: ...OWNER S MANUAL 5GF 28199 16 TTR250T C LIT 11626 18 24 ...
Страница 2: ...5GF 16_hyoushi2 3 4 14 04 8 00 PM Page 1 ...
Страница 8: ......
Страница 12: ...1 4 ...
Страница 13: ...1 6 EAU10381 y before operating this vehicle 2 3 4 ...
Страница 15: ...2 1 EAU10410 3 4 5 6 7 2 ing dial 8 Front fork damping adjusting screw page 3 7 ...
Страница 17: ...2 3 EAU10430 3 4 5 6 7 ...
Страница 36: ...RATION AND IMPORTANT RIDING POINTS 5 4 2 3 4 5 6 7 8 9 ...
Страница 78: ...SPECIFICATIONS 8 3 2 3 4 5 6 7 8 9 ...
Страница 80: ...CONSUMER INFORMATION 9 2 2 3 4 5 6 7 8 9 ...
Страница 83: ...9 5 EAU26670 S A OFF ROAD MOTORCYCLE LIMITED WARRANTY ...
Страница 84: ...CONSUMER INFORMATION 9 6 2 3 4 5 6 7 8 9 ...
Страница 86: ...CONSUMER INFORMATION 9 8 2 3 4 5 6 7 8 9 benefits of sy knowing n after your amaha with We ll be ed ...


