background image


3-1


2

3

4

5

6

7

8

9


INSTRUMENT AND CONTROL FUNCTIONS


EAU10450


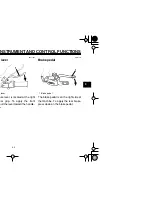
Main switch 


The main switch controls the ignition
and lighting systems. The various main
switch positions are described below.


EAU10630


ON


All electrical systems are supplied with
power, and the engine can be started.
The key cannot be removed.


EAU10660


OFF


All electrical systems are off. The key
can be removed.


EAU11830


Tripmeter 


The tripmeter shows the distance trav-
eled since it was last set to zero with the
reset knob. The tripmeter can be used
to estimate the distance that can be
traveled with a full tank of fuel. This in-
formation will enable you to plan future
fuel stops.


EAU12343


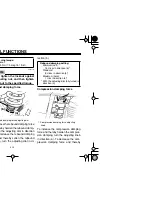
Handlebar switches 


Left

Right

OFF

ON


1. Tripmeter
2. Tripmeter reset knob

1

2


1. Light switch “

1. Engine stop switch “

/

2. Start switch “START”

1

1

2

Содержание TT-R250

Страница 1: ...OWNER S MANUAL 5GF 28199 16 TTR250T C LIT 11626 18 24 ...

Страница 2: ...5GF 16_hyoushi2 3 4 14 04 8 00 PM Page 1 ...

Страница 3: ... result of Yamaha s vast experience in the pro acing machines It represents the high degree of craftsmanship and reli ields operation inspection and basic maintenance of this machine If you have nance of your machine please consult a Yamaha dealer ...

Страница 4: ... printing there may be minor discrepancies between your machine oncerning this manual please consult your Yamaha dealer Symbol means ATTENTION BECOME ALERT YOUR SAFETY IS WARNING instructions could result in severe injury or death to the a bystander or a person inspecting or repairing the machine ates special precautions that must be taken to avoid damage to key information to make procedures easi...

Страница 5: ...ND OPERATING FEATURES AND UNTIL ROPER RIDING TECHNIQUES REGULAR INSPECTIONS AND CARE DING SKILLS WILL ENSURE THAT YOU SAFELY ENJOY THE CAPA CHINE EWA10040 CTURED FOR OFF ROAD USE ONLY IT IS ILLEGAL TO OPERATE OAD OR HIGHWAY SUCH USE IS PROHIBITED BY LAW THIS MA E OFF HIGHWAY NOISE LEVEL AND SPARK ARRESTER LAWS AND AL RIDING LAWS AND REGULATIONS BEFORE OPERATING THIS ...

Страница 6: ...E TTR250T OWNER S MANUAL amaha Motor Corporation U S A 1st edition April 2004 All rights reserved printing or unauthorized use ut the written permission of a Motor Corporation U S A s expressly prohibited Printed in Japan P N LIT 11626 18 24 ...

Страница 7: ...ting the clutch lever free play 6 18 Adjusting the brake lever free play 6 18 Checking the front and rear brake pads 6 19 Checking the brake fluid level 6 20 Changing the brake fluid 6 21 Drive chain slack 6 21 Lubricating the drive chain 6 23 Checking and lubricating the cables 6 23 Checking and lubricating the throttle grip and cable 6 24 Checking and lubricating the brake and clutch levers 6 24...

Страница 8: ......

Страница 9: ... pical error made by the operator is veering wide on a turn due to EXCESSIVE SPEED or undercor nering insufficient lean angle for the speed Never travel faster than warranted by conditions Ride cautiously in unfamiliar ar eas You may encounter hidden obstacles that could cause an ac cident The posture of the operator is im portant for proper control The op erator should keep both hands on the hand...

Страница 10: ...hine to minimize imbal ce or instability Shifting weights can create a sud den imbalance Make sure that ac cessories and cargo are securely attached to the machine before riding Check accessory mounts and cargo restraints frequently Never attach any large or heavy items to the handlebar front fork or front fender These items in cluding such cargo as sleeping bags duffel bags or tents can create un...

Страница 11: ...aust pipe s muffler s when refuel ng Never refuel while smoking or in the vicinity of an open flame Never start the engine or let it run for any length of time in a closed area The exhaust fumes are poi sonous and may cause loss of consciousness and death within a short time Always operate your machine in an area that has ade quate ventilation Always turn the engine off before leaving the machine ...

Страница 12: ...1 4 ...

Страница 13: ...1 6 EAU10381 y before operating this vehicle 2 3 4 ...

Страница 14: ...S MANUAL AND ALL LABELS NEVER CARRY A PASSENGER You increase you operate this vehicle on a public road EXPERIENCED RIDER ONLY 8 8 8 8 8 5PA 2118K 00 ALWAYS WEAR AN APPROVED MOTORCYCLE HELMET eye protection and protective clothing ROADS You can collide with another vehicle if NEVER OPERATE THIS VEHICLE ON PUBLIC your risk of losing control if you carry a passenger BEFORE YOU OPERATE THIS VEHICLE RE...

Страница 15: ...2 1 EAU10410 3 4 5 6 7 2 ing dial 8 Front fork damping adjusting screw page 3 7 ...

Страница 16: ...DESCRIPTION 2 2 2 3 4 5 6 7 8 9 EAU10420 3 4 5 6 7 8 djusting 8 Shock absorber assembly spring preload adjusting nut page 3 9 ...

Страница 17: ...2 3 EAU10430 3 4 5 6 7 ...

Страница 18: ...av nce it was last set to zero with the nob The tripmeter can be used mate the distance that can be d with a full tank of fuel This in on will enable you to plan future ps EAU12343 Handlebar switches Left Right eter eter reset knob 1 2 1 Light switch 1 Engine stop switch 2 Start switch START 1 1 2 ...

Страница 19: ...To disengage the clutch pull the lever toward the handle bar grip To engage the clutch release the lever The lever should be pulled rapidly and released slowly for smooth clutch operation The clutch lever is equipped with a clutch switch which is part of the start ing circuit cut off system See page 3 11 1 Clutch lever 1 ...

Страница 20: ...90 e lever ake lever is located at the right bar grip To apply the front pull the lever toward the handle p EAU12941 Brake pedal The brake pedal is on the right side of the machine To apply the rear brake press down on the brake pedal e lever 1 1 Brake pedal 1 ...

Страница 21: ...he use of leaded gasoline will cause severe damage to internal engine parts such as the valves and piston rings as well as to the exhaust system Your Yamaha engine has been de signed to use regular unleaded gaso line with a pump octane number R M 2 of 86 or higher or a research octane number of 91 or higher If knocking or pinging occurs use a gasoline of a different brand or premi um unleaded fuel...

Страница 22: ...re that the end of the fuel nk breather hose is not blocked d clean it if necessary EAU13560 Fuel cock The fuel cock supplies fuel from the tank to the carburetor while filtering it al so The fuel cock has three positions OFF With the lever in this position fuel will not flow Always return the lever to this position when the engine is not running ank breather hose 1 1 Arrow mark positioned over OF...

Страница 23: ...the lever back to er refueling EAU13600 Starter choke knob Starting a cold engine requires a richer air fuel mixture which is supplied by the starter choke Move the knob in direction a to turn on the starter choke Move the knob in direction b to turn off the starter choke 1 Starter choke knob 1 a b ...

Страница 24: ...ate and screws for adjusting the damping force WARNING EWA10190 There should be no difference in air pressure between the fork legs Spring rate The total spring rate is adjusted by changing the air pressure as follows 1 Lift the front wheel off the ground according to the procedure on page 6 31 NOTE When checking and adjusting the air pressure there should be no weight on the front end of the vehi...

Страница 25: ... move the rubber cap from each k leg 2 To increase the damping force and thereby harden the damping turn the adjusting screw on each fork leg in direction a To decrease the damping force and thereby soften the damping turn the ad justing screw on each fork leg in di rection b g rate nimum soft Air pressure 0 kPa 0 psi 0 kgf cm2 ndard Air pressure 0 kPa 0 psi 0 kgf cm2 ximum hard Air pressure 40 kP...

Страница 26: ...obtain a precise adjustment d be advisable to check the num clicks of each damping force ad mechanism and to modify the cations as necessary EAU15070 Adjusting the shock absorber assembly This shock absorber assembly is equipped with a spring preload adjust ing nut a rebound damping force ad justing dial and a compression damping force adjusting knob CAUTION ECA10100 Never attempt to turn an adjus...

Страница 27: ...n b Compression damping force To increase the compression damping force and thereby harden the compres sion damping turn the adjusting knob in direction a To decrease the com pression damping force and thereby ening torque cknut 70 Nm 7 0 m kgf 51 ft lbf und damping force adjusting dial b a Rebound damping setting Minimum soft 16 clicks in direction b Standard 8 clicks in direction b Maximum hard ...

Страница 28: ...y explode due to excessive s pressure o not deform or damage the s cylinder in any way as this ll result in poor damping per rmance ways have a Yamaha dealer rvice the shock absorber EAU15390 Starting circuit cut off system The starting circuit cut off system com prising the clutch switch and the neutral switch prevents starting when the transmission is in gear and the clutch lever is not pulled P...

Страница 29: ...ctive The motorcycle should not be ridden until checked by a Yamaha dealer The clutch switch may be defective The motorcycle should not be ridden until checked by a Yamaha dealer NOTE a warmed up engine dden This check is most reliable if performed with ...

Страница 30: ...as a result of exposure to the elements Any damage fluid leakage or loss ces Therefore it is very important in addition to a thorough visual inspec e he vehicle is used Such an inspection can be accomplished in a very short n worth the time involved EWA11150 ot working properly have it inspected and repaired before operating ...

Страница 31: ...c system y or wear y eservoir commended brake fluid to specified level tem for leakage 6 18 6 19 6 20 ve Yamaha dealer bleed hydraulic system or wear y eservoir commended brake fluid to specified level tem for leakage 6 19 6 20 cessary y 6 18 ation is smooth ay amaha dealer adjust cable free play and lubricate cable 6 14 6 24 ...

Страница 32: ...smooth ary 6 23 on ary 6 21 6 23 n and tread depth y 6 15 6 17 ration is smooth oting points if necessary 6 24 ration is smooth ting points if necessary 6 24 ration is smooth cessary 6 25 nuts bolts and screws are properly tightened y y 3 1 CHECKS PAGE ...

Страница 33: ...ion into the neu position n the starter choke on and completely close the throttle See page 3 6 5 Start the engine by pushing the start switch NOTE If the engine fails to start release the start switch wait a few seconds and then try again Each starting attempt should be as short as possible to pre serve the battery Do not crank the en gine more than 10 seconds on any one attempt 6 After starting ...

Страница 34: ...AU16671 Shifting Shifting gears lets you control the amount of engine power available for starting off accelerating climbing hills etc The gear positions are shown in the il lustration NOTE To shift the transmission into the neu tral position press the shift pedal down repeatedly until it reaches the end of its travel and then slightly raise it 1 Shift pedal 2 Neutral position 5 4 3 2 N 1 6 1 2 ...

Страница 35: ...ation should wed with a substantial rest peri he engine To allow the engine down from the temporary build eat cruise at a lower engine 0 10 hours Avoid prolonged operation above 1 2 throttle After every hour of operation stop the engine and then let it cool for five to ten minutes Vary the engine speed from time to time Do not operate the engine at one set throttle position 10 20 hours Avoid prolo...

Страница 36: ...RATION AND IMPORTANT RIDING POINTS 5 4 2 3 4 5 6 7 8 9 ...

Страница 37: ... ance and minor repairs How dditional tools such as a torque may be necessary to perform maintenance work correctly o not have the tools or experi quired for a particular job have ha dealer perform it for you ARNING EWA10340 ations not approved by a may cause loss of perfor excessive emissions and the vehicle unsafe for use t a Yamaha dealer before at ng any changes ...

Страница 38: ...a and technical CKS AND MAINTENANCE JOBS INITIAL EVERY 100 mi 150 km or 1 month 600 mi 1000 km or 6 months 1200 mi 2000 km or 12 months oses for cracks or damage cessary on nd clean djust valve clearance when engine is cold lvent cessary tion hose for cracks or damage and drain any cessary e idling speed and starter operation ssary kage essary ket s if necessary m engine before draining rm engine ...

Страница 39: ... and for fluid leakage pads if necessary ks or damage Every 4 years spoke tightness and for damage s if necessary epth and for damage essary sure ssary s for smooth operation essary assemblies for looseness pack with lithium soap based grease ack alignment and condition icate chain with a special O ring chain lubricant Every ride assemblies for looseness ack with lithium soap based grease every 12...

Страница 40: ...p based grease all purpose grease lightly on and for oil leakage cessary on and for oil leakage cessary enum disulfide grease lightly a chain and cable lube or engine oil 10W 30 thor on and free play ottle cable free play if necessary throttle grip housing and cable CKS AND MAINTENANCE JOBS INITIAL EVERY 100 mi 150 km or 1 month 600 mi 1000 km or 6 months 1200 mi 2000 km or 12 months ...

Страница 41: ...ND MINOR REPAIR 6 5 EAU18670 ou are riding in unusually wet or dusty areas the brake fluid level onents of the brake master cylinders and calipers and change the brake and if cracked or damaged ...

Страница 42: ...e the cowling screws and then cowling off as shown To install the cowling Place the cowling in the original posi tion and then install the screws EAU19292 Panels A and B To remove one of the panels Remove the screw and then pull the panel off as shown l B w 1 1 3 1 Screw 2 Panel A 1 2 ...

Страница 43: ...k plug as shown h the spark plug wrench includ in the owner s tool kit To check the spark plug 1 Check that the porcelain insulator around the center electrode of the spark plug is a medium to light tan the ideal color when the vehicle is ridden normally NOTE If the spark plug shows a distinctly dif ferent color the engine could be defec tive Do not attempt to diagnose such problems yourself Inste...

Страница 44: ... the oil must be changed and the oil filter ele ment cleaned at the intervals specified in the General maintenance and lubri cation chart To check the engine oil level 1 Place the vehicle on a level sur face and hold it in an upright posi tion NOTE Make sure that the vehicle is positioned straight up when checking the oil level A slight tilt to the side can result in a false reading 2 Start the en...

Страница 45: ... the oil filter element drain bolt to drain the oil from the oil filter element NOTE Skip steps 5 9 if the oil filter element is not being cleaned 5 Remove the oil filter element cover by removing the bolts 6 Remove the oil filter element and O rings e oil filler bolt e oil drain bolt 1 1 Oil filter element drain bolt 2 Bolt 3 Oil filter element cover 1 3 2 2 ...

Страница 46: ...i fication of CD or oils of a high er quality than specified In addition do not use oils labeled ENERGY CONSERVING II or higher Make sure that no foreign mate rial enters the crankcase 13 Start the engine and then let it idle for several minutes while checking it for oil leakage If oil is leaking im mediately turn the engine off and check for the cause tening torque filter element cover bolt 10 Nm...

Страница 47: ...ntenance and lubrication chart Clean the air filter element more fre quently if you are riding in unusually wet or dusty areas 1 Remove panel A See page 6 6 2 Remove the air filter case cover by removing the holding clips 3 Pull the air filter element out of the air filter case bolt ening torque ed bolt 7 Nm 0 7 m kgf 5 0 ft lbf 1 1 Holding clip 1 3 ...

Страница 48: ...r filter ele ent into the air filter case and en install the air filter case cover installing the holding clips CAUTION ECA10480 Make sure that the air filter ele ment is properly seated in the air filter case The engine should never be op erated without the air filter ele ment installed otherwise the piston s and or cylinder s may become excessively worn 8 Install the panel ecommended oil Yamaha ...

Страница 49: ...the tailpipe move the purging bolt 5 Start the engine and rev it approx imately twenty times while mo mentarily creating exhaust system back pressure using a shop towel to block the end of the muffler 6 Stop the engine and allow the ex haust pipe to cool 7 Install the purging bolt and tighten it e arrester 2 1 Purging bolt 1 ...

Страница 50: ...he cable free play and if neces ave a Yamaha dealer adjust it EAU21400 Adjusting the valve clearance The valve clearance changes with use resulting in improper air fuel mixture and or engine noise To prevent this from occurring the valve clearance must be adjusted by a Yamaha dealer at the intervals specified in the periodic maintenance and lubrication chart tle cable free play 1 ...

Страница 51: ...ely cked items which can shift during a ride Securely pack the heaviest items close to the center of the vehicle and distribute the weight evenly on both sides Adjust the suspension and tire air pressure with regard to the load Check the tire condition and air pressure before each ride Tire inspection The tires must be checked before each ride If a tire tread shows crosswise lines minimum tread de...

Страница 52: ...of control e replacement of all wheel d brake related parts includ g the tires should be left to a maha dealer who has the cessary professional knowl ge and experience s not recommended to patch punctured tube If unavoid le however patch the tube very carefully and replace it as soon as possible with a high quality product t tire ze 80 100 21 51M anufacturer model DUNLOP D739FA tire ze 100 100 18 ...

Страница 53: ...n the in stability of the original Genuine Yamaha Parts and ories are designed and test e compatible with your vehi Please consider Genuine a Parts and Accessories be aking a purchase Use of maha approved accessories acement parts may cause handling stability and riding Since Yamaha cannot con e quality of accessories or anufactured by other compa amaha cannot be held liable y consequences caused ...

Страница 54: ...ee ay turn the adjusting nut in direc n a To decrease the clutch le r free play turn the adjusting nut direction b ghten both locknuts EAU22092 Adjusting the brake lever free play The brake lever free play should mea sure 2 0 5 0 mm 0 08 0 20 in as shown Periodically check the brake le ver free play and if necessary adjust it as follows 1 Loosen the locknut at the brake le ver 2 To increase the br...

Страница 55: ...ch brake pad is provided with a wear indicator which allows you to check the brake pad wear without having to disassemble the brake To check the brake pad wear check the position of the wear indicator while applying the brake If a brake pad has worn to the point that the wear indi cator almost touches the brake disc have a Yamaha dealer replace the brake pads as a set ndicator ndicator 1 1 ...

Страница 56: ...s may deteriorate causing akage and poor braking perfor ance fill with the same type of brake d Mixing fluids may result in a rmful chemical reaction and ad to poor braking performance careful that water does not en the brake fluid reservoir when refilling Water will significantly lower the boiling point of the fluid and may result in vapor lock Brake fluid may deteriorate paint ed surfaces or pla...

Страница 57: ...shing machine to locate the tightest tion of the drive chain and then asure the drive chain slack as own 4 If the drive chain slack is incorrect adjust it as follows EAU22910 To adjust the drive chain slack 1 Remove the cotter pin from the axle nut and then loosen the axle nut 2 To tighten the drive chain turn the adjusting plate on each side of the swingarm in direction a To loos en the drive cha...

Страница 58: ... a new cotter pin into the axle t and then bend its ends as own ure that two notches in the axle aligned with the hole through eel axle otherwise further tight axle nut until they are WARNING EWA10700 Always use a new cotter pin for the axle nut tening torque le nut 105 Nm 10 5 m kgf 76 ft lbf r pin 1 ...

Страница 59: ...ecked before each ride and the ca bles and cable ends should be lubricat ed if necessary If a cable is damaged or does not move smoothly have a Yamaha dealer check or replace it WARNING EWA10710 Damage to the outer housing of ca bles may result in internal rusting and cause interference with cable movement Replace damaged ca bles as soon as possible to prevent unsafe conditions Recommended lubrica...

Страница 60: ...ed before each nd the lever pivots should be lu d if necessary EAU23180 Lubricating the brake pedal The operation of the brake pedal should be checked before each ride and the pedal pivot should be lubricat ed if necessary ecommended lubricant Lithium soap based grease all purpose grease Recommended lubricant Lithium soap based grease all purpose grease ...

Страница 61: ... so that no danger of it falling over the inner tubes for scratches e and excessive oil leakage ck the operation ce the vehicle on a level sur e and hold it in an upright posi n ile applying the front brake sh down hard on the handlebars eral times to check if the front k compresses and rebounds oothly CAUTION ECA10590 If any damage is found or the front fork does not operate smoothly have a Yamah...

Страница 62: ...king the wheel bearings The front and rear wheel bearings must be checked at the intervals specified in the periodic maintenance and lubrica tion chart If there is play in the wheel hub or if the wheel does not turn smoothly have a Yamaha dealer check the wheel bearings ...

Страница 63: ...cient ventilation when arging it in an enclosed space KEEP THIS AND ALL BATTER IES OUT OF THE REACH OF CHILDREN To charge the battery Have a Yamaha dealer charge the bat tery as soon as possible if it seems to have discharged Keep in mind that the battery tends to discharge more quickly if the vehicle is equipped with optional electrical accessories To store the battery 1 If the vehicle will not b...

Страница 64: ...use and then tall a new fuse of the specified mperage CAUTION ECA10640 Do not use a fuse of a higher amper age rating than recommended to avoid causing extensive damage to the electrical system and possibly a fire 3 Turn the key to ON and turn on the electrical circuits to check if the devices operate 4 If the fuse immediately blows again have a Yamaha dealer check the electrical system e fuse 1 2...

Страница 65: ...then secure it with the b holder CAUTION ECA10660 Do not touch the glass part of the headlight bulb to keep it free from oil otherwise the transparency of the glass the luminosity of the bulb and the bulb life will be adversely af fected Thoroughly clean off any dirt and fingerprints on the headlight bulb using a cloth moistened with al cohol or thinner ght bulb holder 1 1 Headlight bulb 1 ...

Страница 66: ...ving the screws move the defective bulb by shing it in and turning it counter ckwise 3 Insert a new bulb into the socket push it in and then turn it clock wise until it stops 4 Install the lens by installing the screws CAUTION ECA10680 Do not overtighten the screws oth erwise the lens may break w ht lens 1 2 2 1 Bulb 1 ...

Страница 67: ...heel axle holder nuts n the wheel axle 3 Lift the front wheel off the ground according to the procedure on page 6 31 4 Pull the wheel axle out and then remove the wheel CAUTION ECA11070 Do not apply the brake after the wheel has been removed together with the brake disc otherwise the brake pads will be forced shut EAU24961 To install the front wheel 1 Install the tripmeter gear unit into 1 Tripmet...

Страница 68: ...s are ed in this sequence there be a gap at the bottom of the lder 5 While applying the front brake push down hard on the handlebars several times to check if the front fork compresses and rebounds smoothly 6 Connect the tripmeter cable ner el axle el axle holder nut tening torque heel axle 58 Nm 5 8 m kgf 42 ft lbf 3 4 1 Upper nut 2 Lower nut 3 Gap Tightening torque Wheel axle holder nut 10 Nm 1 ...

Страница 69: ... chain does not need to be disassembled in order to remove and install the wheel 5 Remove the wheel CAUTION ECA11070 Do not apply the brake after the wheel has been removed together with the brake disc otherwise the brake pads will be forced shut EAU25630 To install the rear wheel 1 Install the wheel NOTE Make sure that there is enough space arm end cover 1 2 2 2 ...

Страница 70: ...e can cause poor starting and power ollowing troubleshooting chart ents a quick and easy procedure cking these vital systems your owever should your machine re ny repair take it to a Yamaha whose skilled technicians have cessary tools experience and ow to service the machine prop nly genuine Yamaha replace arts Imitation parts may look like a parts but they are often inferi e a shorter service lif...

Страница 71: ...ition Have a Yamaha dealer check the vehicle ry cloth and correct the or replace the spark plug dealer check the vehicle The engine does not start Have a Yamaha dealer check the vehicle The engine does not start Check the battery The battery is good Check the battery lead connections and charge the battery if necessary Open the throttle halfway and operate the electric starter ...

Страница 72: ...ic o not use any harsh chemical oducts on plastic parts Be re to avoid using cloths or sponges which have been in contact with strong or abrasive cleaning products solvent or thinner fuel gasoline rust re movers or inhibitors brake flu id antifreeze or electrolyte Do not use high pressure wash ers or steam jet cleaners since they cause water seepage and deterioration in the following ar eas seals ...

Страница 73: ...ed through polishing prevent corrosion it is recom nded to apply a corrosion pro tection spray on all metal including chrome and nickel plat ed surfaces 5 Use spray oil as a universal clean er to remove any remaining dirt 6 Touch up minor paint damage caused by stones etc 7 Wax all painted surfaces 8 Let the machine dry completely before storing or covering it WARNING EWA10930 Make sure that there...

Страница 74: ... ain the carburetor float chamber by loosening the drain bolt this will prevent fuel deposits from building up Pour the drained fuel into the fuel tank 4 Fill up the fuel tank and add fuel stabilizer if available to prevent the fuel tank from rusting and the fuel from deteriorating 5 Perform the following steps to pro tect the cylinder piston rings etc from corrosion a Remove the spark plug cap an...

Страница 75: ...AGE 7 4 not store the battery in an ex ssively cold or warm place ss than 0 C 30 F or more n 30 C 90 F For more in mation on storing the battery e page 6 27 any necessary repairs before he machine ...

Страница 76: ...44 Imp gal etor acturer KEI Type x quantity Y30P x 1 Spark plug s Manufacturer model NGK CR9E Manufacturer model DENSO U27ESR N Spark plug gap 0 7 0 8 mm 0 028 0 031 in Clutch Clutch type Wet multiple disc Transmission Primary reduction system Spur gear Primary reduction ratio 74 24 3 083 Secondary reduction system Chain drive Secondary reduction ratio 52 13 4 000 Transmission type Constant mesh 6...

Страница 77: ... Telescopic fork Spring shock absorber type Coil air spring oil damper Wheel travel 280 0 mm 11 02 in Rear suspension Type Swingarm link suspension Spring shock absorber type Coil spring gas oil damper Wheel travel 280 0 mm 11 02 in Electrical system Ignition system DC C D I Charging system A C magneto Battery Model GT7B 4 Voltage capacity 12 V 6 5 Ah Headlight Bulb type Halogen bulb Bulb voltage ...

Страница 78: ...SPECIFICATIONS 8 3 2 3 4 5 6 7 8 9 ...

Страница 79: ...00 Vehicle identification number The vehicle identification number is stamped into the steering head pipe Record this number in the space pro vided NOTE The vehicle identification number is used to identify your machine and may be used to register your machine with the licensing authority in your area entification number 1 Vehicle identification number 1 ...

Страница 80: ...CONSUMER INFORMATION 9 2 2 3 4 5 6 7 8 9 ...

Страница 81: ...corporated into any new ve e or delivery to the ultimate purchaser or while it is in use or 2 the use of has been removed or rendered inoperative by any person TITUTE TAMPERING ARE THE ACTS LISTED BELOW ystems i e modification removal etc haust system Muffler Exhaust pipe Silencer ake system Air cleaner case Air cleaner element Intake duct ...

Страница 82: ...CONSUMER INFORMATION 9 4 2 3 4 5 6 7 8 9 EAU26651 n the machine is serviced Mileage Servicing dealer name and address Remarks ...

Страница 83: ...9 5 EAU26670 S A OFF ROAD MOTORCYCLE LIMITED WARRANTY ...

Страница 84: ...CONSUMER INFORMATION 9 6 2 3 4 5 6 7 8 9 ...

Страница 85: ...d and lodging when you are away from home This superb coverage goes into effect when you purchase Y E S so it applies to any warranty repairs as well as covered repairs during your entire Y E S plan period Y E S coverage is honored at any authorized Yamaha dealer nationwide Y E S coverage is transferable to a new owner if you sell or trade in That can make your Yamaha much more valuable This excel...

Страница 86: ...CONSUMER INFORMATION 9 8 2 3 4 5 6 7 8 9 benefits of sy knowing n after your amaha with We ll be ed ...

Страница 87: ...k plug checking 6 7 Specifications 8 1 Starter choke knob 3 6 Starting and warming up a cold engine 5 1 Starting circuit cut off system 3 11 Start switch 3 2 Steering checking 6 26 Storage 7 3 Supporting the motorcycle 6 31 T Taillight bulb replacing 6 30 Throttle cable free play adjusting 6 14 Throttle grip and cable checking and lubricating 6 24 Tires 6 15 Tool kit 6 1 Tripmeter 3 1 Troubleshoot...

Страница 88: ...PRINTED IN JAPAN 2002 5 0 6 1 E PRINTED ON RECYCLED PAPER YAMAHA MOTOR CO LTD PRINTED IN JAPAN 2004 5 0 7 1 E 5GF 16_hyoushi 4 29 04 3 48 PM Page 1 ...

Отзывы: