


5
Transporting and Setting Up the Timpani
6
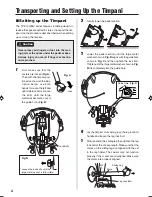
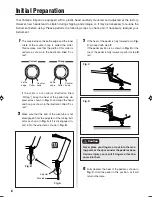
Turn the timpani over and extend and secure the
other leg. Make sure that the marks on the slid-
ing leg are aligned with the slit in the leg holder.
7
Return the timpani to an upright position, and then
adjust the length of the left and right legs.
8
When it comes time to store or pack up the tim-
pani, simply reverse the setup procedure order.
Height Adjustment Screw
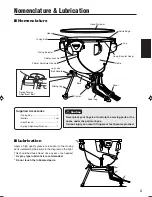
■
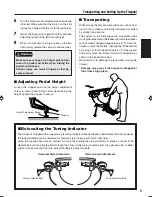
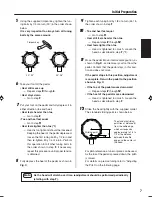
Adjusting Pedal Height
Loosen the stopper and use the height adjustment
screw to adjust pedal height. After determining the
height, tighten the stopper to secure.
■
Relocating the Tuning Indicator
The timpani is shipped with a universal style tuning indicator already attached (performer’s left side) however,
the tuning indicator can be relocated for German style tuning (performer’s right side).
Using the supplied hex wrench, remove the two bolts holding the tuning indicator in place as shown in the
diagram below, then slide the bolts through the holes on the tuning indicator from the opposite side. In either
position, make sure that the note indicator bridge is easily viewable.
Tuning Indicator Bolt
Tuning Indicator Bolt
Universal Style Attachment
German Style Attachment
Stopper
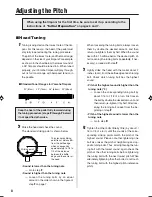
Caution
Make sure your fingers do not get pinched be-
tween the pedal and kettle when folding the
pedal or pedal base.
Serious injury can result if fingers or feet be-
come pinched.
■
Transporting
When moving the timpani over a distance, such as from
room to room, make sure that the instrument is carried
by at least two persons.
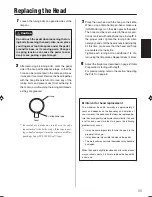
The casters on the sliding legs are convenient when
moving the timpani short distances over smooth surfaces
such as when changing stage setups, etc. To move the
timpani, unlock the casters, then slightly lift the timpani
by the lugs so that the pedal frame is off of the ground
and slowly move the timpani forward or backward as
shown in the illustration below.
Be careful not to damage the legs while moving the
timpani.
* Damage may occur if the timpani is dropped or
falls from a high place.
tp3100ea_en_om.6pm
08.2.5, 9:28 AM
5


